
Table of Contents
Updates
Before diving in to all the details, if you want to follow updates on the tile set, follow my hobby Instagram account @monsterpartywars, or the build thread on The Replica Prop Forum: Death Star Micro Tiles + Trench Run (STL files V5 available).
Now, on to business.
Introduction

This is a set of very small surface tiles for a certain space station which is no moon. Intended for very small scale dioramas, the tiles are sized to a 10mm x 10mm grid, with the basic square tile size being 20mm on each side. I'm not sure what scale this puts them at, but it's somewhere between 1:350 and 1:500, I think.

I originally designed these tiles to be cut out of flat styrene sheets using a Cricut Maker electronic cutting machine, which is how I built the originals, in the same manner that I built my 1:144th scale T-16 Skyhopper. I've since modified those patterns to add detail and make them printable.
I'm also building a Death Star trench run diorama with these, and you can follow my build thread on the Replica Prop Forum. At the bottom of this page are are some resources that have inspired me - other model builders, and for original prop reference, very little beats Prop Store auctions! Bite sized updates are also posted to my instagram account, monsterpartywars.
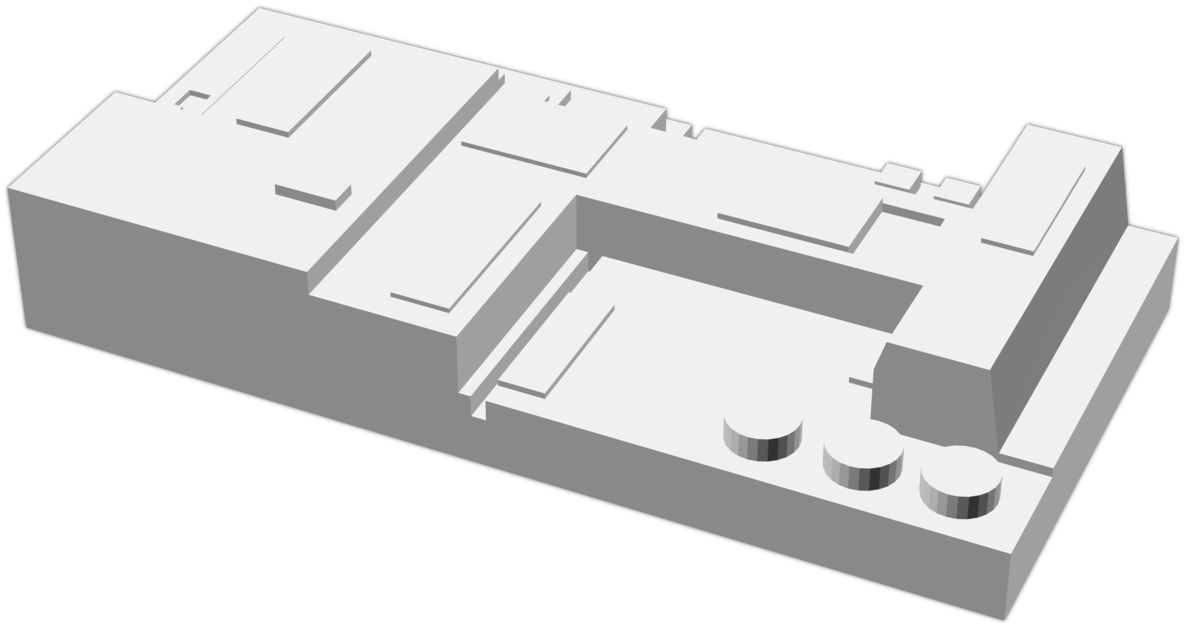
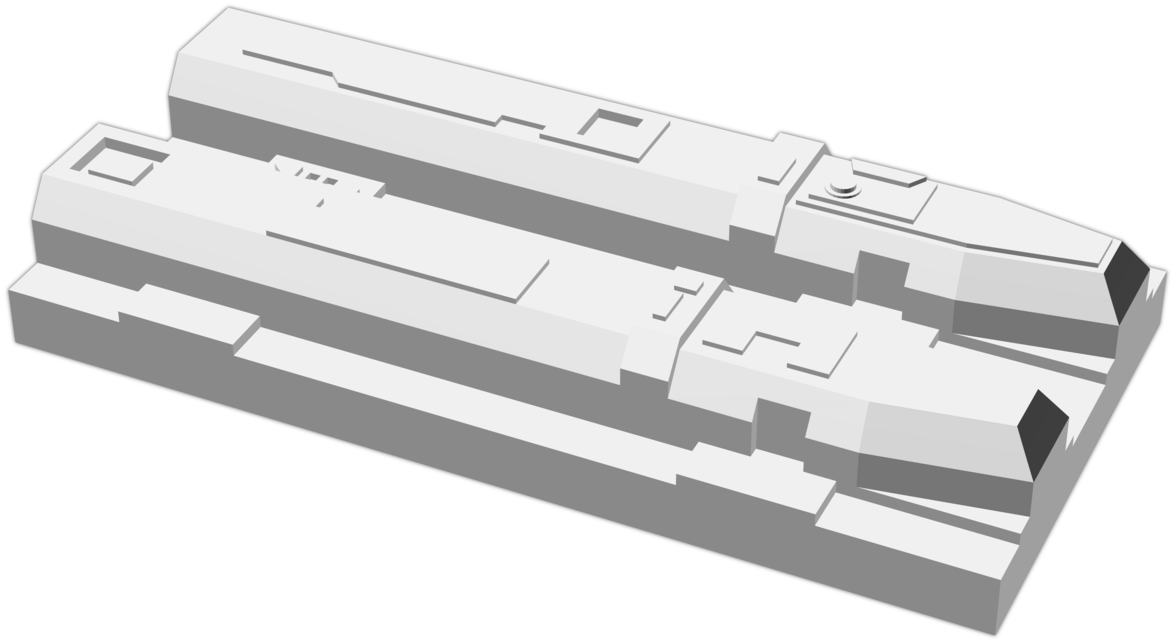
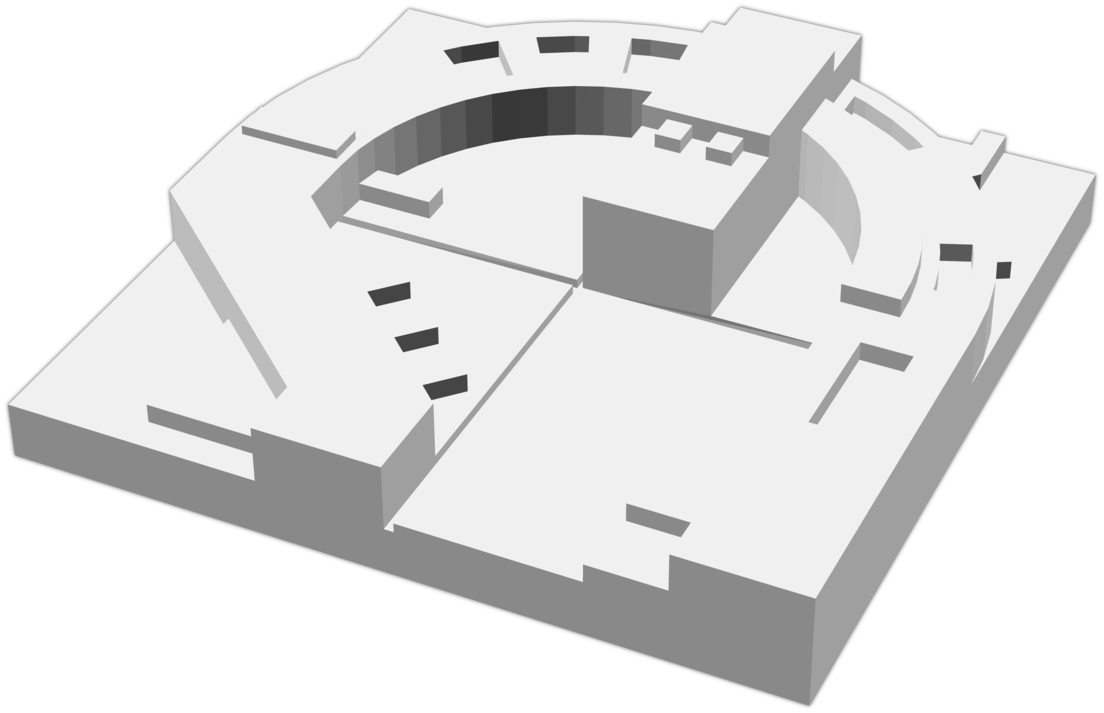
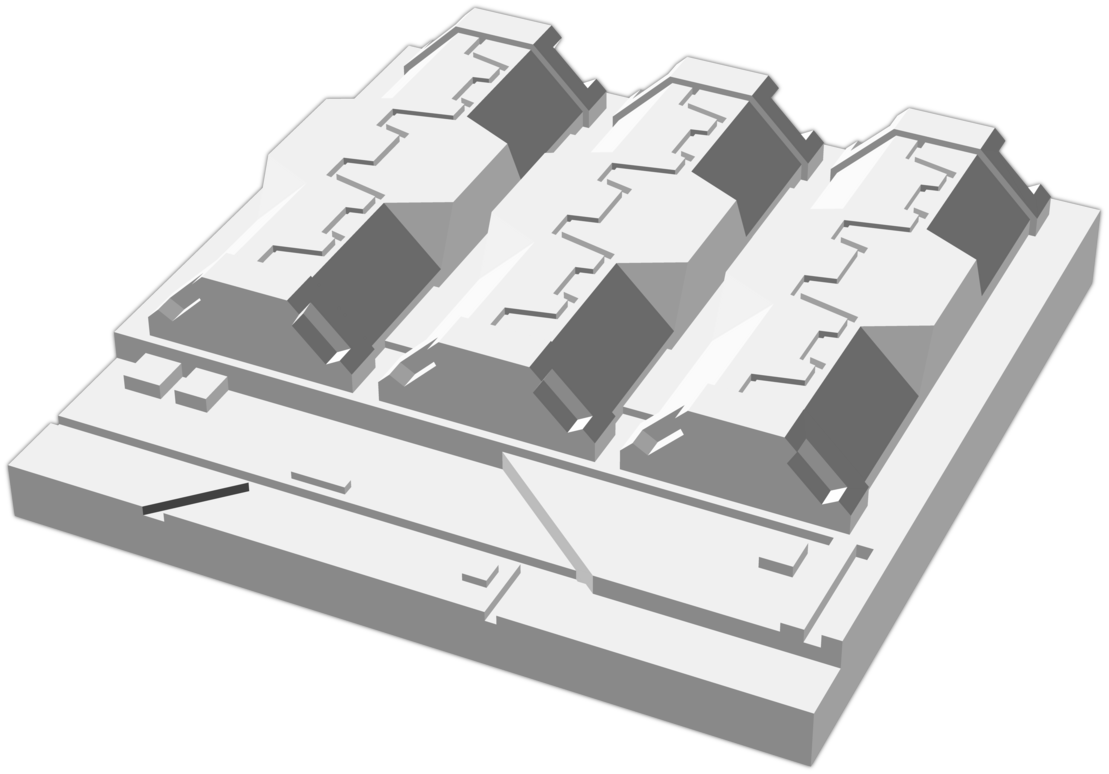
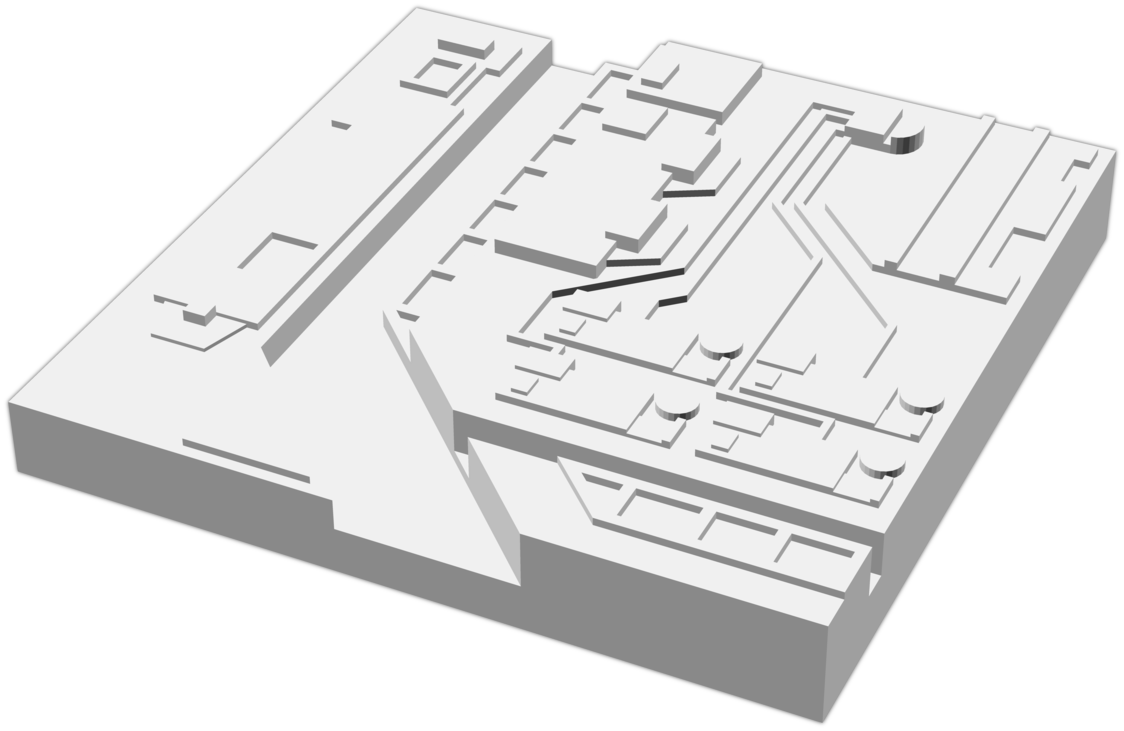
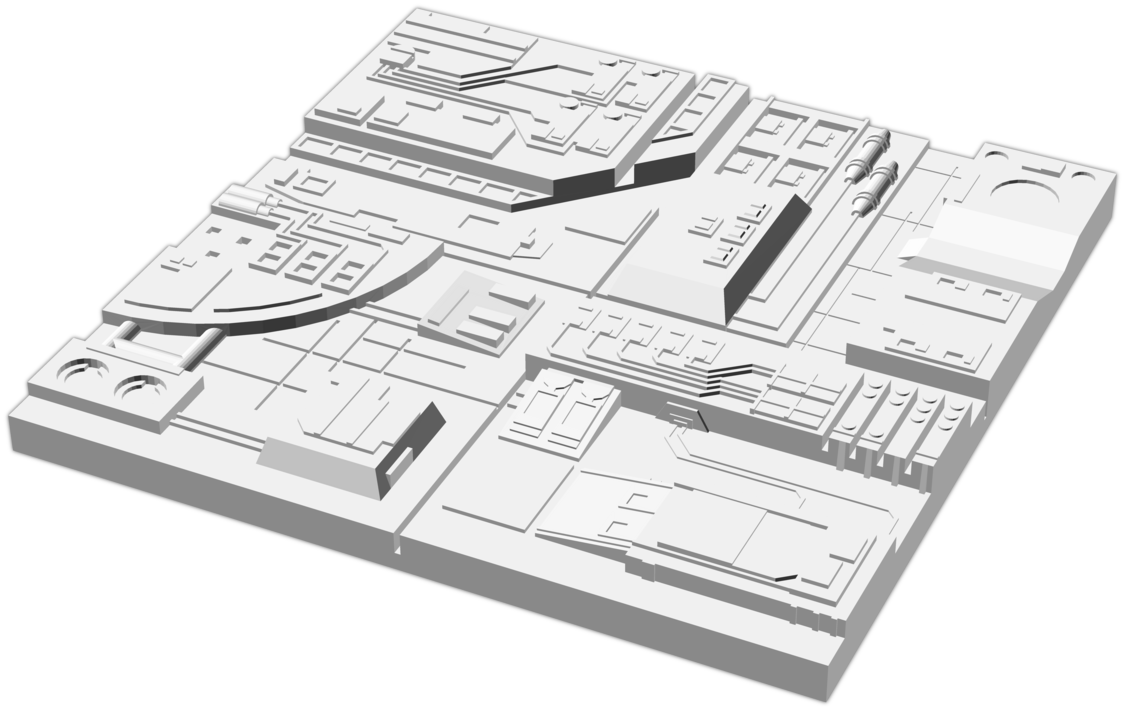
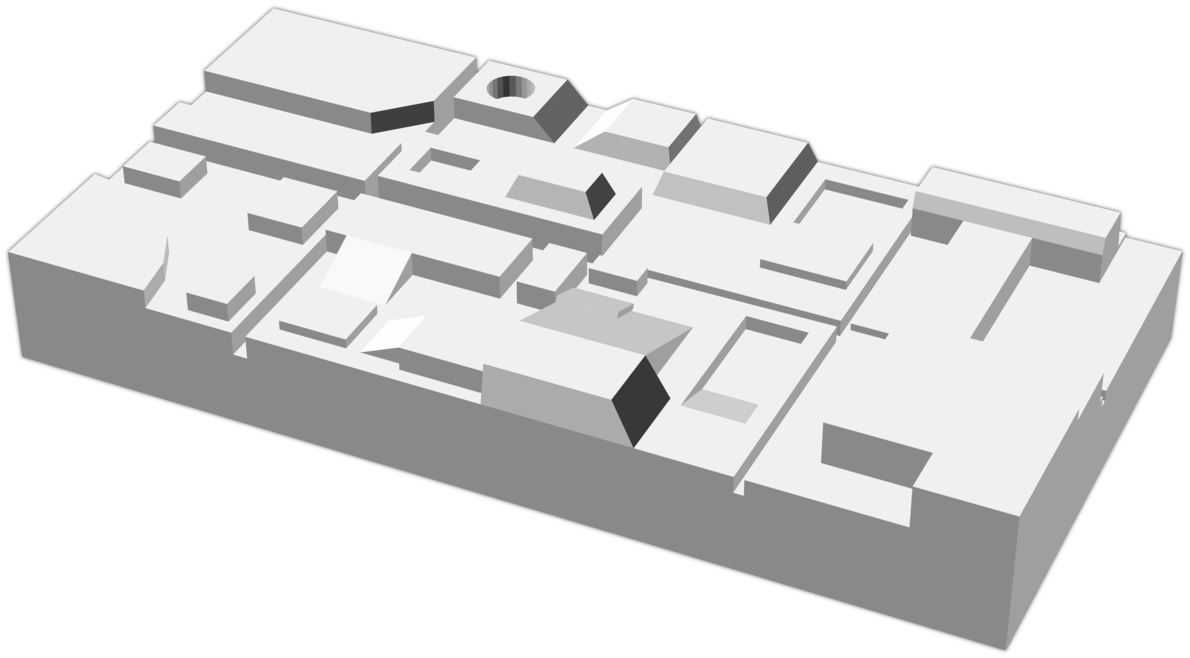
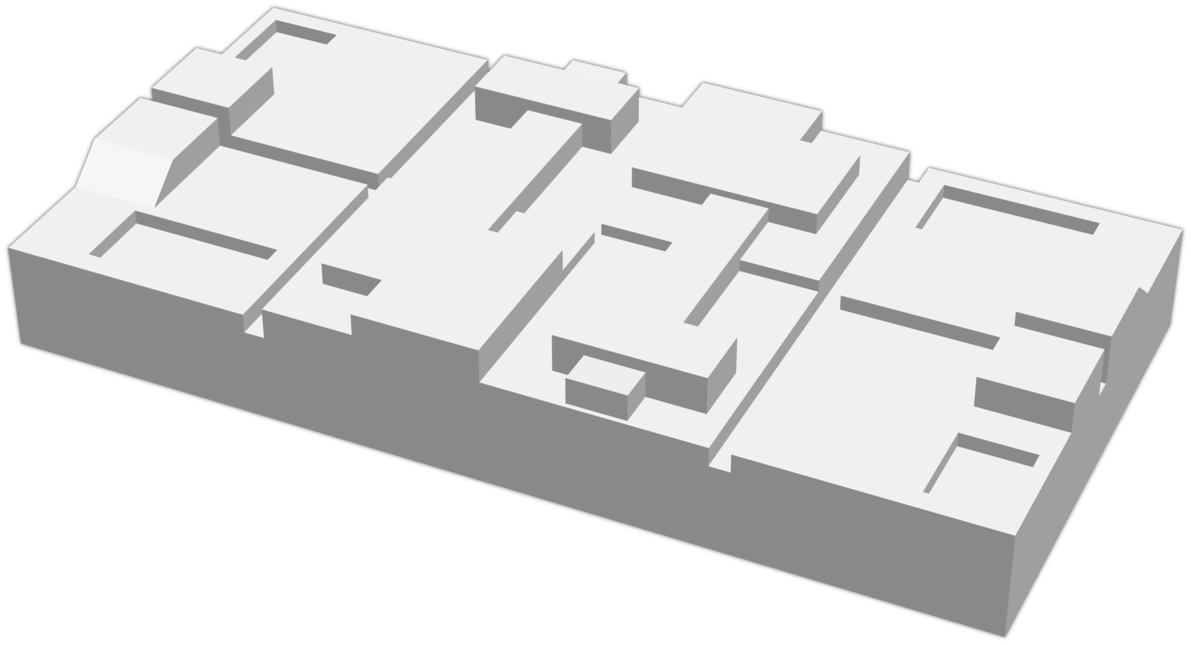
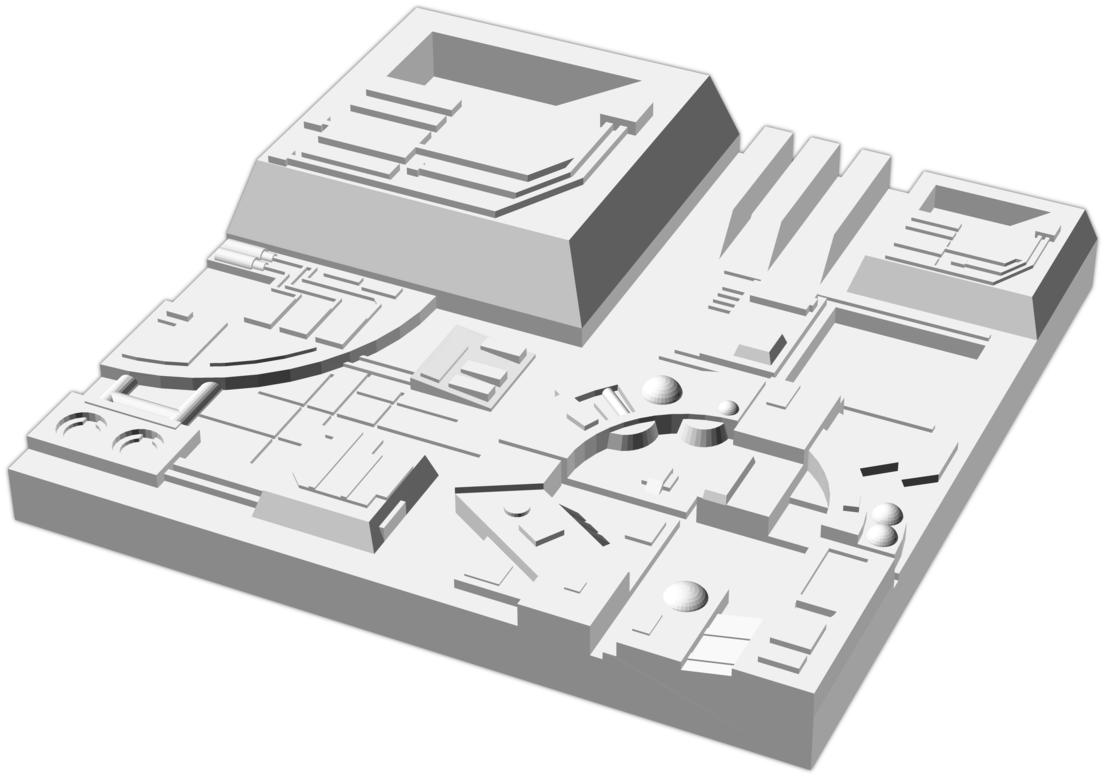
Here's the digital mockup, in SketchUp, of the trench diorama, modelling the placement of tiles and the structure build from .060" styrene and rectangular styrene tubing.
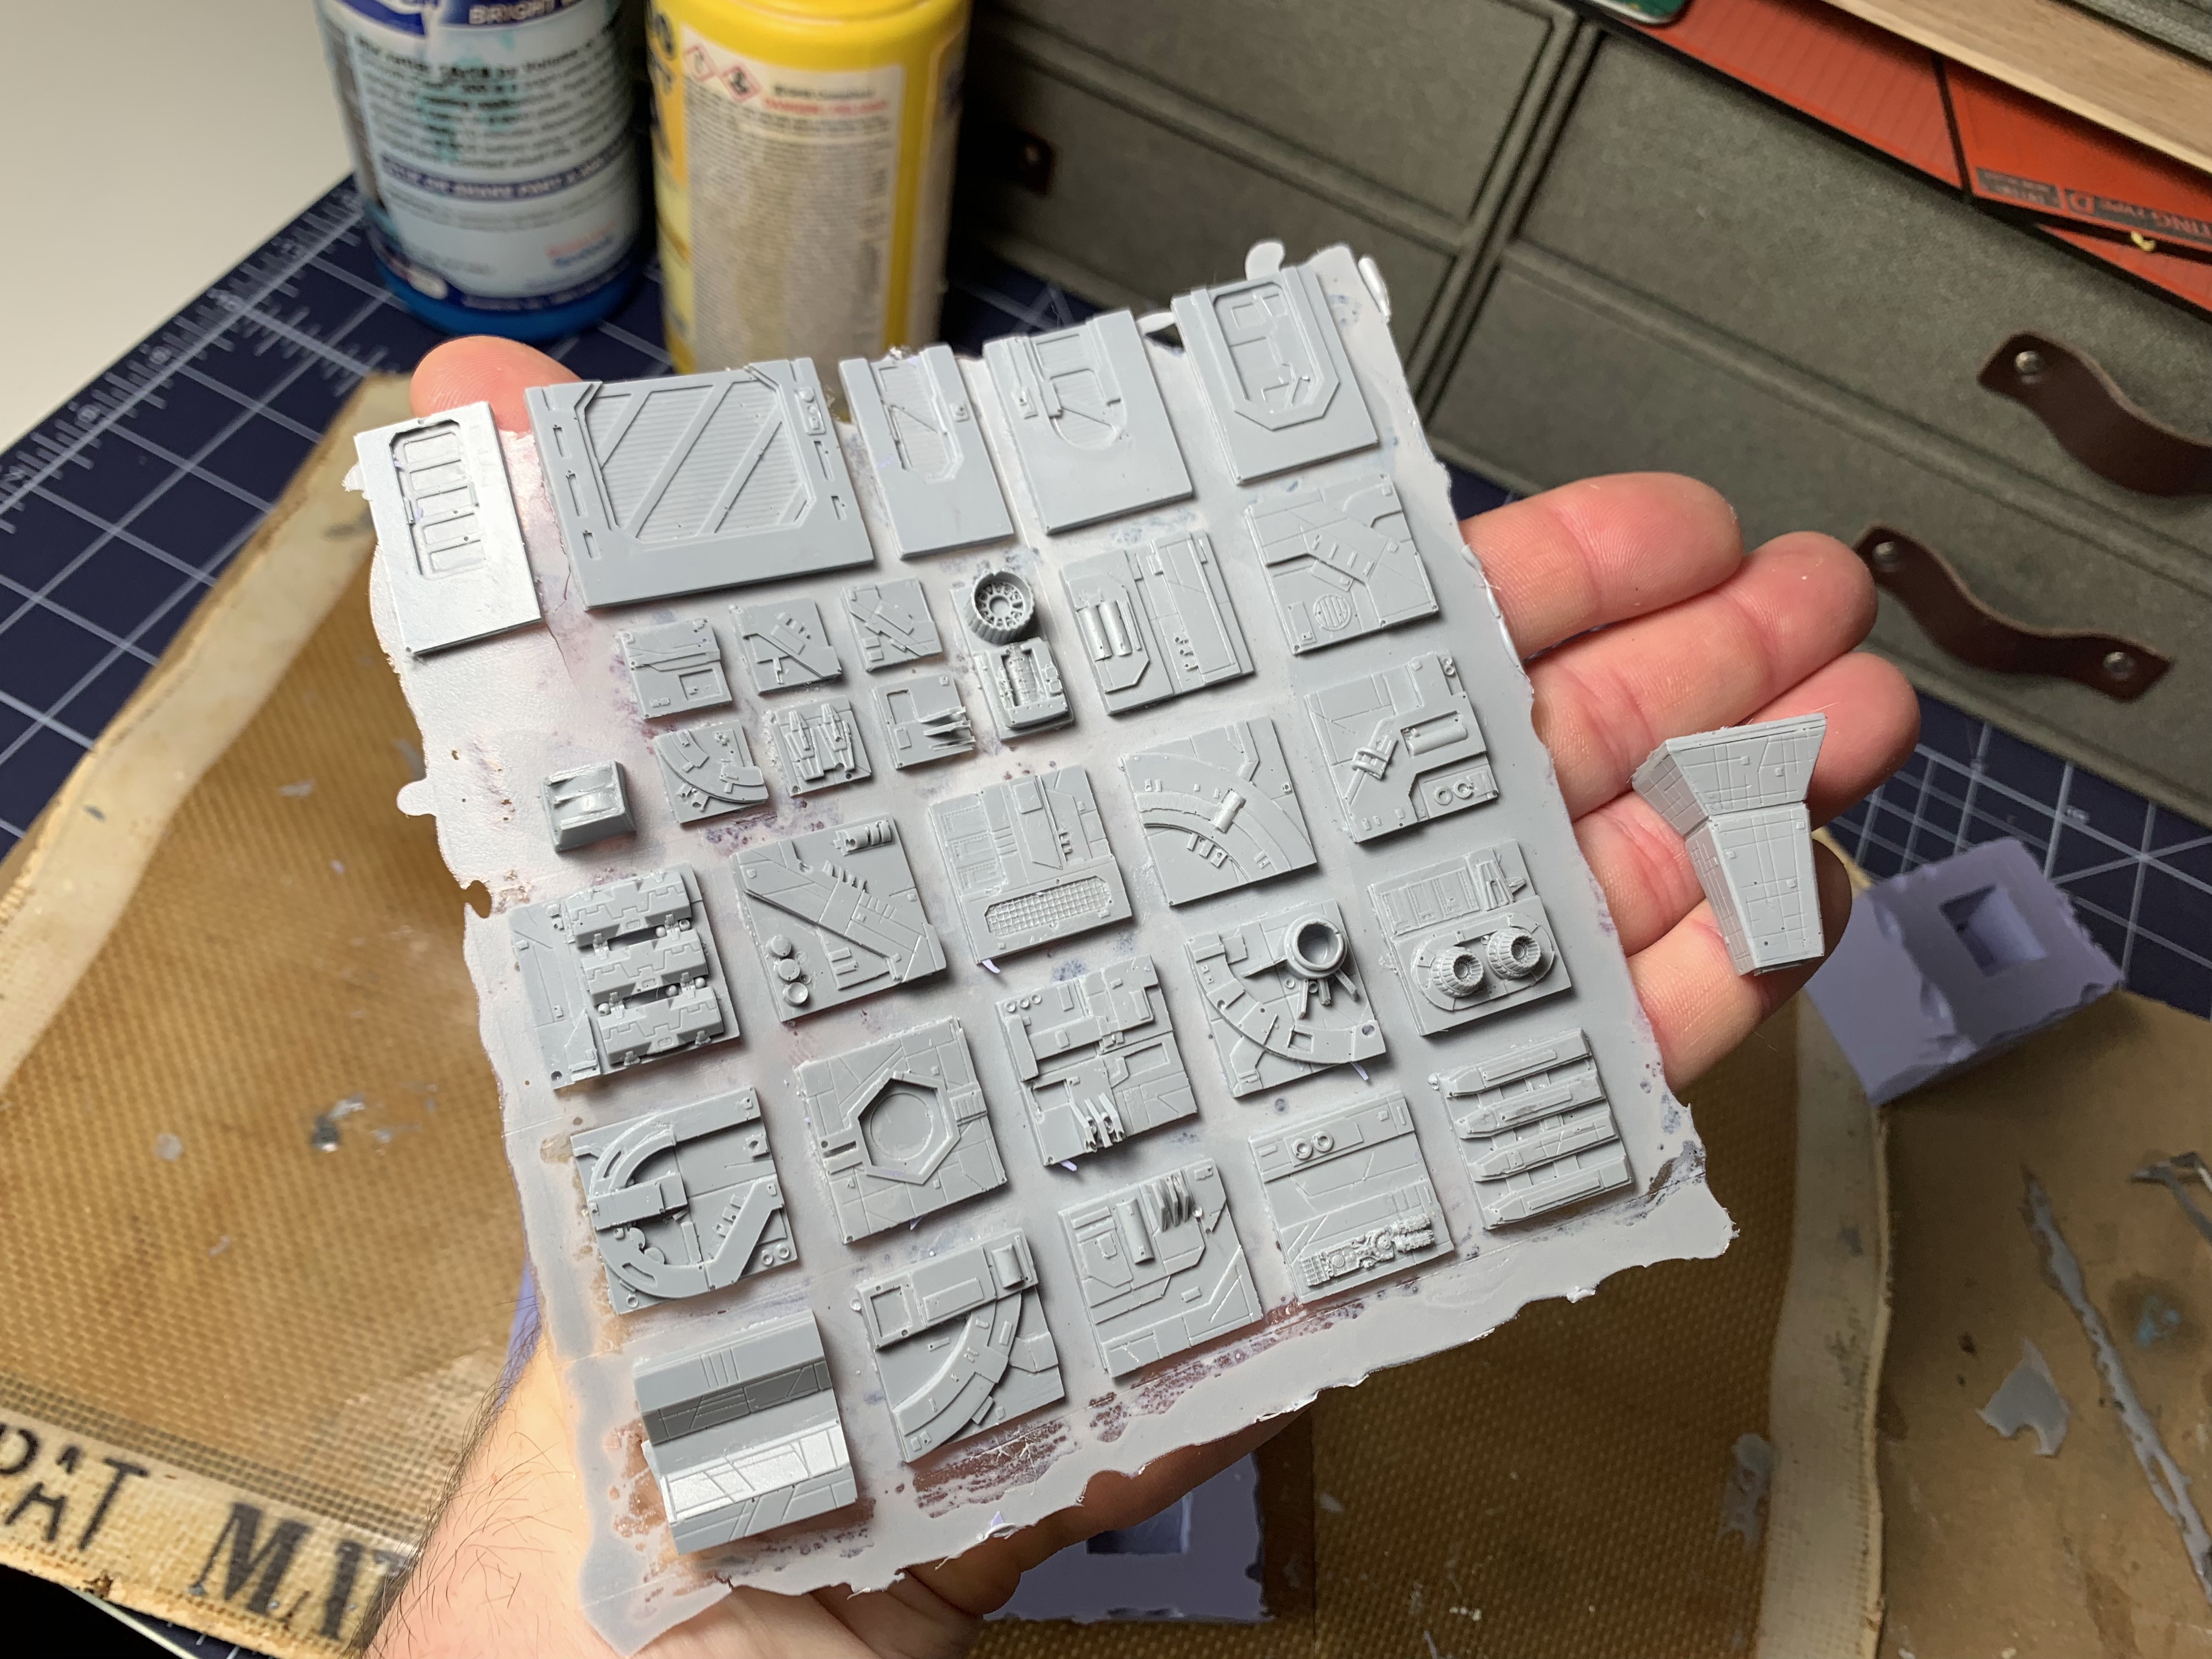
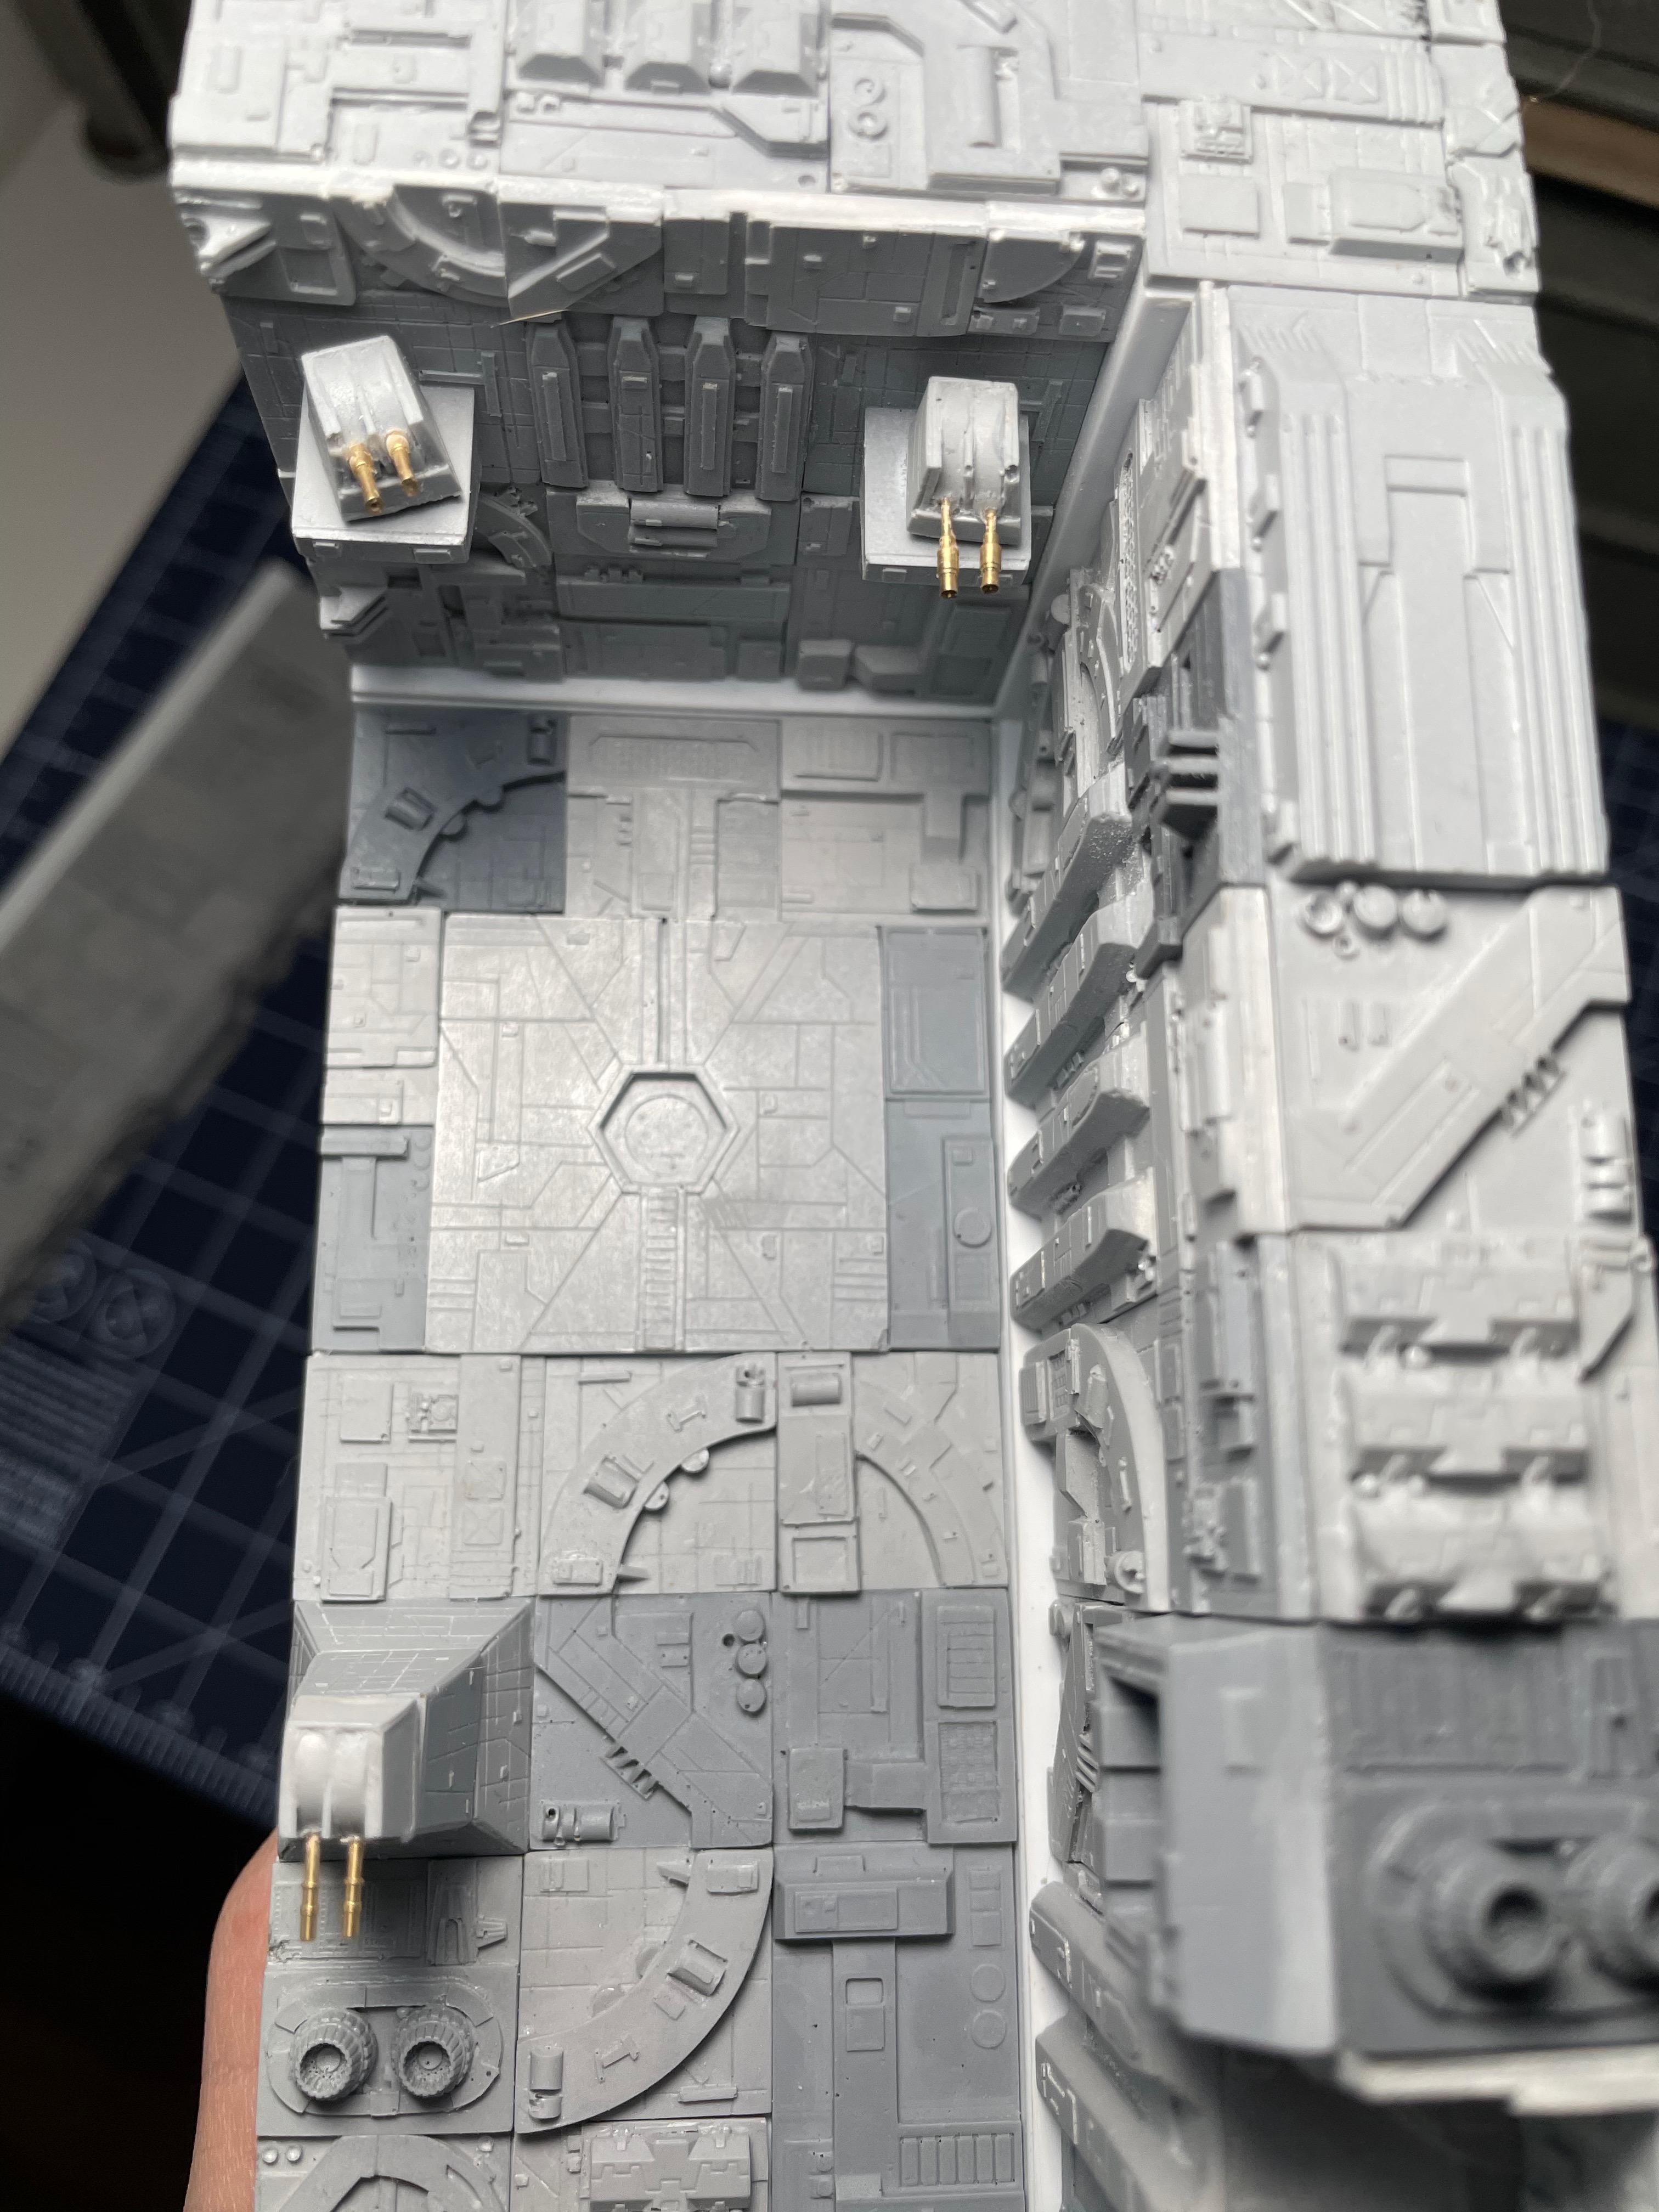
And the translation of that to styrene and resin, prior to painting. I used scale brass aircraft gun barrels from Master-Model.pl for the tower guns.
The Files
10x10 grid
The tiles are not sized according to a defined scale -- they're sized to a strict 10mm x 10mm grid, with each tile's dimensions being in multiples of 10mm. I like the math to work out evenly like that. The standard square tiles are 20mm x 20mm, which is what I consider the "whole tile" size, and everything else is in multiples or fractions of that basic tile size - quarter tiles are 10mm x 10mm, double tiles are 40mm x 40mm, and there are several variations inbetween (10x20, 10x40, 20x40).
Downloads
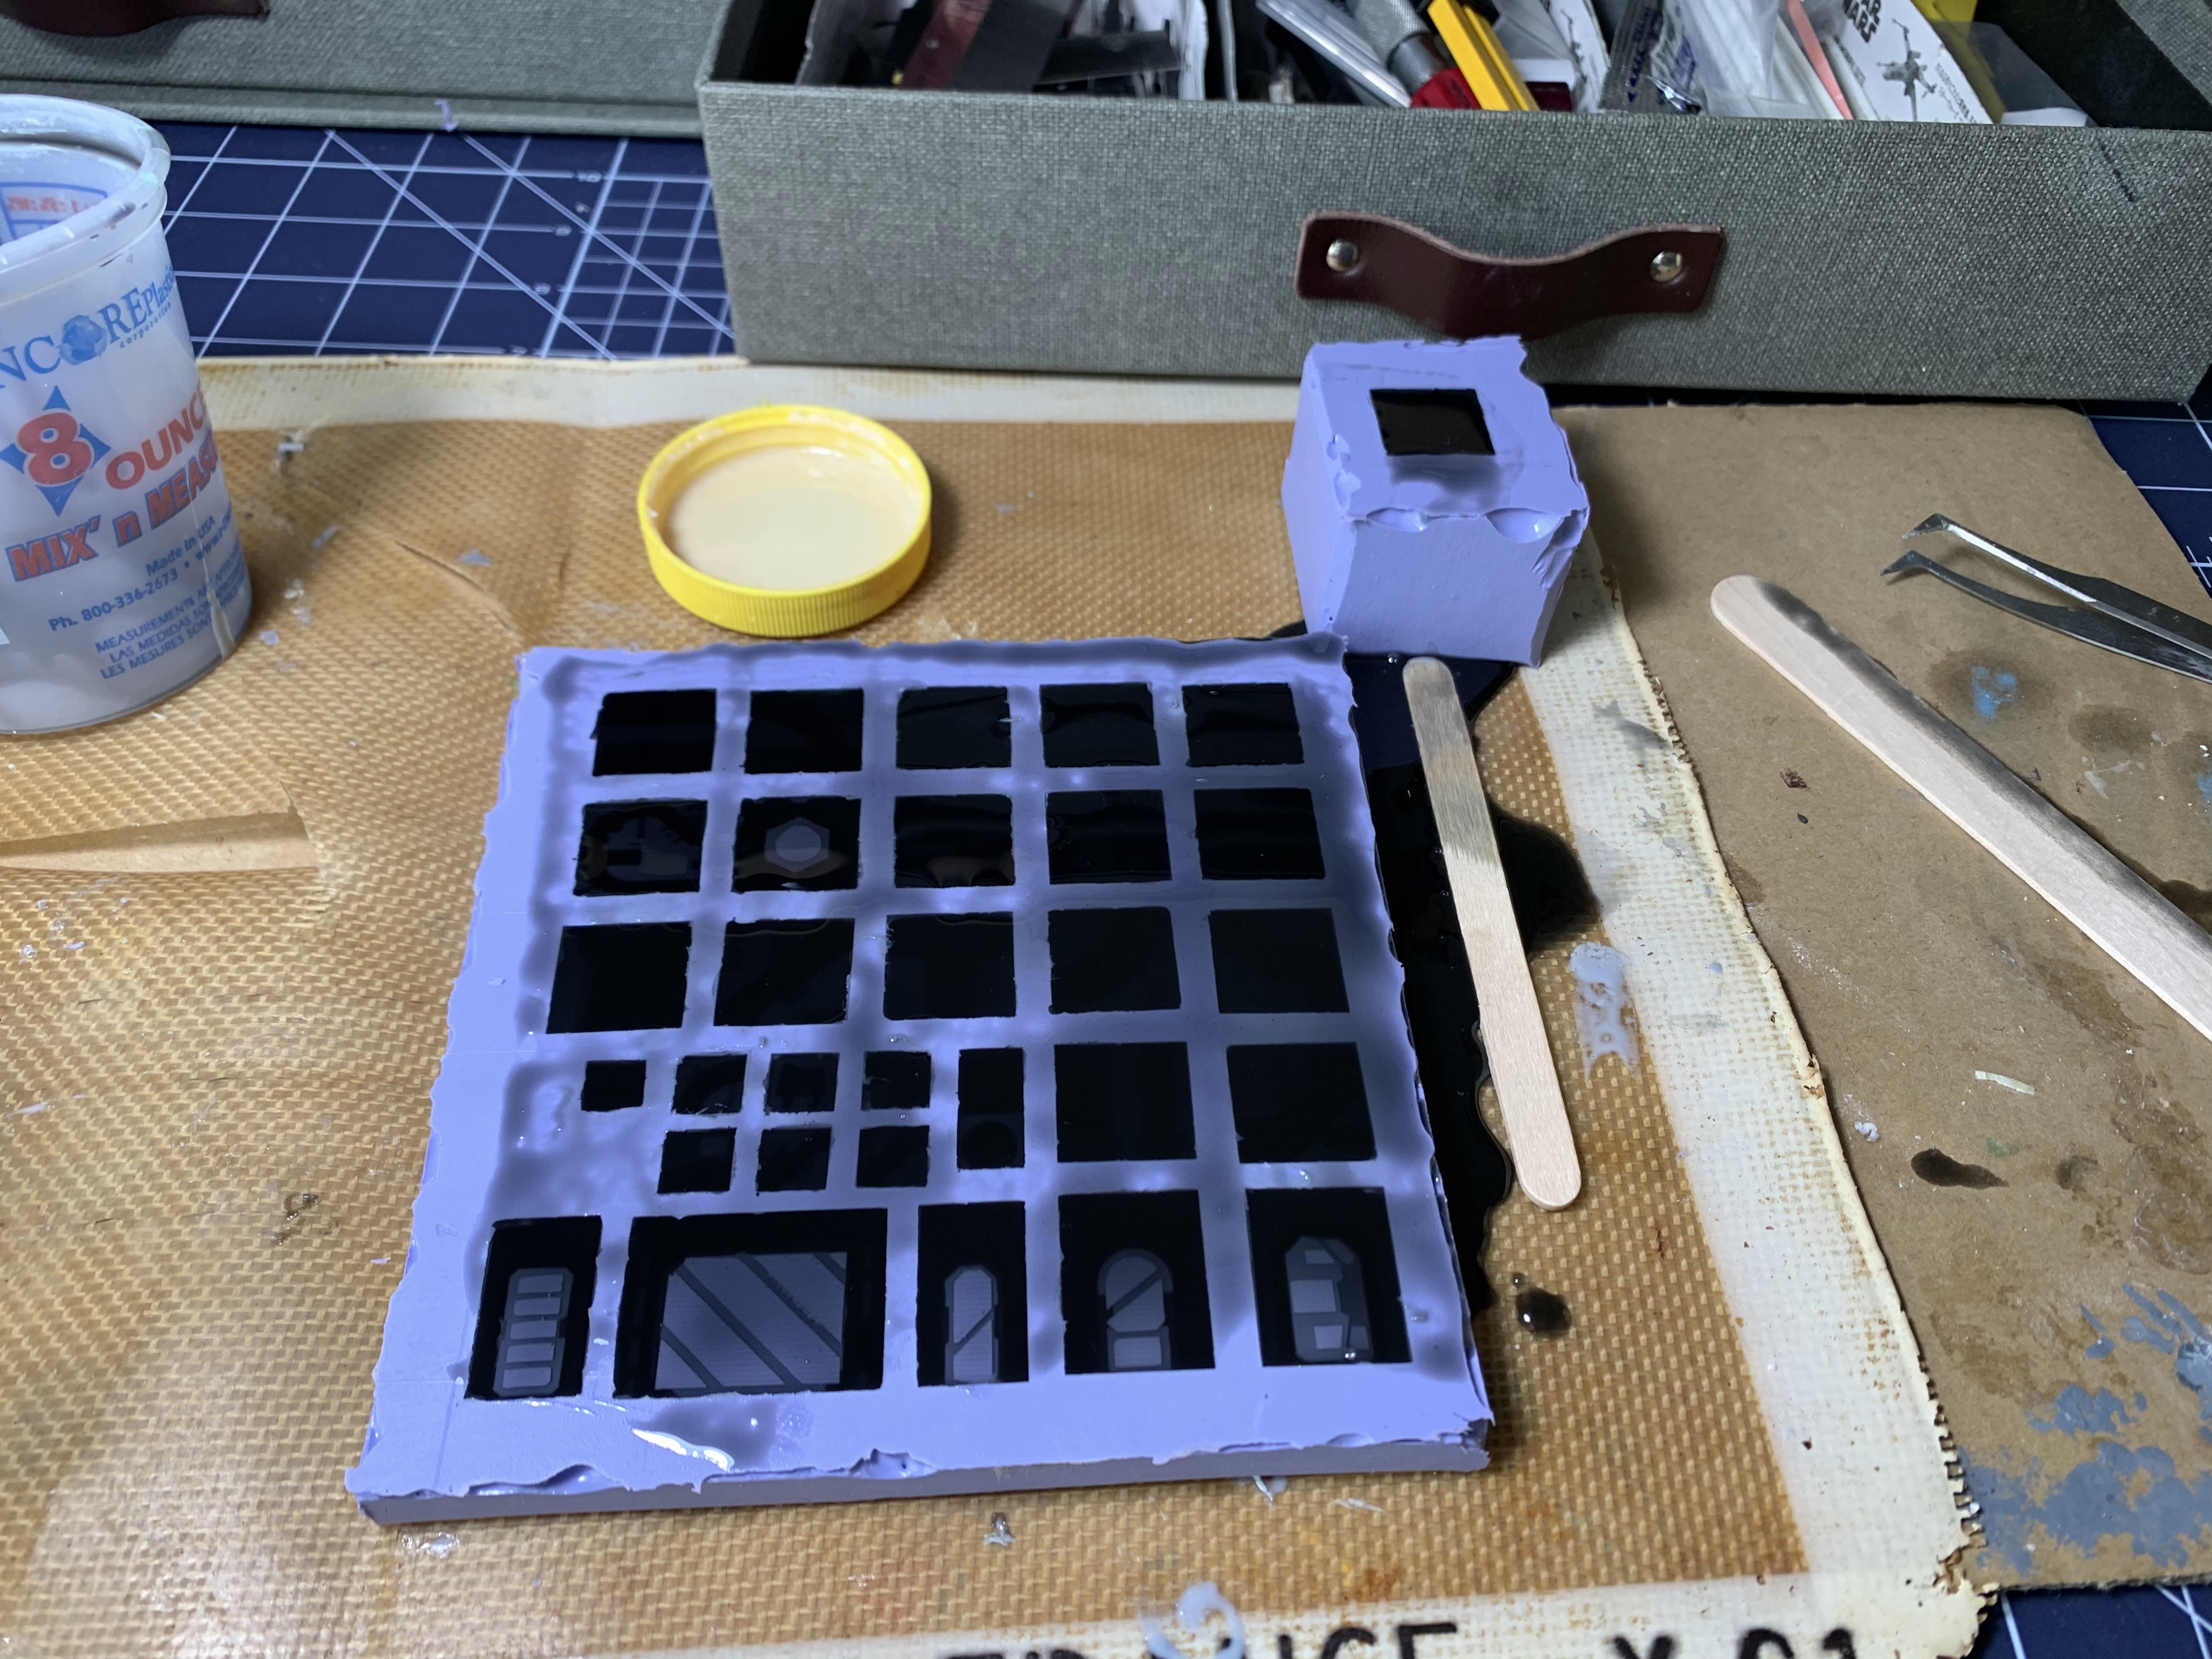
The files below are original works licensed under the terms of the Creative Commons Attribution-NonCommercial-ShareAlike license. You are free to copy and redistribute the files with proper attribution, and you may modify and use them to build derivative works provided those works are distributed under the same terms. You MAY NOT use these files for commercial purposes. You MAY NOT sell them or any works derived from them.
By downloading these files you are agreeing to the terms of the license.
Printing Tips
While I don't have a 3D printer myself, I've gotten a bunch of prints made of these from different services, with different experiences.
If you print the tiles flat on the bed of a resin printer they tend to compress vertically somewhat. I'd advise scaling them maybe 10% in the Z axis to compensate, or just print them at an angle on supports - you can get all the supports on the underside and clean it up nicely. With the thinner tiles they seem to come out a little pancake-y if they're printed directly on the bed.
Version 6, 2021-10-06
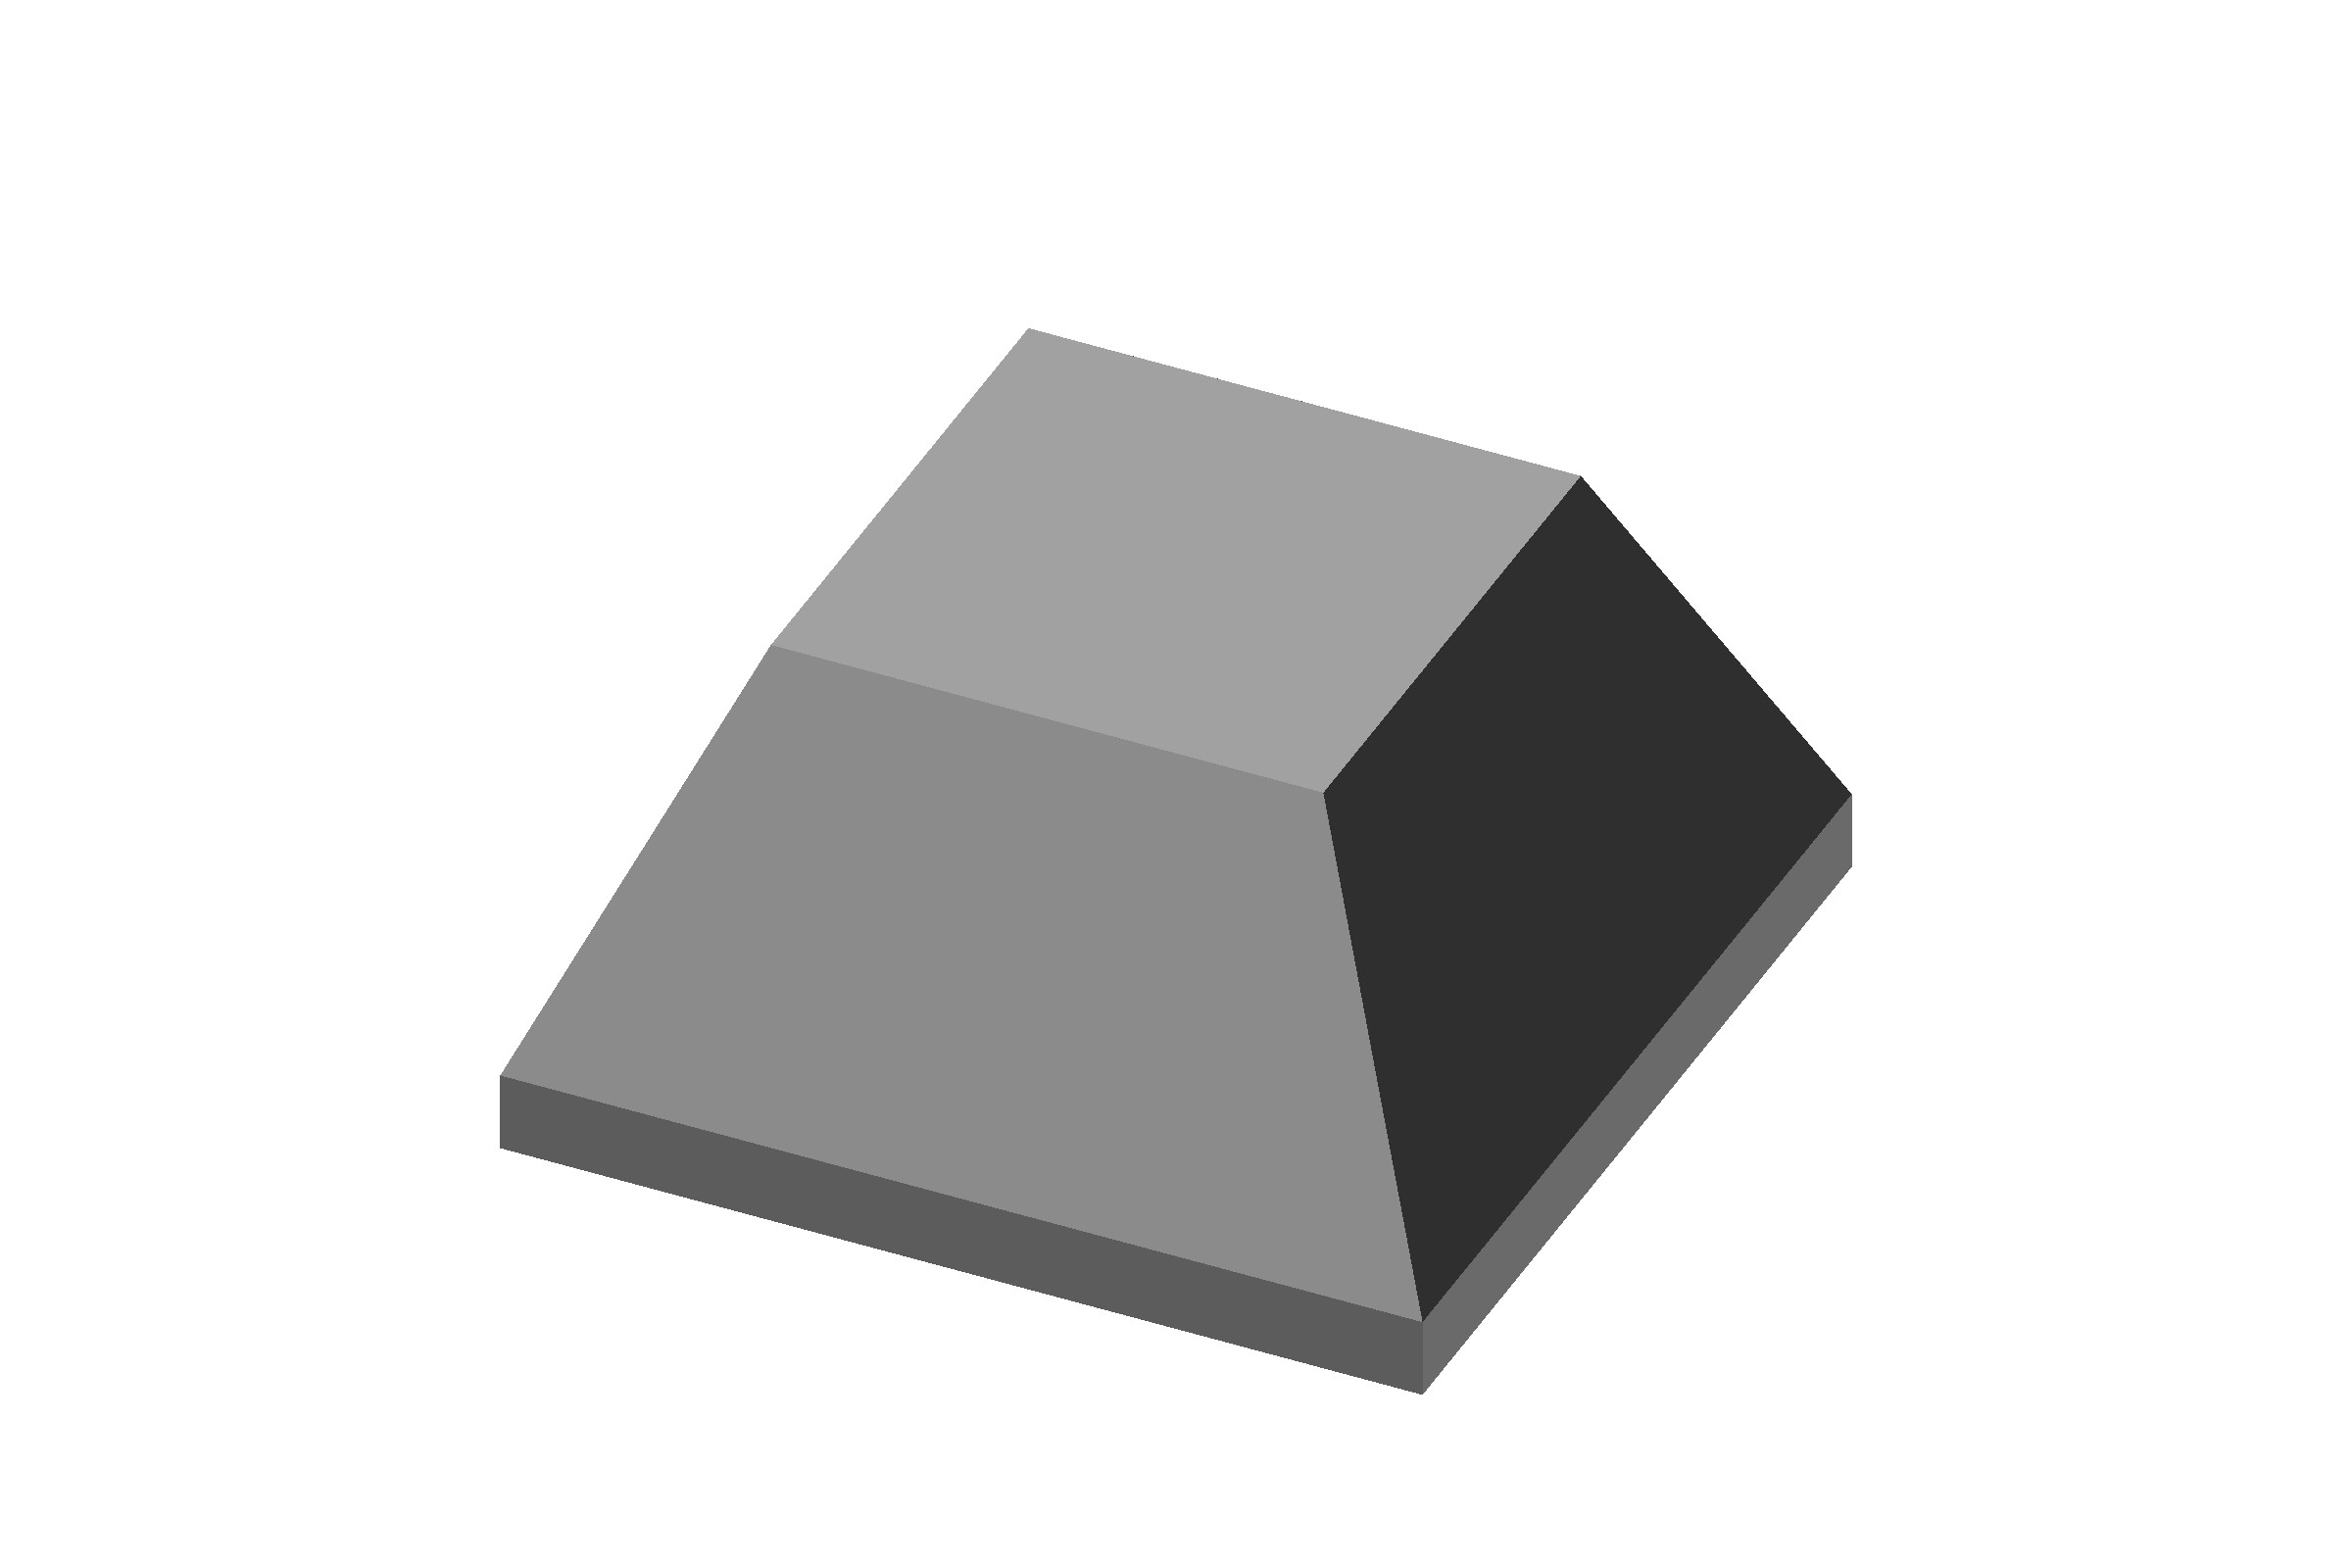
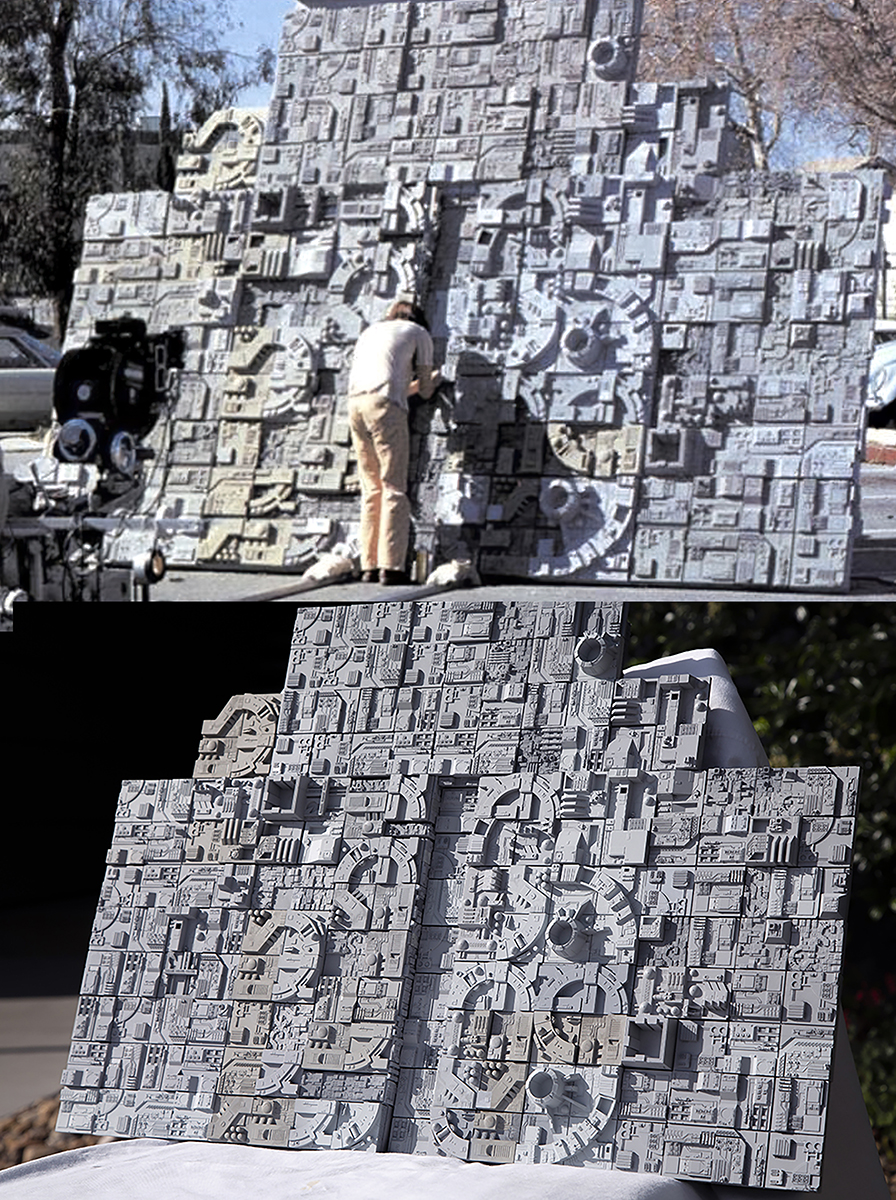
Wow, it's been nearly a year since the last release! This release has new additions on both ends of the size spectrum. The primary motivator for this release was some stellar work by another member of The Replica Prop Forum. User 3DImpact posted a full build thread for his incredible work on replicating the Death Star surface pyro model used to shoot explosions on the surface of the Death Star in the ILM parking lot in 1977.
I'm just going to post the two comparisons of the model to reference photos here, which do an amazing job of replicating the lighting as well as the model itself! Go check out the build thread for the rest - it's really, really well done.

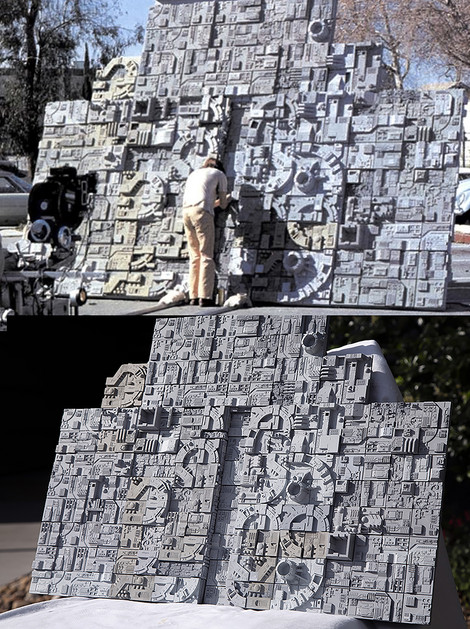
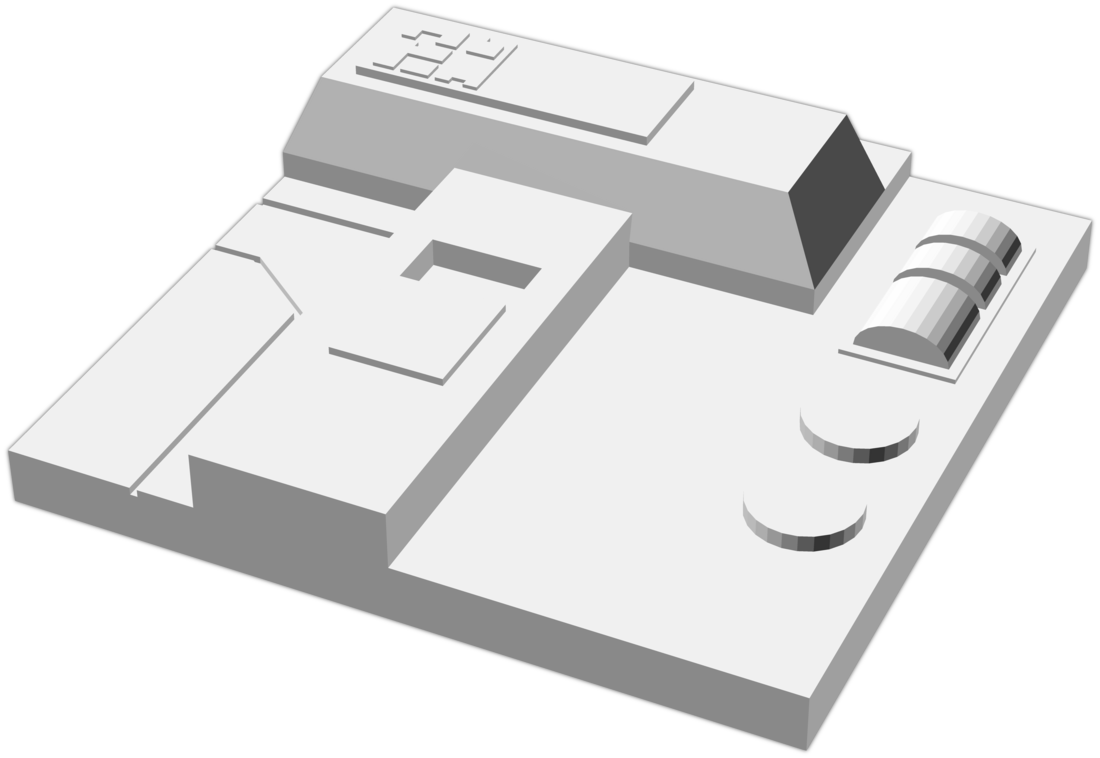
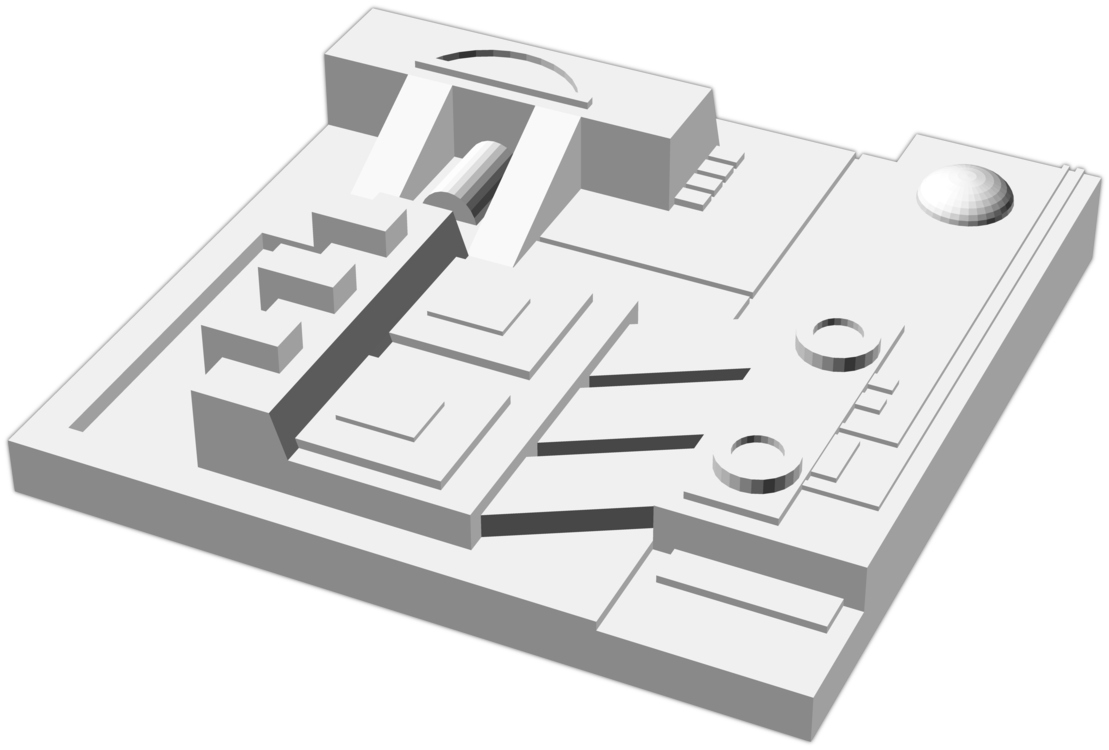
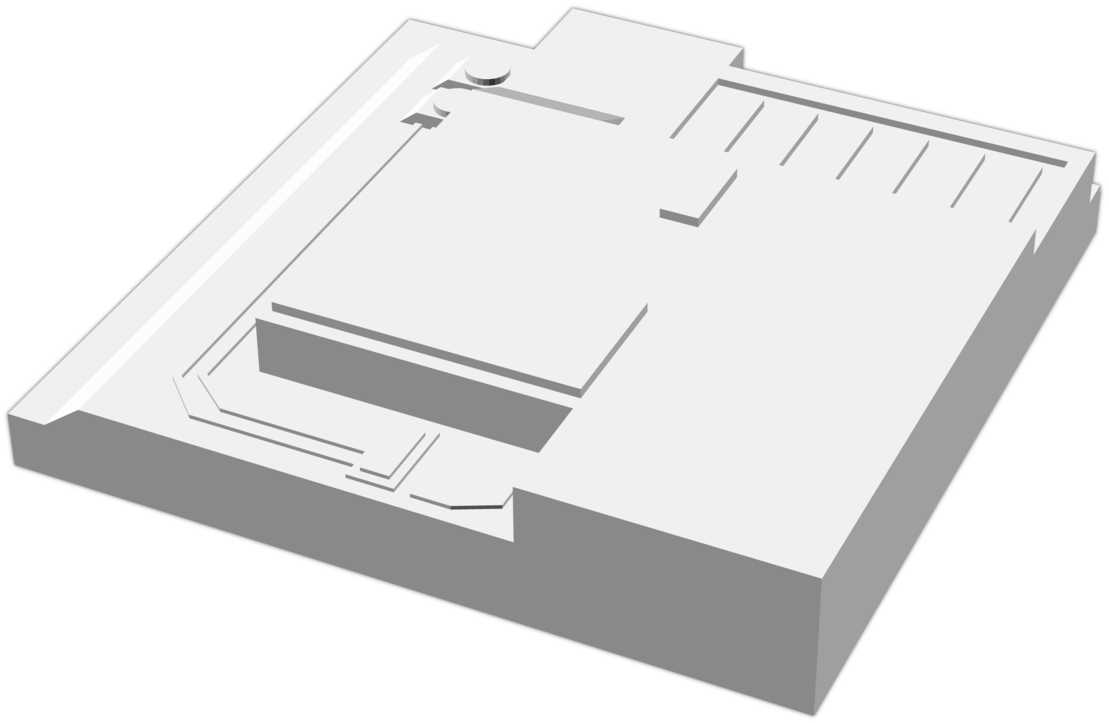
Early on around the first release of my STL tile set, I had actually started mocking up the same pyro model in SketchUp, but I never finished it because (1) I needed to model more detailed larger versions of a few of the tiles as well as some much smaller tiles, and (2) I couldn't identify some of the tiles. 3DImpact's thread inspired me to go back and finish it, and he also kindly provided some high res photos as reference for the remaining tiles.
Larger Tiles
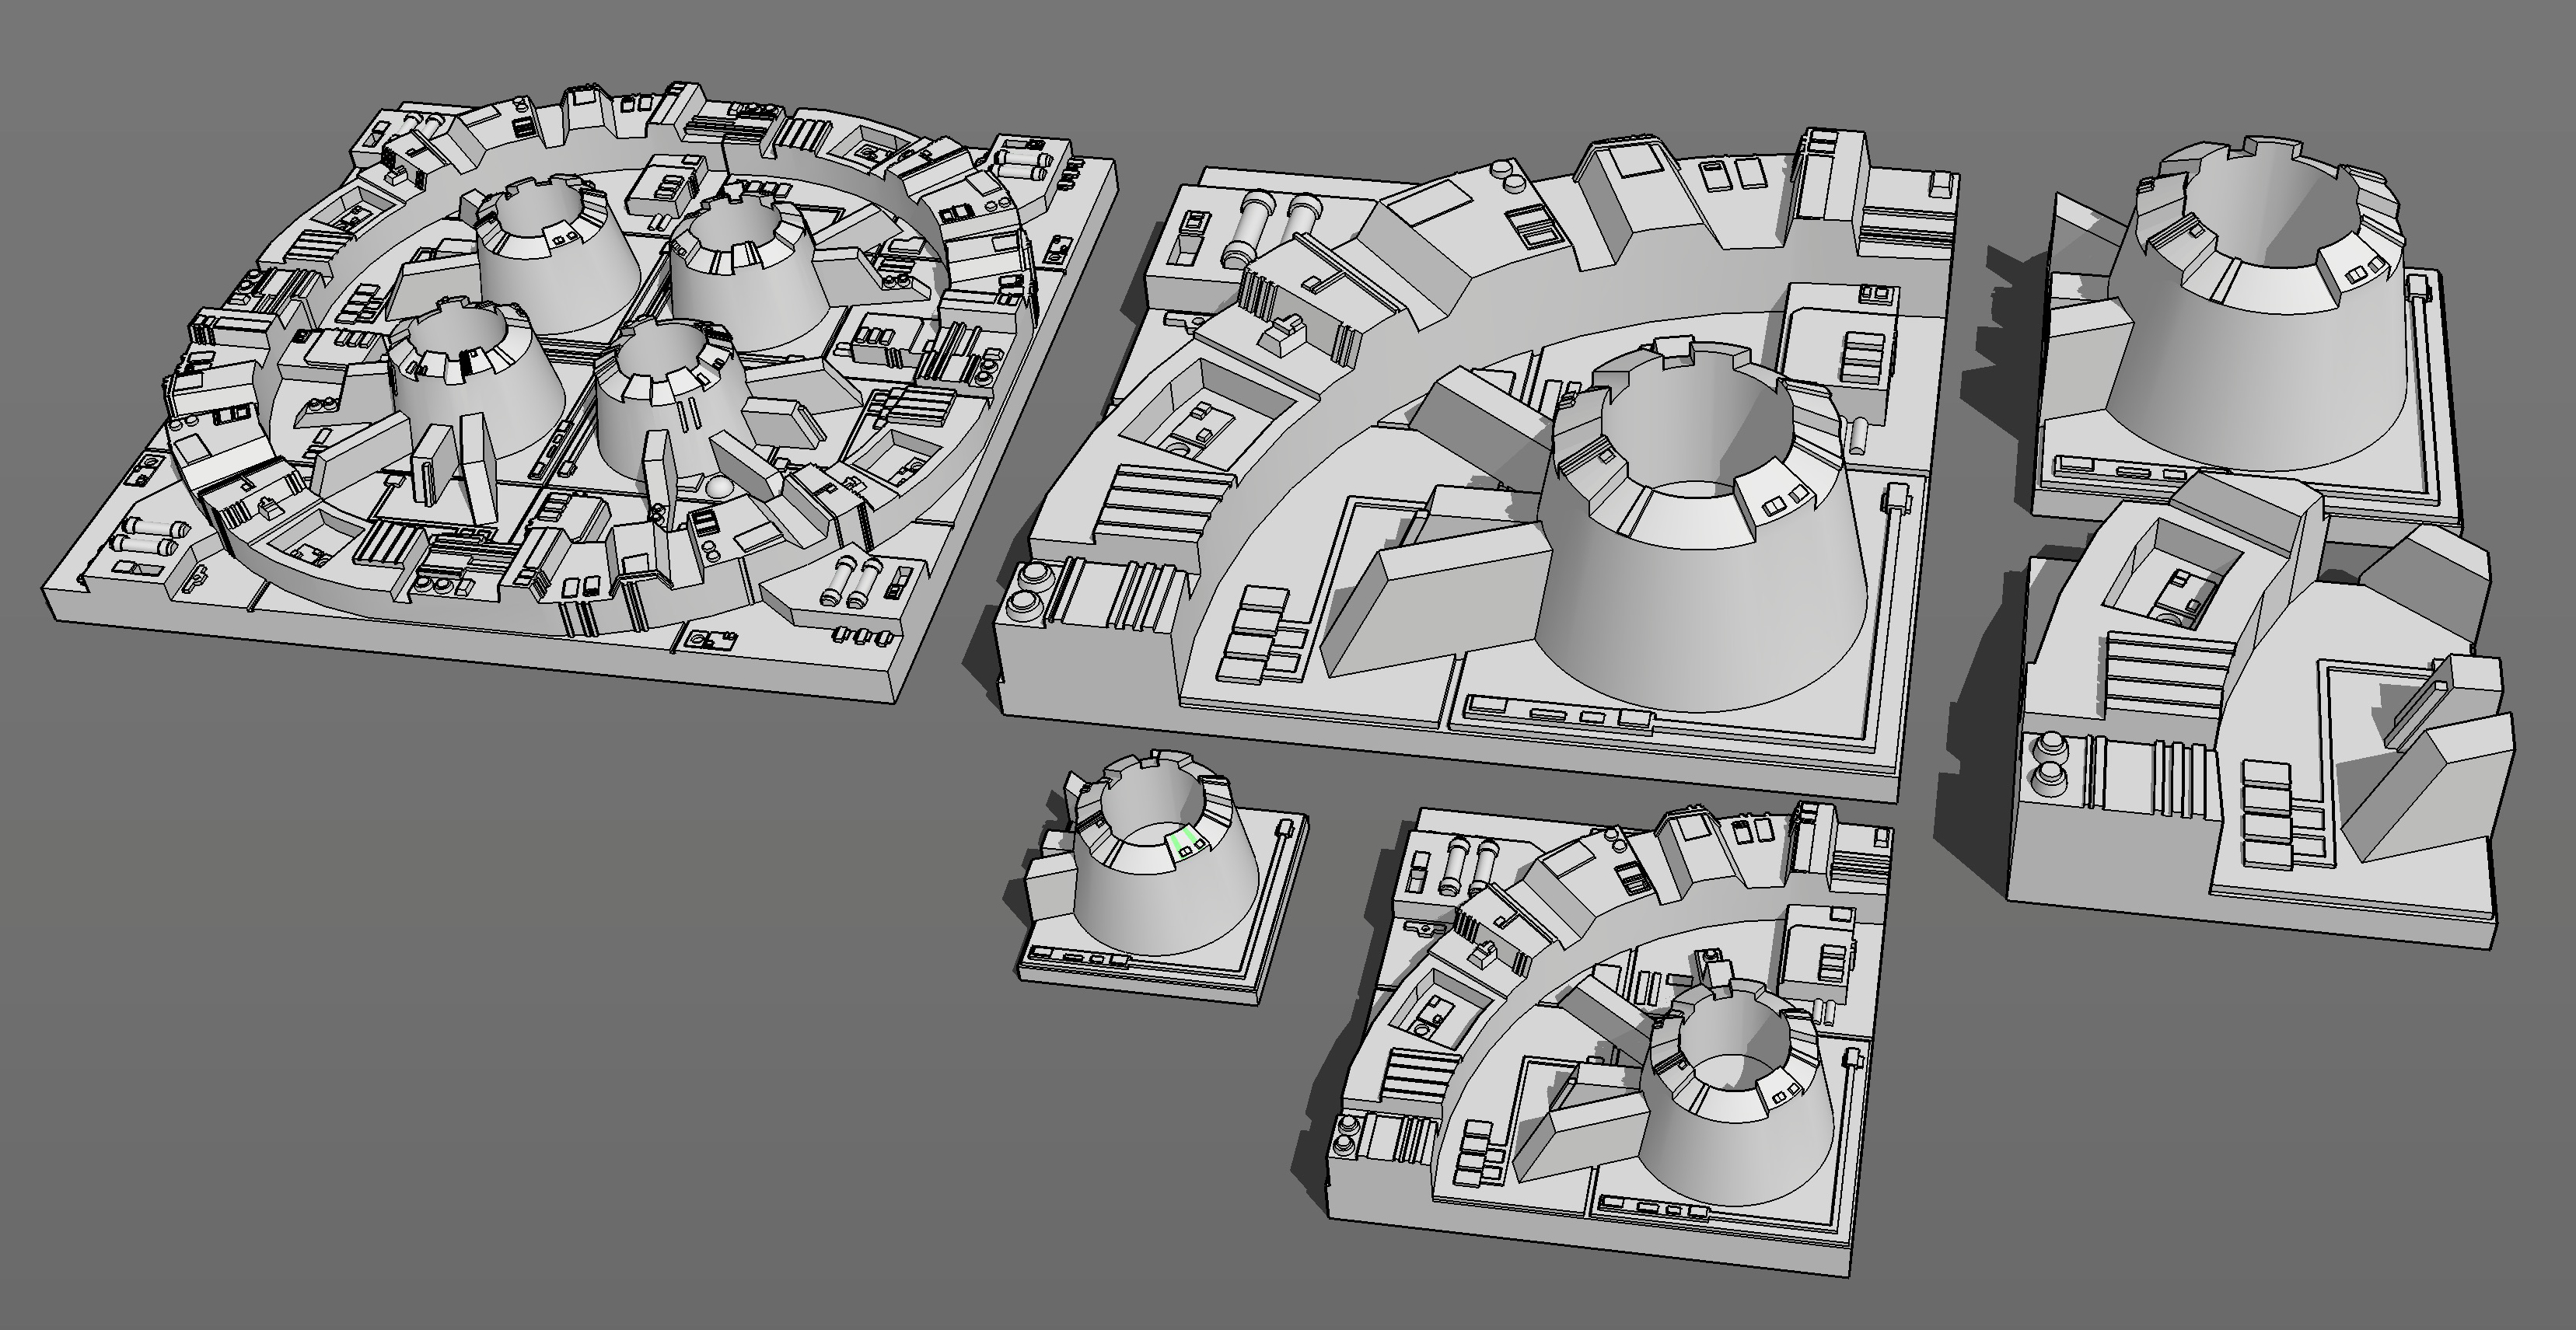
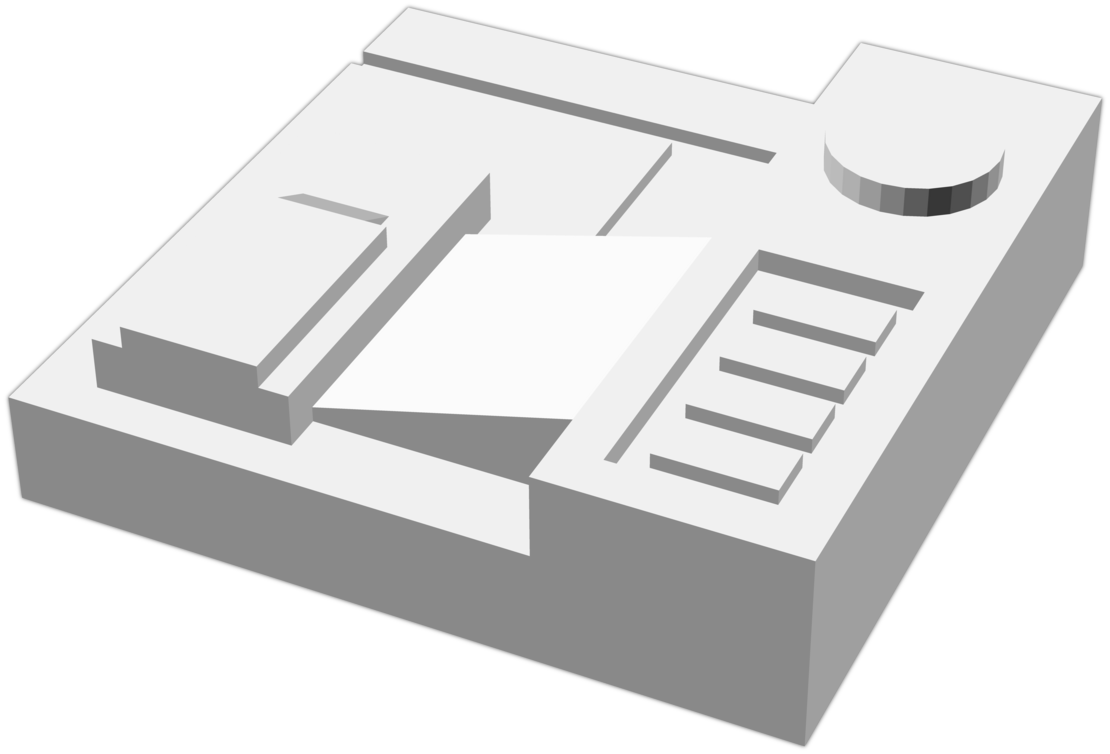
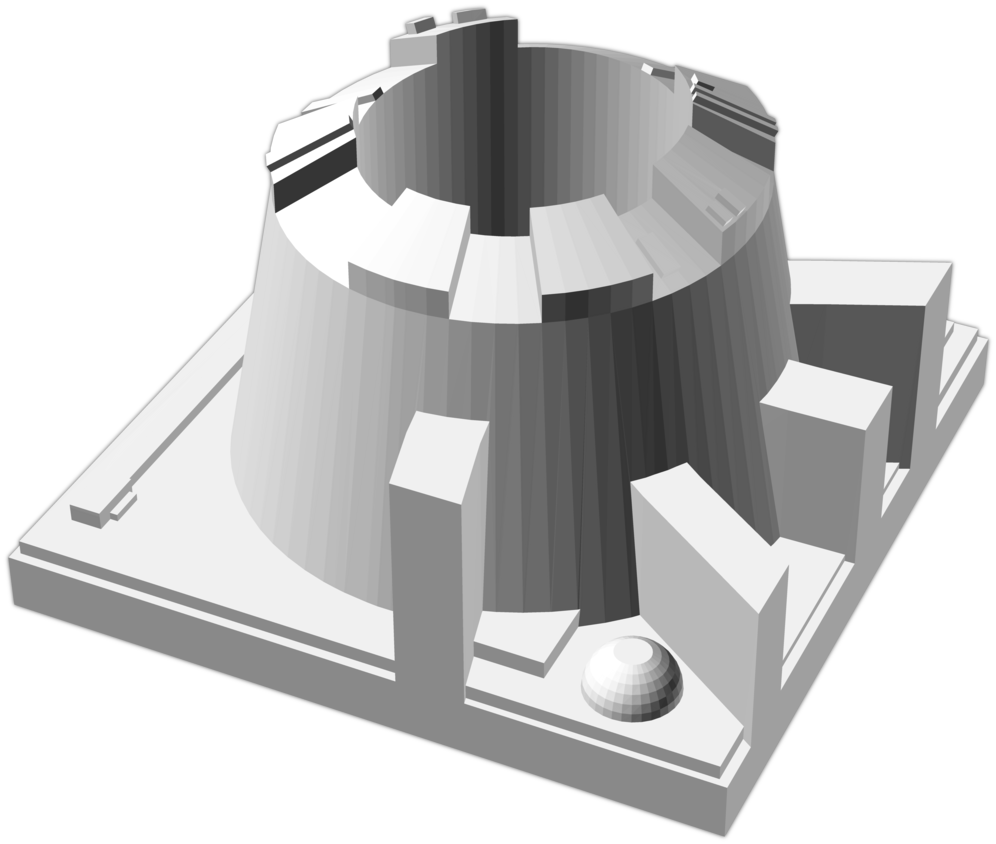
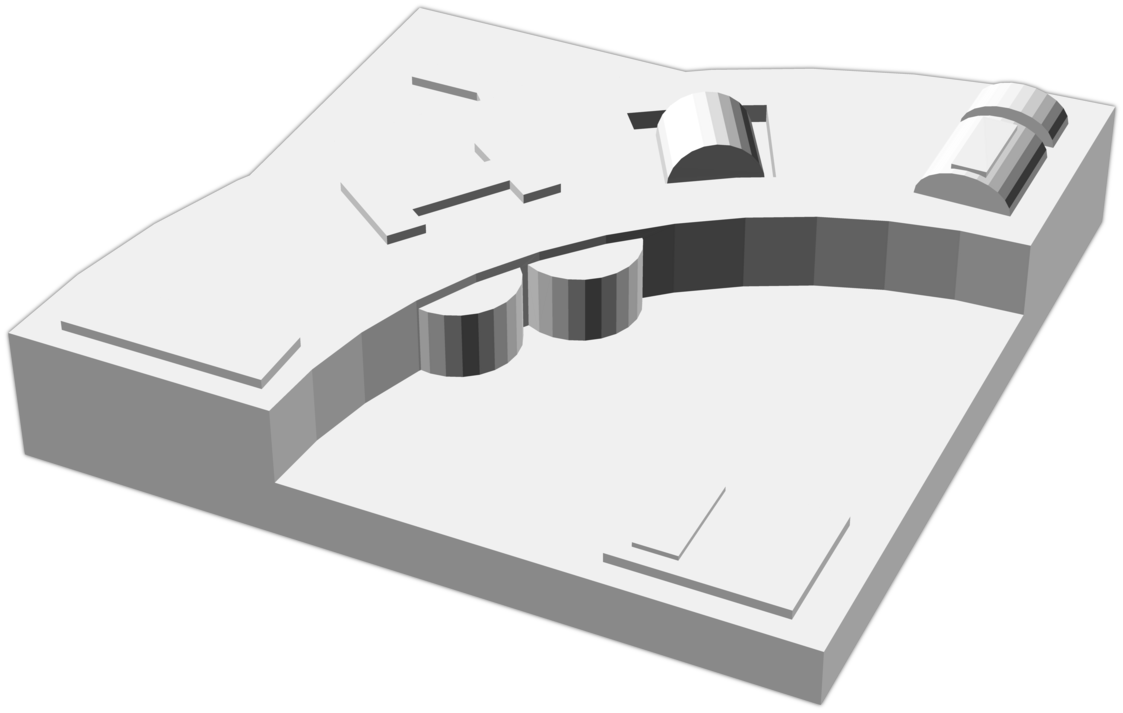
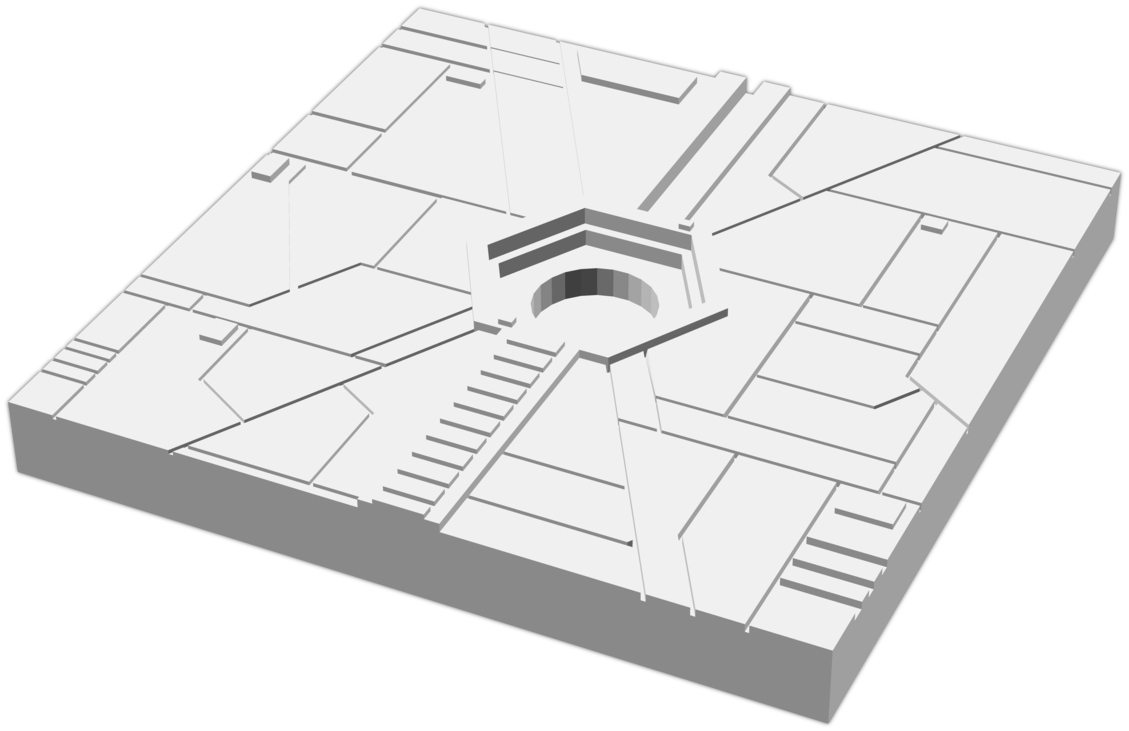
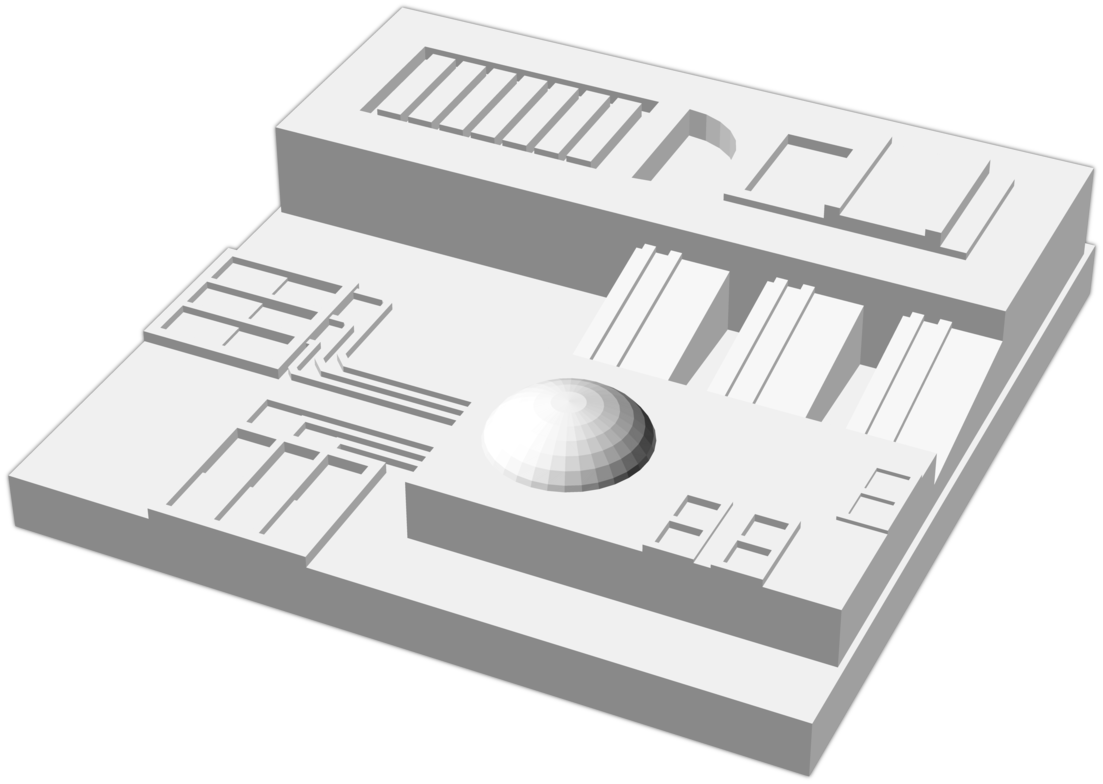
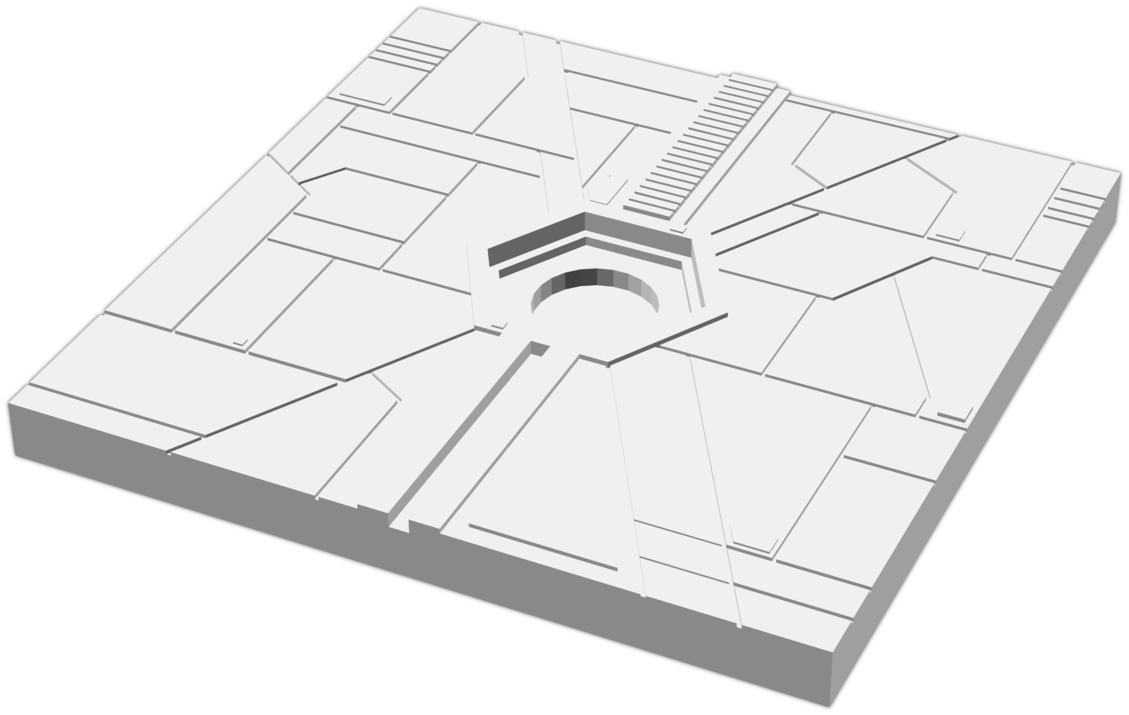
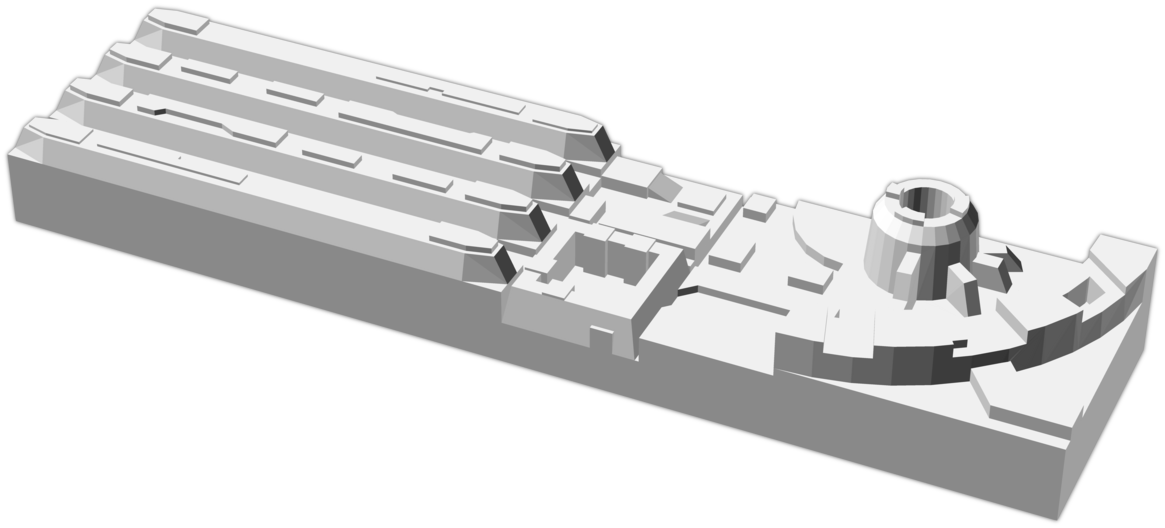
On the larger end of the spectrum is a new 40mm version of the "Citadel" tile (the smoke-stack looking thing with a quarter arc). This isn't a scaled-up version of the 20x20 tile (which was a solid version of my original hand-made tile) - I completely remodeled it. It's still not at all anything approaching "accurate", but it's visually a lot more representative of the original.
The parking lot pyro model includes 2 tiles at the larger scale that are sub-sections of this tile, so I've included those as well.
I've also included a 20x20 version of it, so there's a more detailed option at that size as well, as well as a 40x40 arrangement of 4 of them.
Even Smaller Tiles
Previously, the smallest tiles were 10mm x 10mm, which is pretty small! Well....now there are 5mm x 5mm tiles. The Death Star surface model used all the scales of tiles ILM built, and they built tiles ranging from 2 feet across all the way down to just 3 inches! In order to fill in the pyro model, I needed to model a more of those "high altitude" tiles at a very small scale. For the most part, rather than model those as individual tiles, I've modeled 20x20 and 20x40 arrangements of them, as they were filled in to larger areas on the model - dealing with dozens of individual 5mm tiles would be a big pain.
Version 5, 2020-11-05

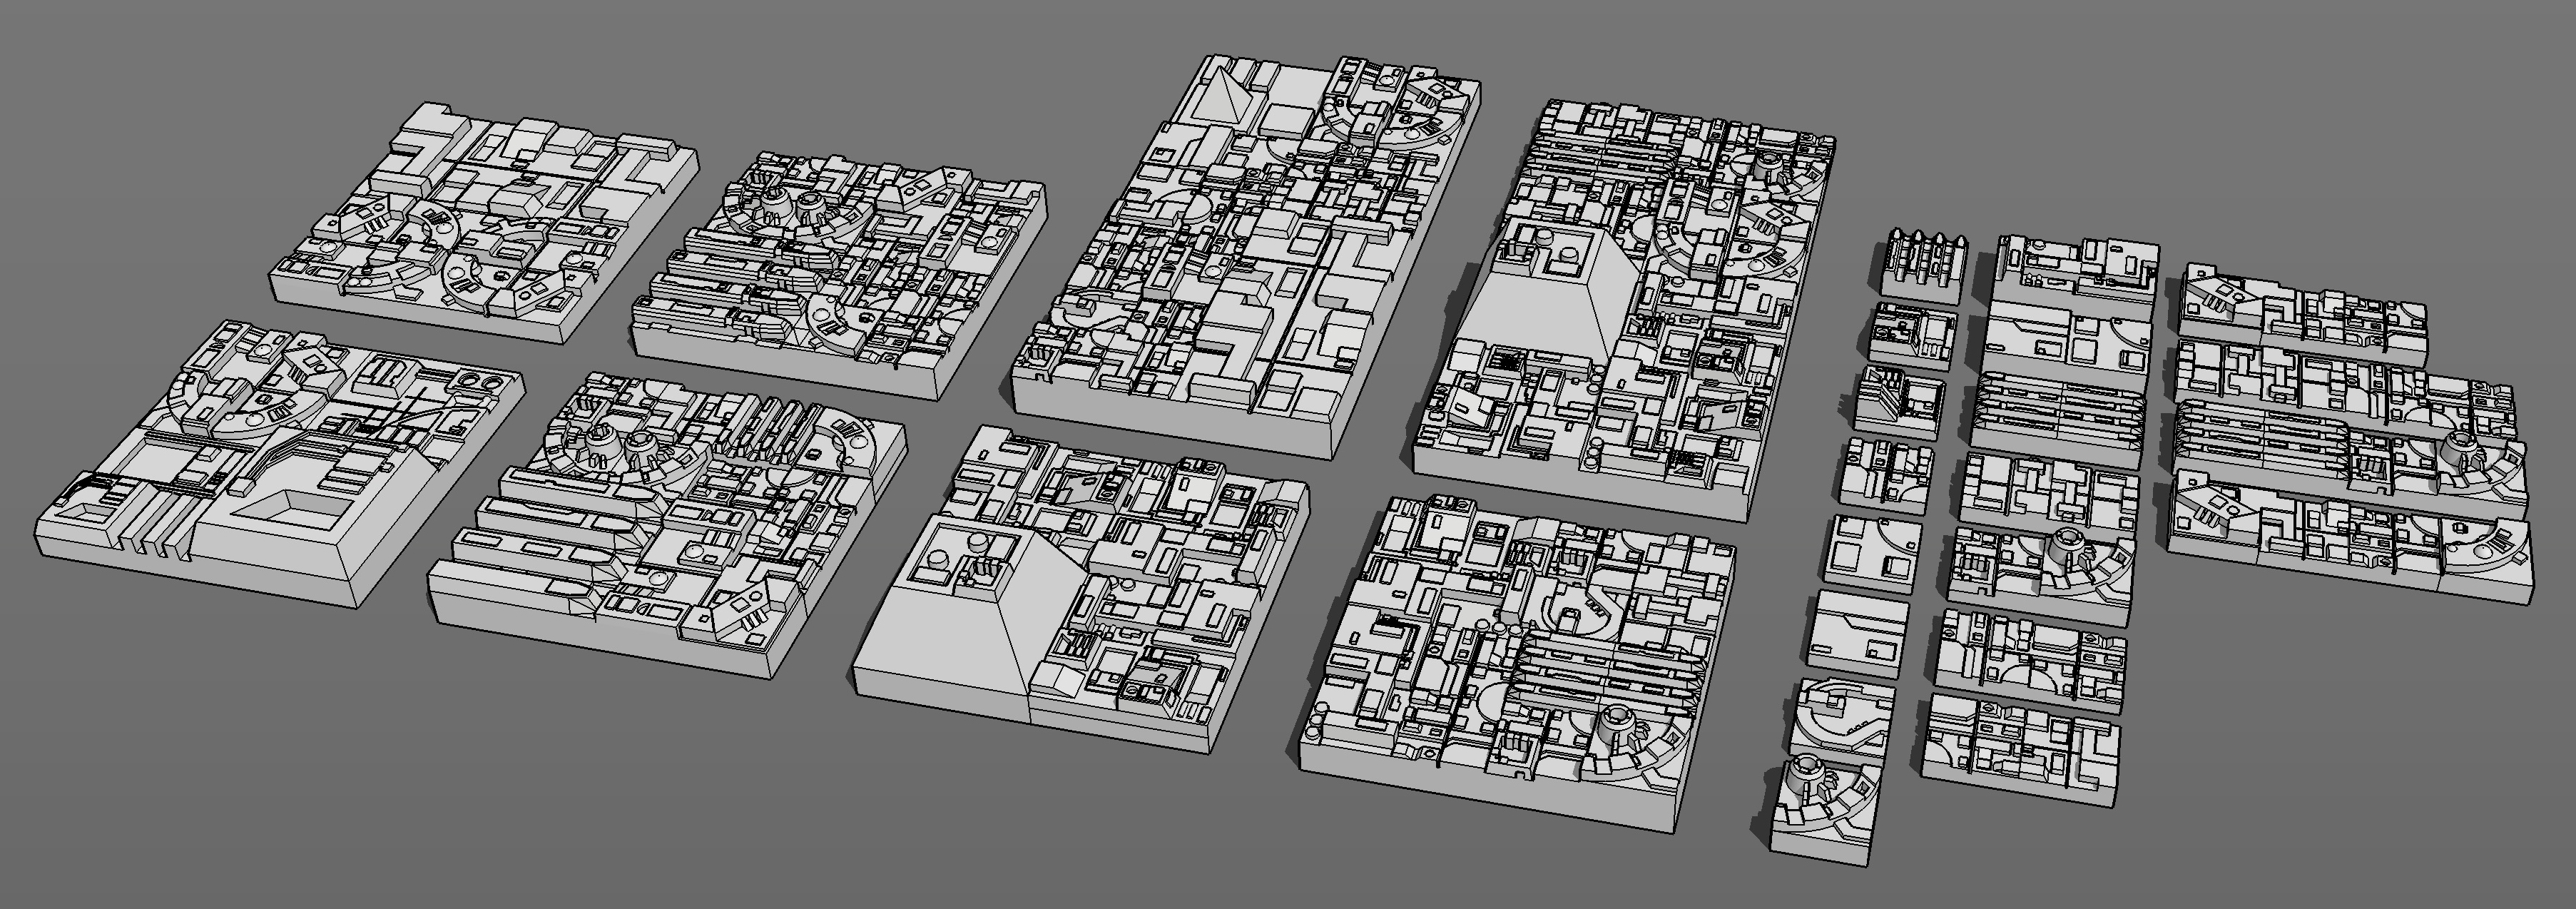
This is a HUGE update, with dozens of new tiles.
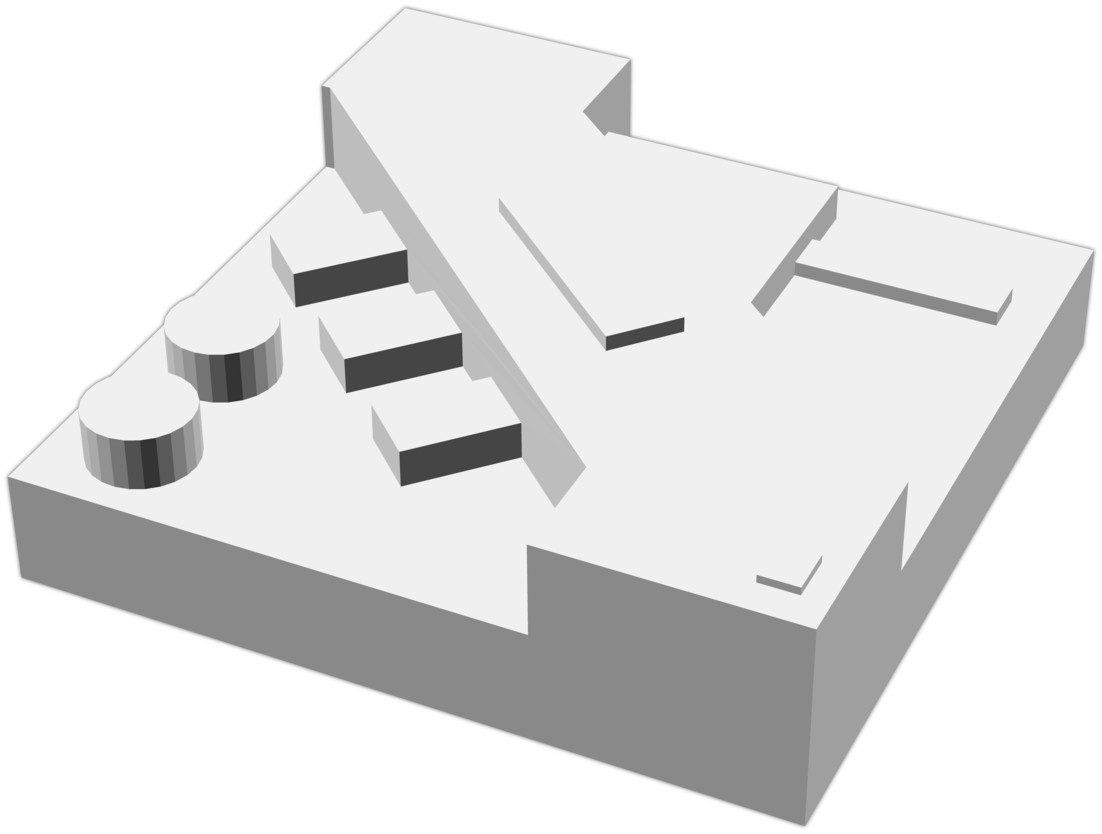
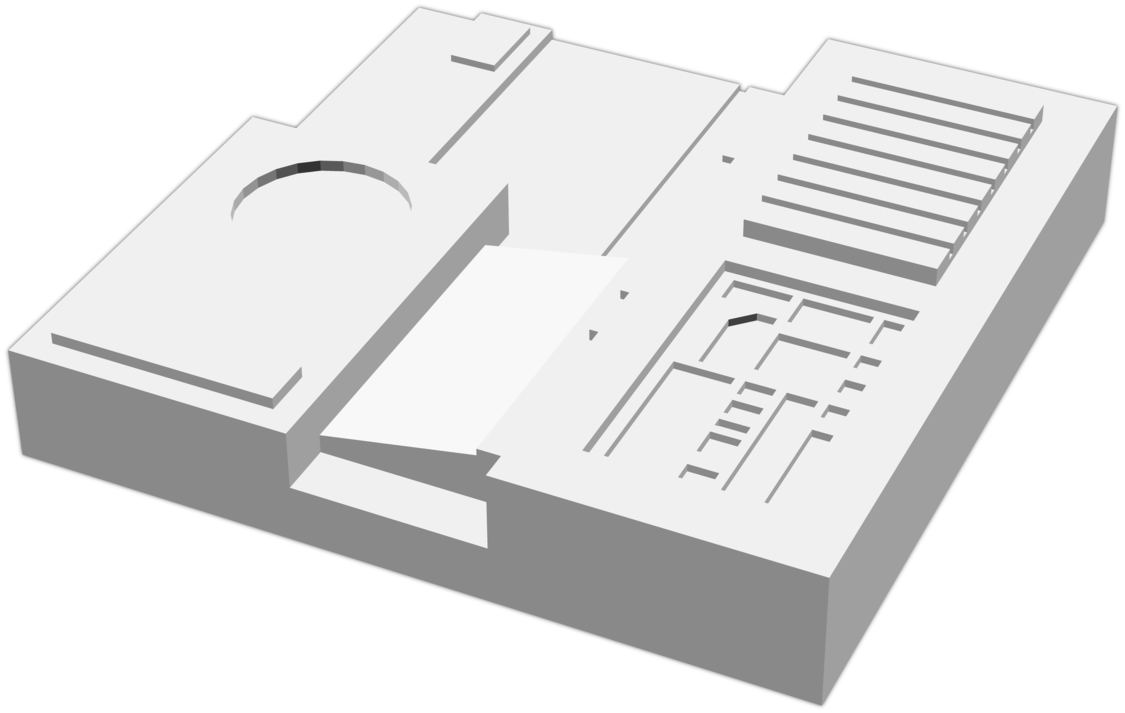
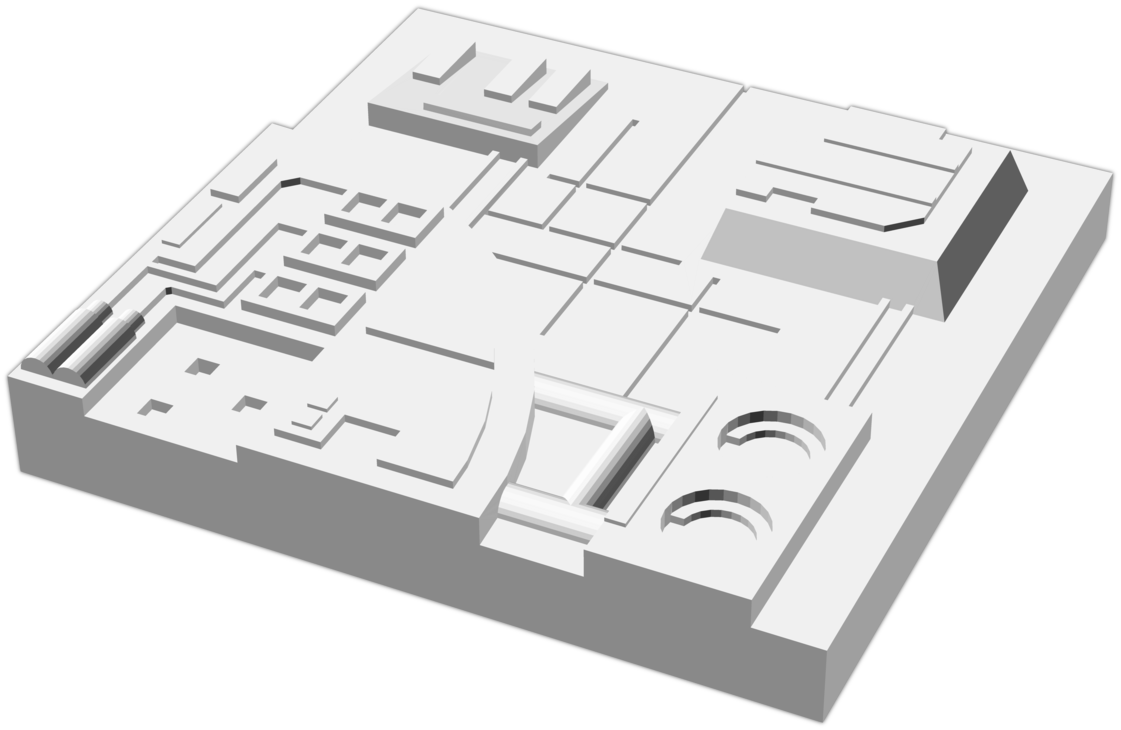
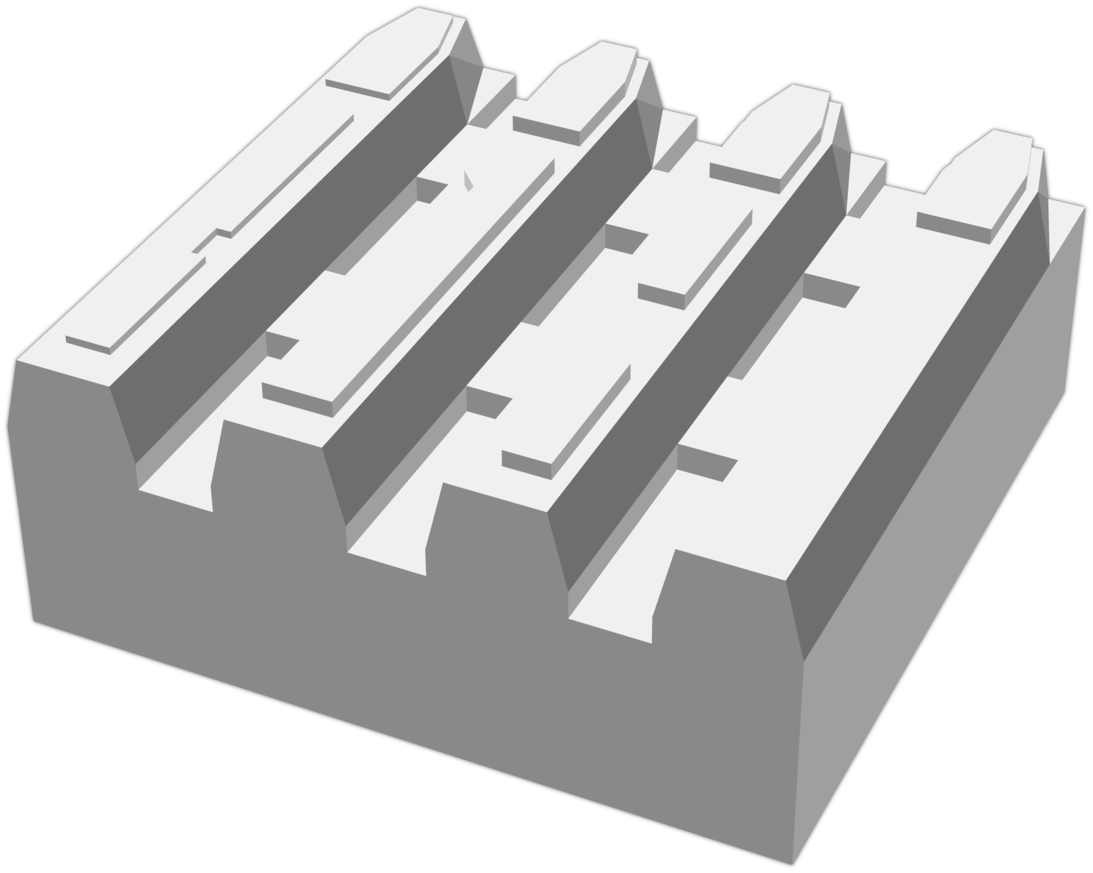
The most prominent addition is a series of new tiles, starting with the four that make of the iconic loop pattern, completely re-modeled from scratch. The first set I made was based on my original hand-built versions. This revision is based on the the "low altitude" two-foot square tiles, with the high resolution photo of one of the parking lot filming sets in this article on starwars.com being my primary reference.
I've also completely remodeled a bunch of other low altitude tiles, added a couple that I'd never created before, and added a few original designs in the same style.
There are also more 10mm tiles, which can be used either to make a really, really small trench run (you could make one 4" long by 1" high, for example, with them), or to fill in areas of a larger arrangement. If you study the filming models, you'll realize they used all the scales of tiles at once.
Version 4, 2020-10-26

More 10mm Tiles

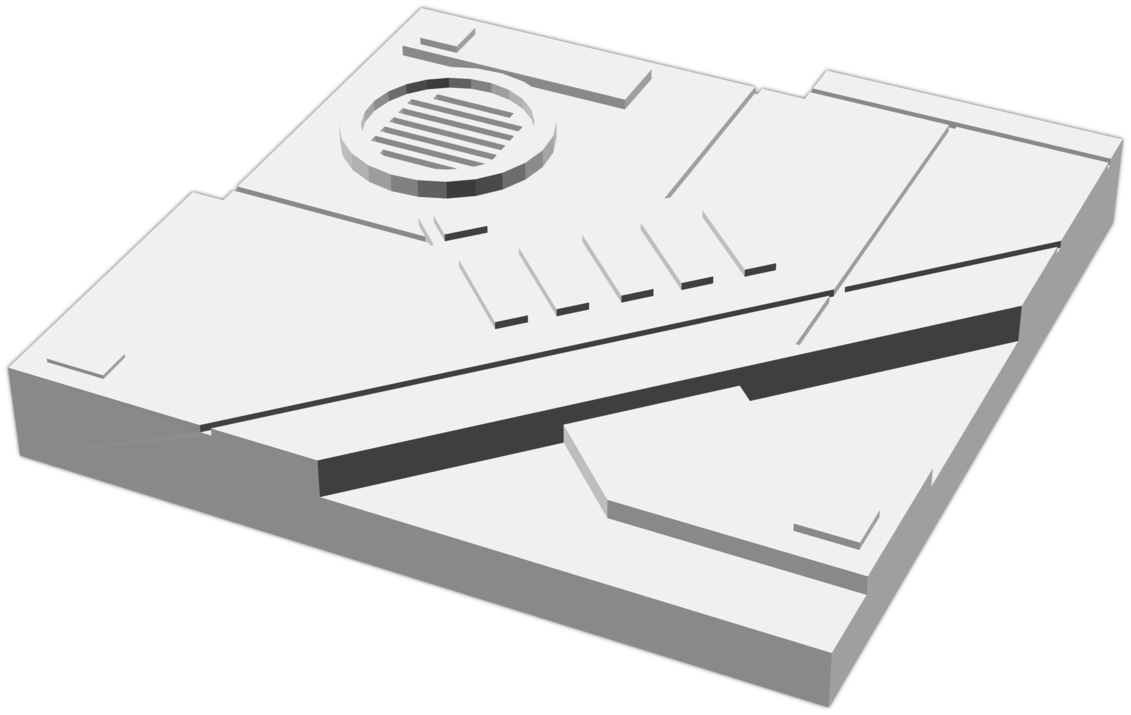
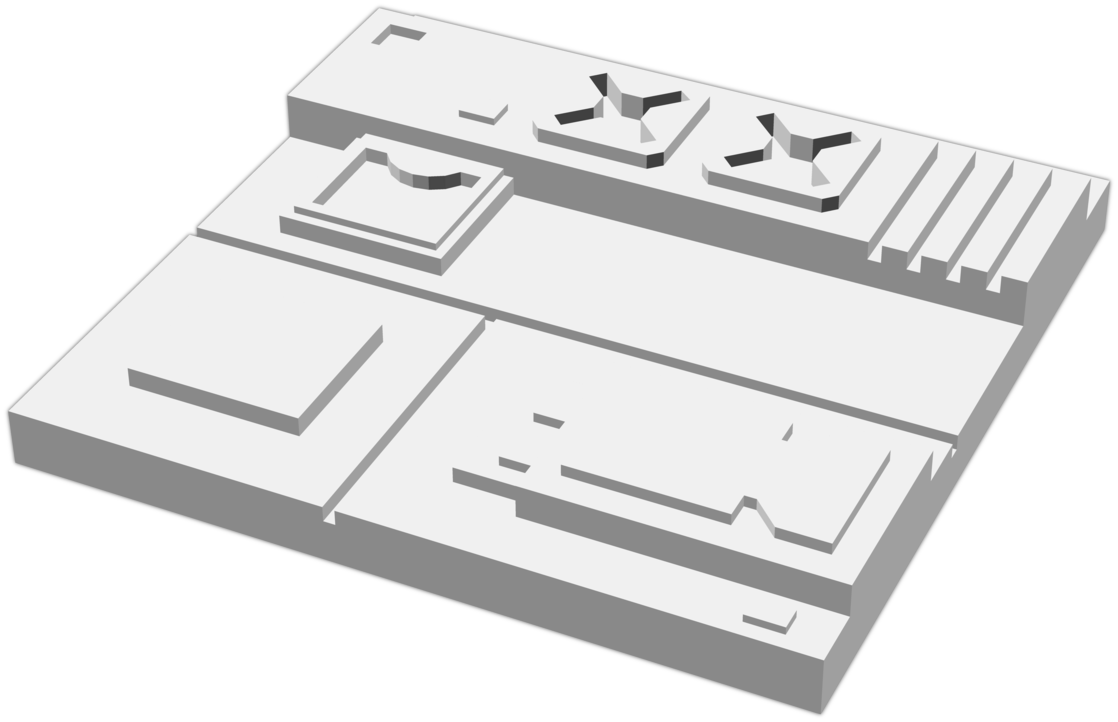
I've scaled down some of the 20mm tiles to 10mm size, so it's now possible to build a trench run out of just the 10mm tiles. There's a thermal exhaust port, a couple of gun turrets, the classic loop tile, and a few others.
This includes new 10x10 tiles, a new 10x20 (scaled down from 20x40), and some 20x20 tiles that are scaled down versions of the 40x40 equivalents.
More Detail
Based on how much detail is possible in a modern SLA print, I've added some more detail to some of the existing tiles.
Version 3, 2020-10-11
Detail Tweaking
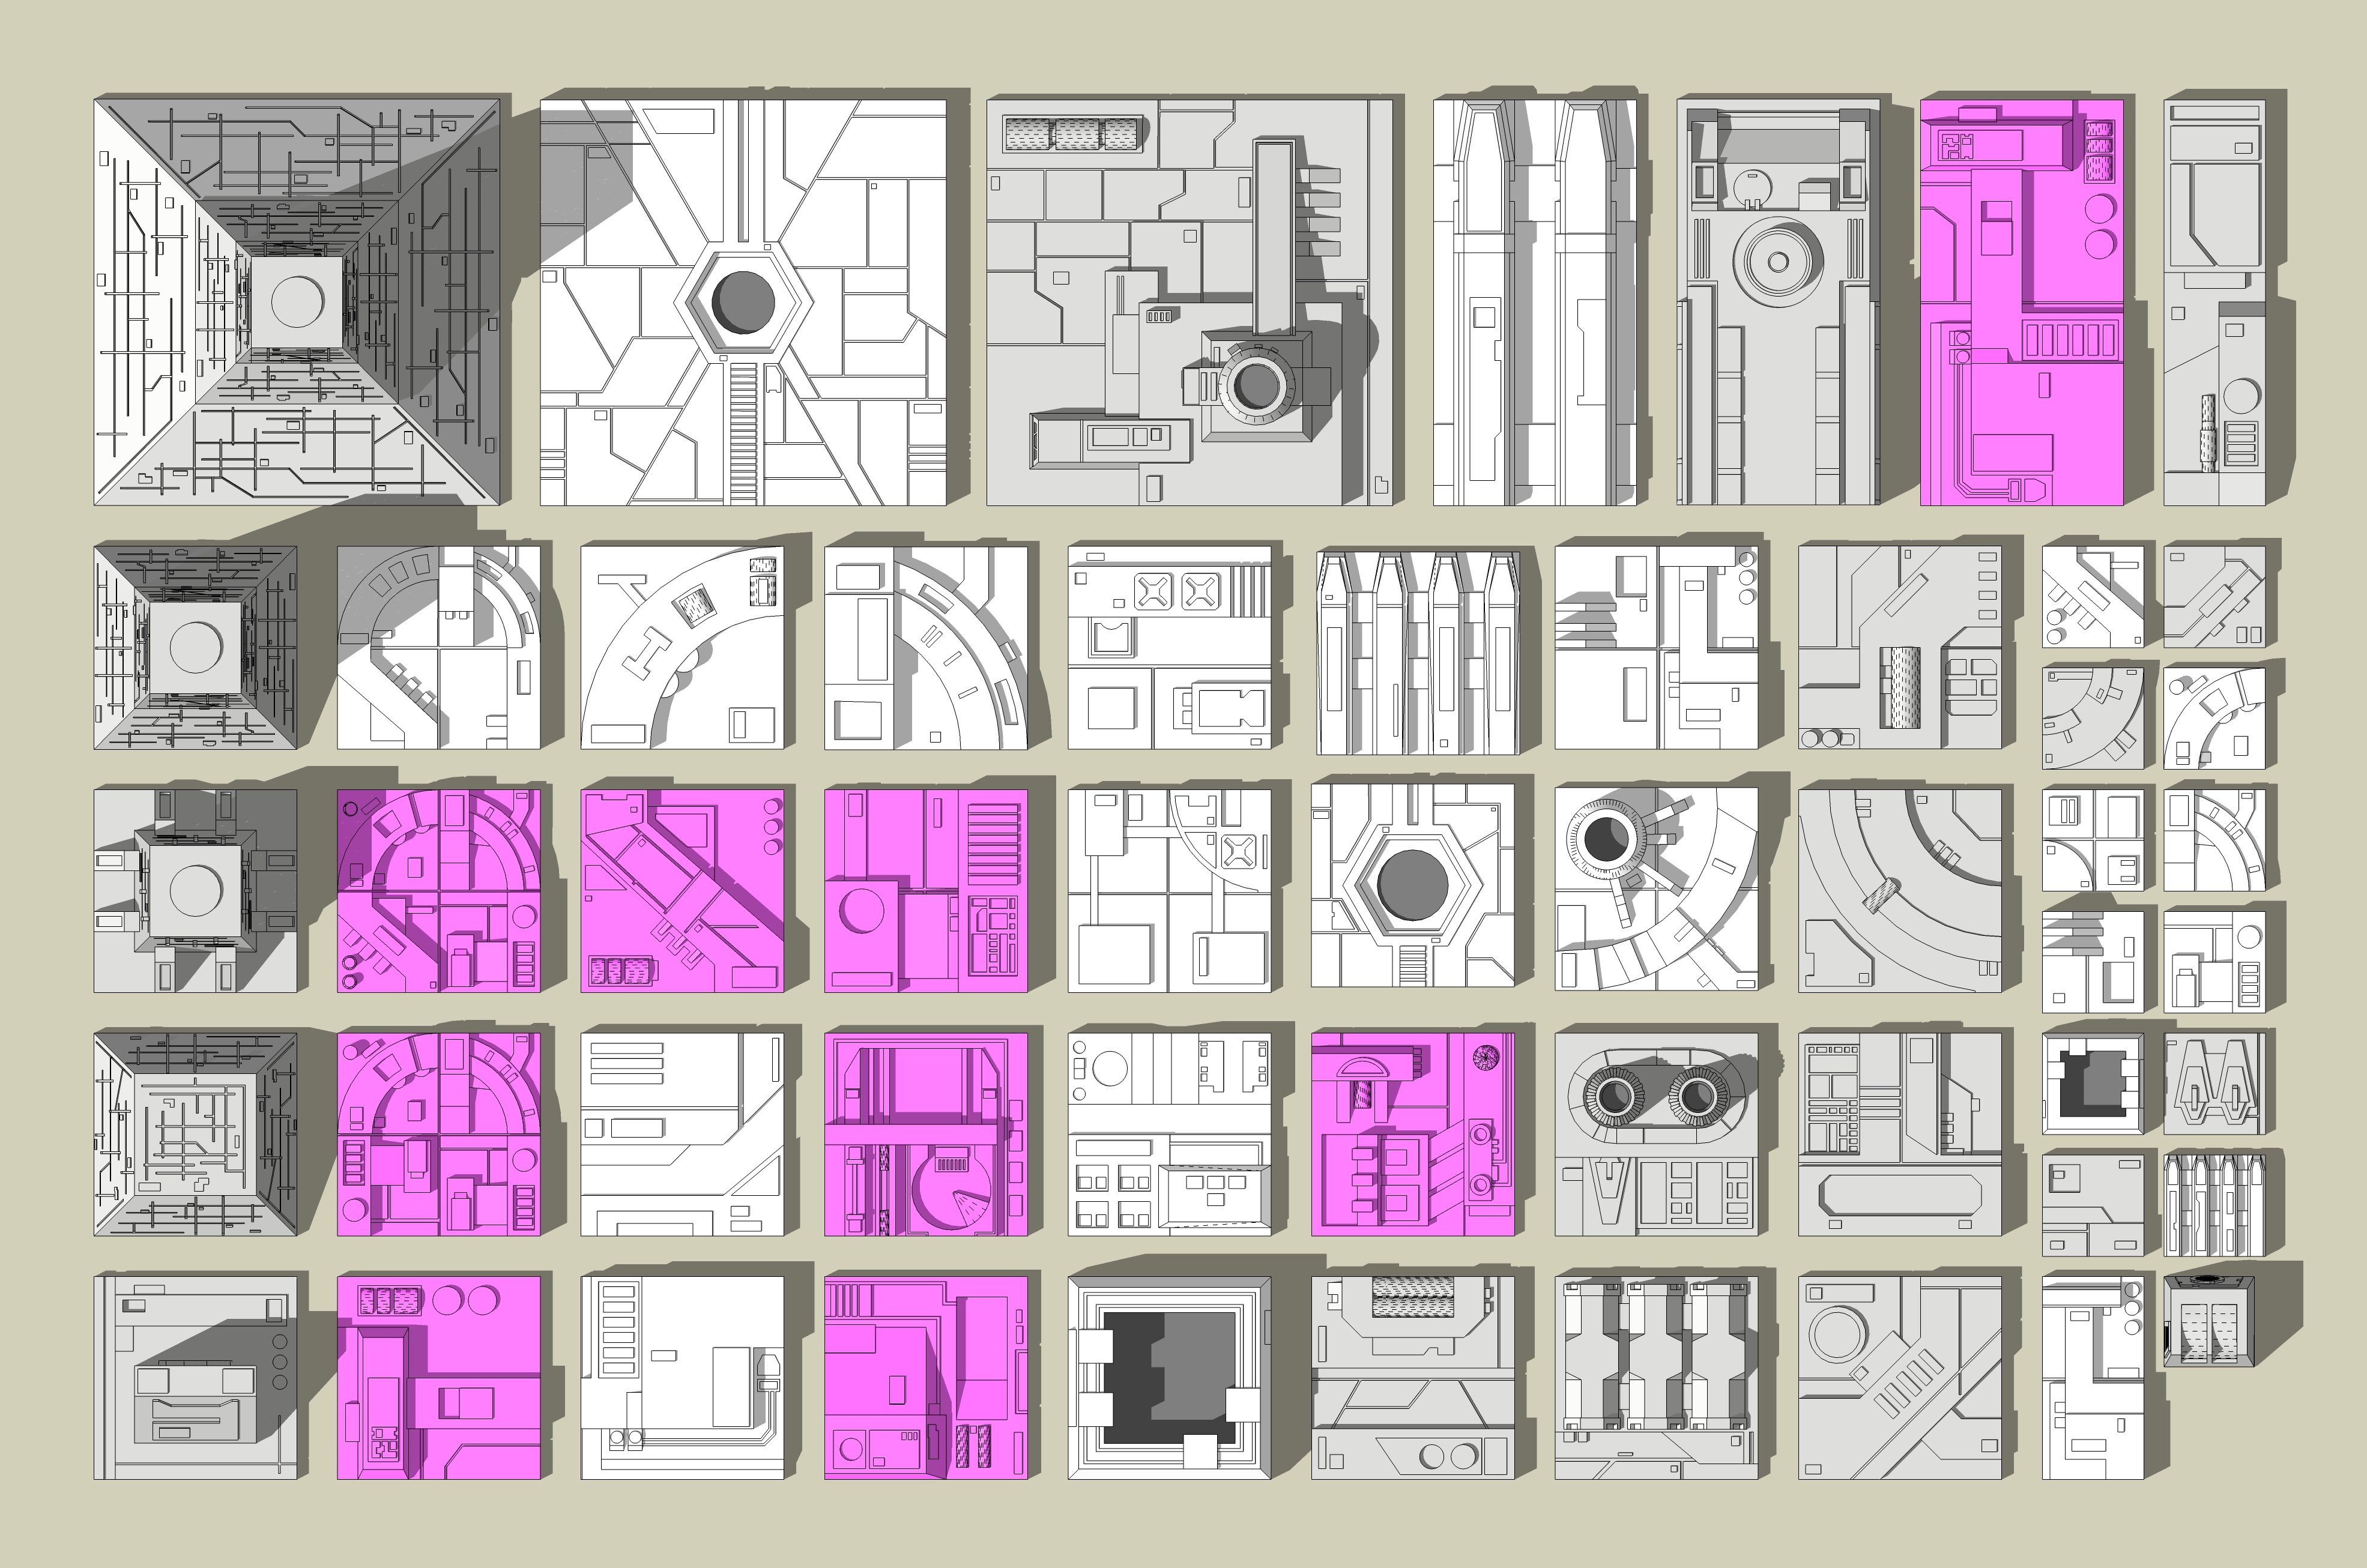
This is a minor update with some tweaks based on printing experience - some of the fine detail on some tiles has been enlarged somewhat (primarily given more vertical offset, though some raised lines have also been thickened) to be more distinct. Modified tiles are highlighted in magenta in the picture below.
Arrangements
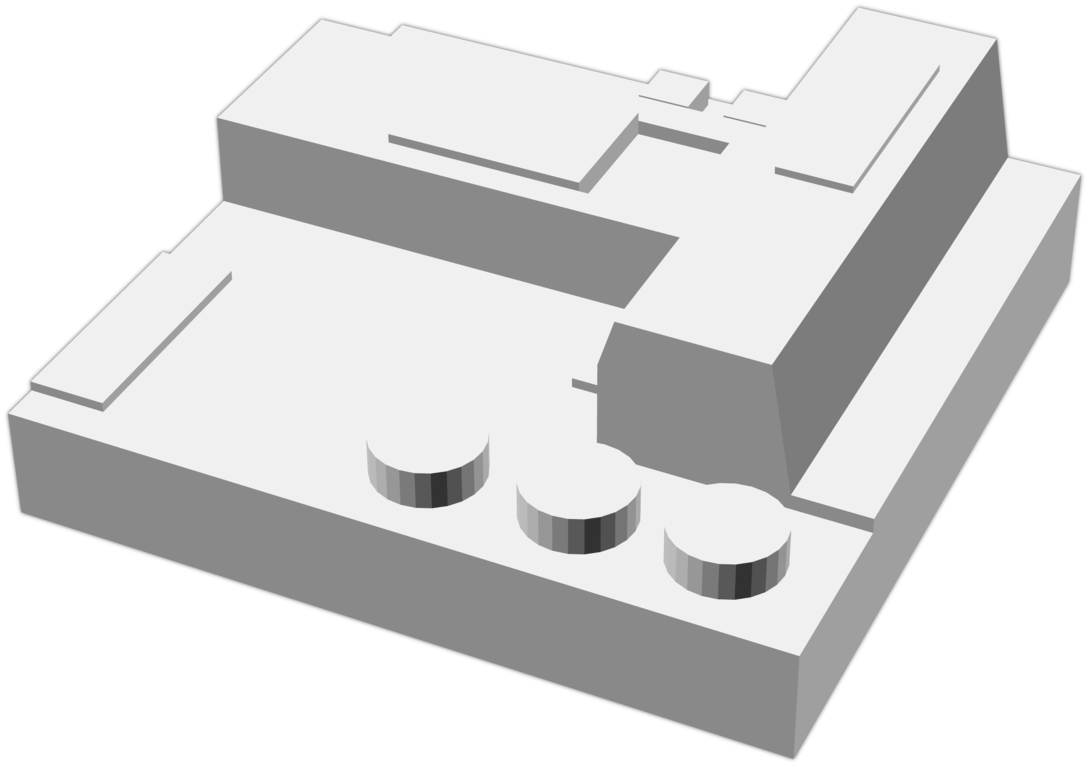
I've also included some 4x4 tile arrangements in the 40x40 tile folder. These are either mostly patterns of tile arrangements found on the original Death Star (or as close to them as can be with the set of tiles I've modeled so far) and some originals. These don't contain any new details beyond what you can already find in the 20x20 tiles, but they should make it more convenient to print and assemble some of the common tile patterns, such as the classic loop.

Version 2, 2020-09-28
- 8 new 20x20 Tiles
- Tiles 21, 22, 25, and 26 are all new, and model a few original medium altitude tiles from ANH.
- Tile 23 and Tile 24 split up Double Tile 02 into its two halves. While it's most recognizable as a pair, the two pieces do appear individually, which you can find in the high resolution photos on this starwars.com article: "BRUCE LOGAN: THE SPECIAL-EFFECTS JEDI WHO BLEW UP THE DEATH STAR". Here's a direct link to the high resolution parking lot Death Star surface filming photo. This is the highest resolution version of this photo available anywhere, as far as I can tell, and it's a fantastic reference. You can really see how the different scales of tiles are mixed in a single shot.
- Tile 01a is a variation of Tile 01, with more detail. It's basically the quarter tiles that make up the 20x20 loop shape joined together. I think it's a little more accurate and a little better looking than Tile 01, which is based on my original hand-made tile.
- Tile 01b is a variant of Tile 01a, which substitutes the straight section for the dogleg section. Basically a convenience for something you could assemble from the quarter tiles - it's a pattern I like, and have used on my Death Star diorama.
- New 20x40 Tile
- Double Tile 03 - based on the undercarriage of the T-16 Skyhopper, which I already had in printable form. This stands in for the kitbashed double tile I made out of the Bandai 1:144 scale Imperial Hover Tank.
- New 40x40 Tile
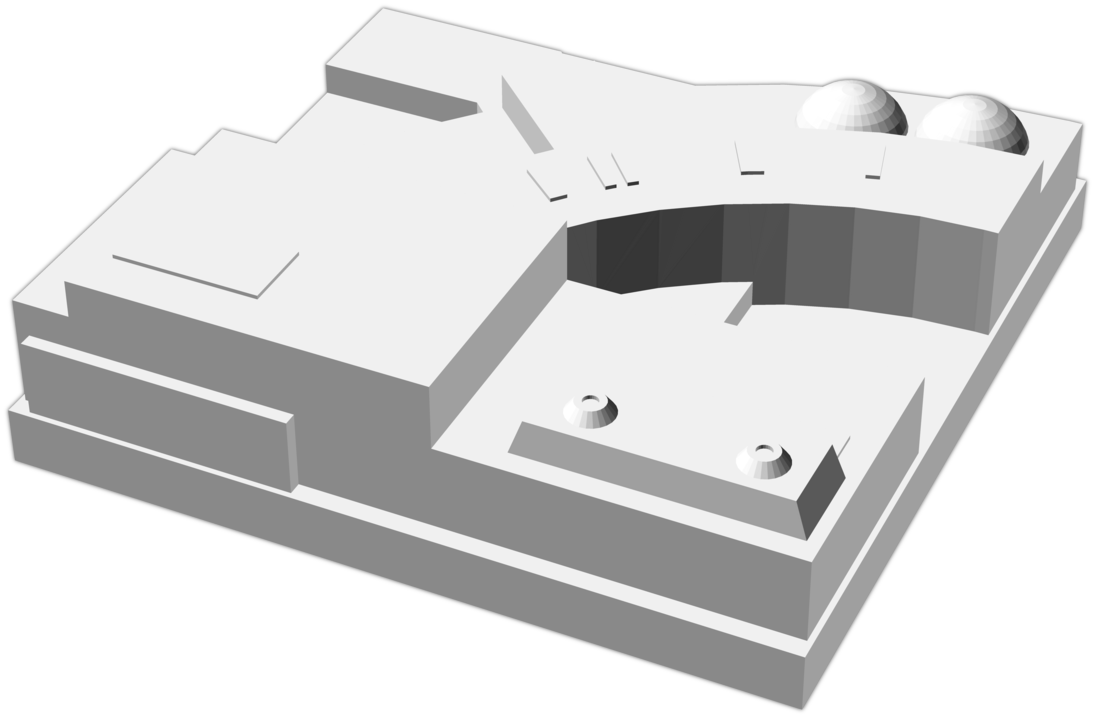
- Quad Tile 02 - I saw this beautiful piece of artwork by Luis Guggenberger which became the Dreadnought antenna from The Last Jedi and thought it would make an excellent large tile, so I modeled a version of it. I did not model the actual antennae, as they would be too fragile to print - they can easily be added with simple music wire and tubing, or many of the exquisite machined parts from Master-Model.pl.
-
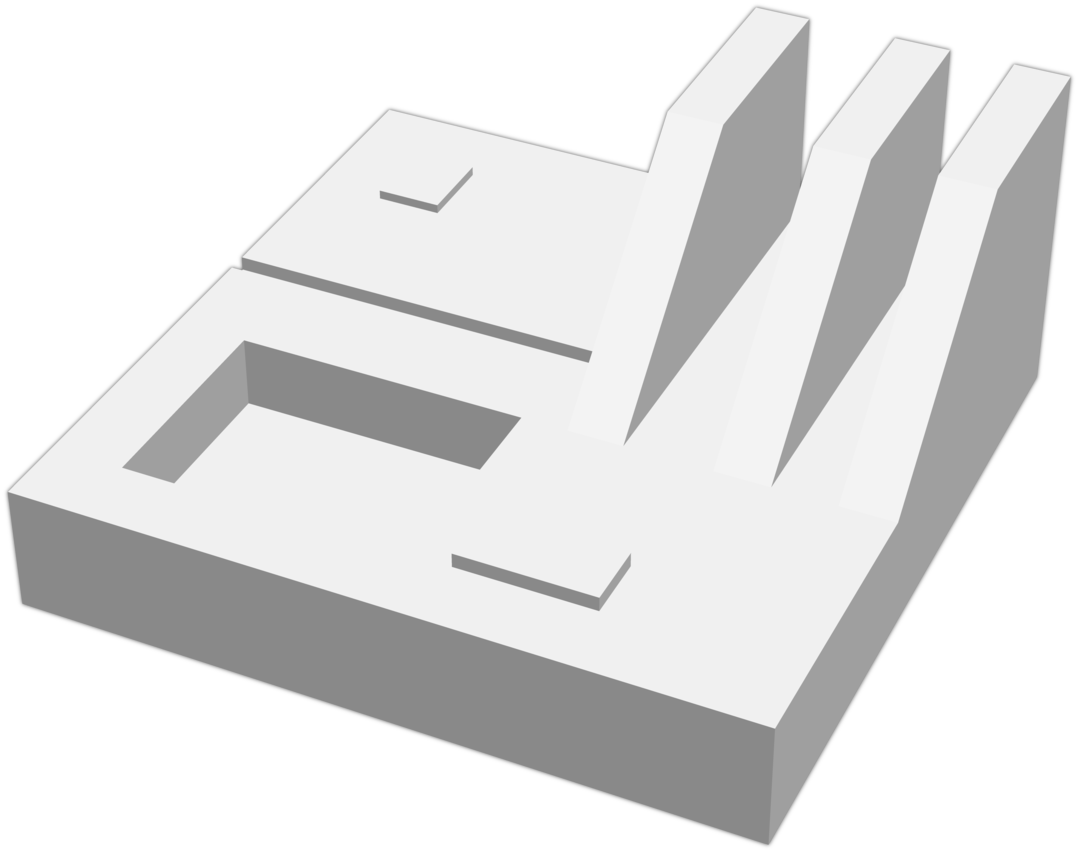
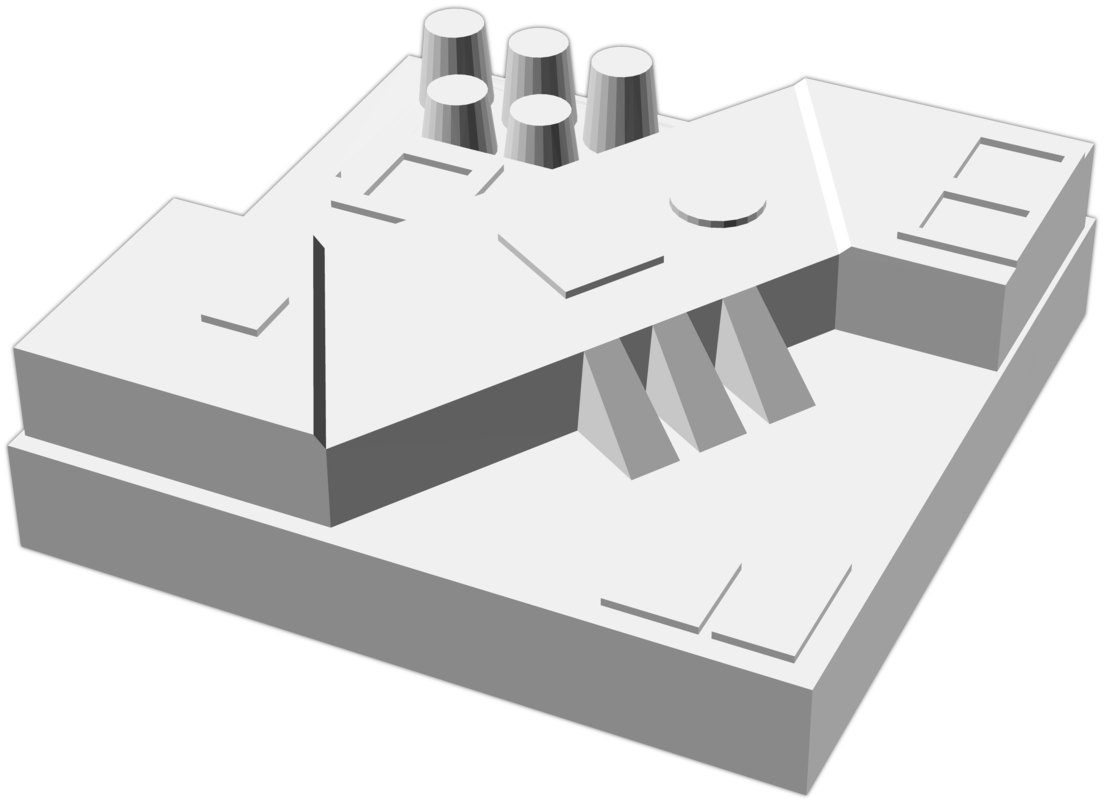
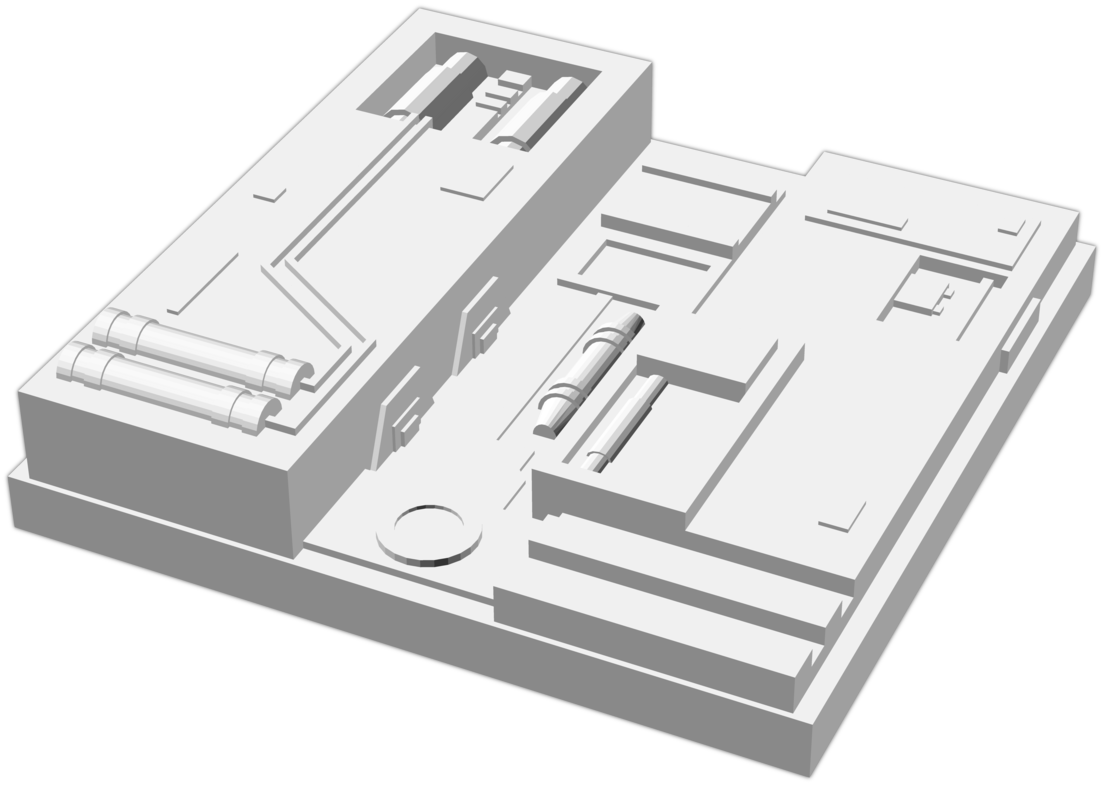
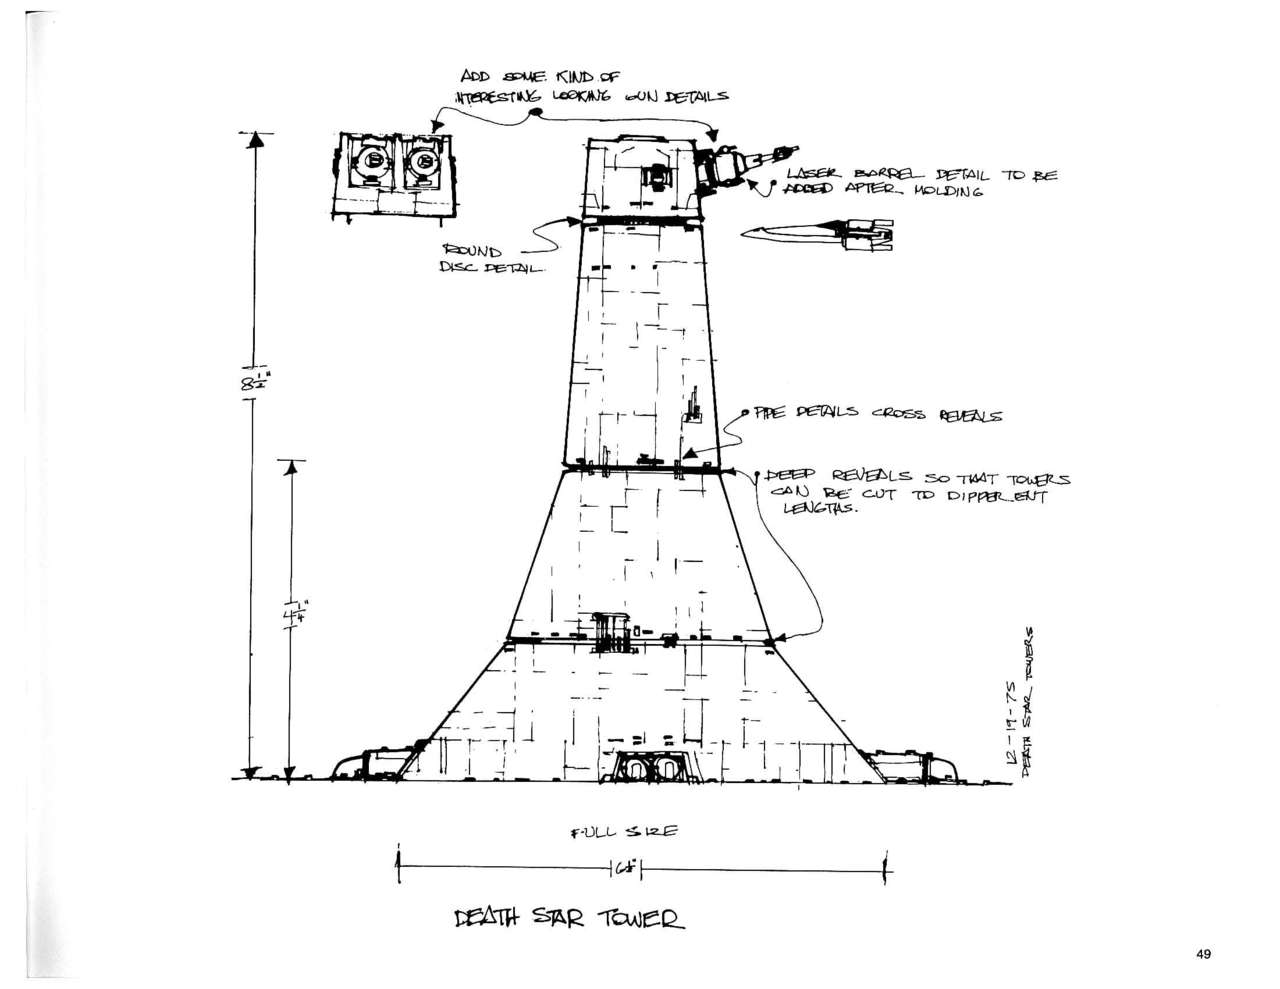
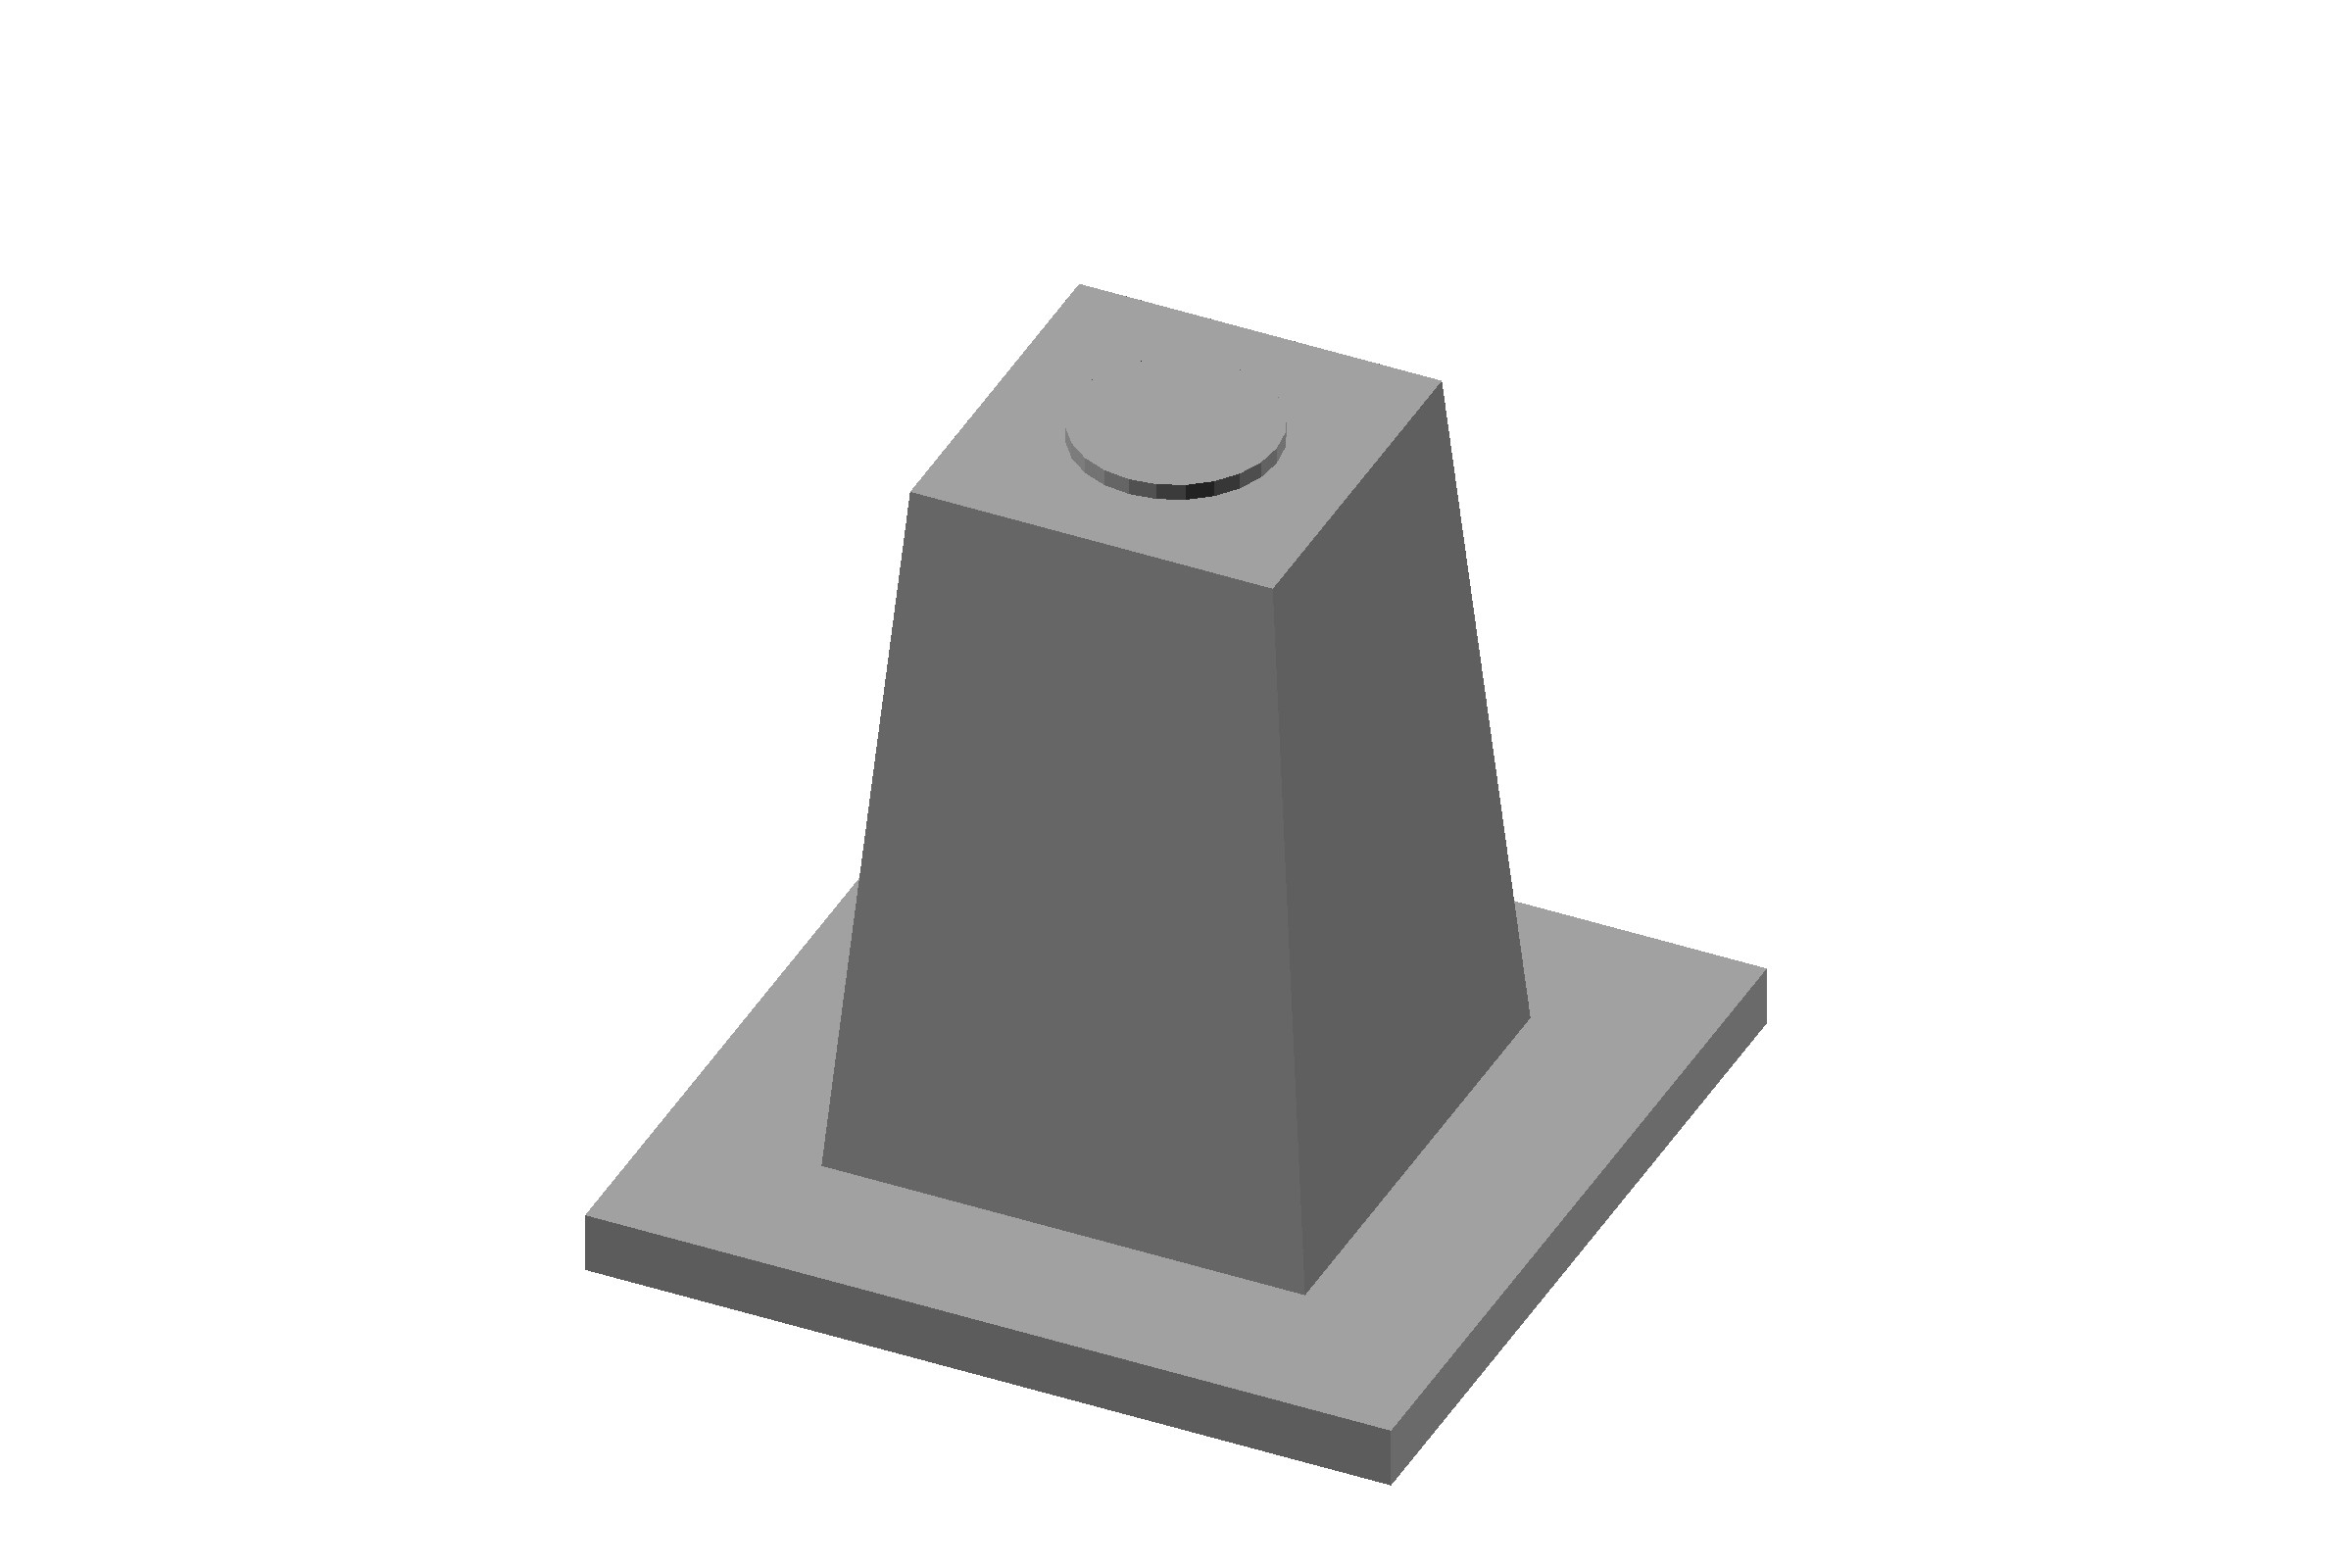
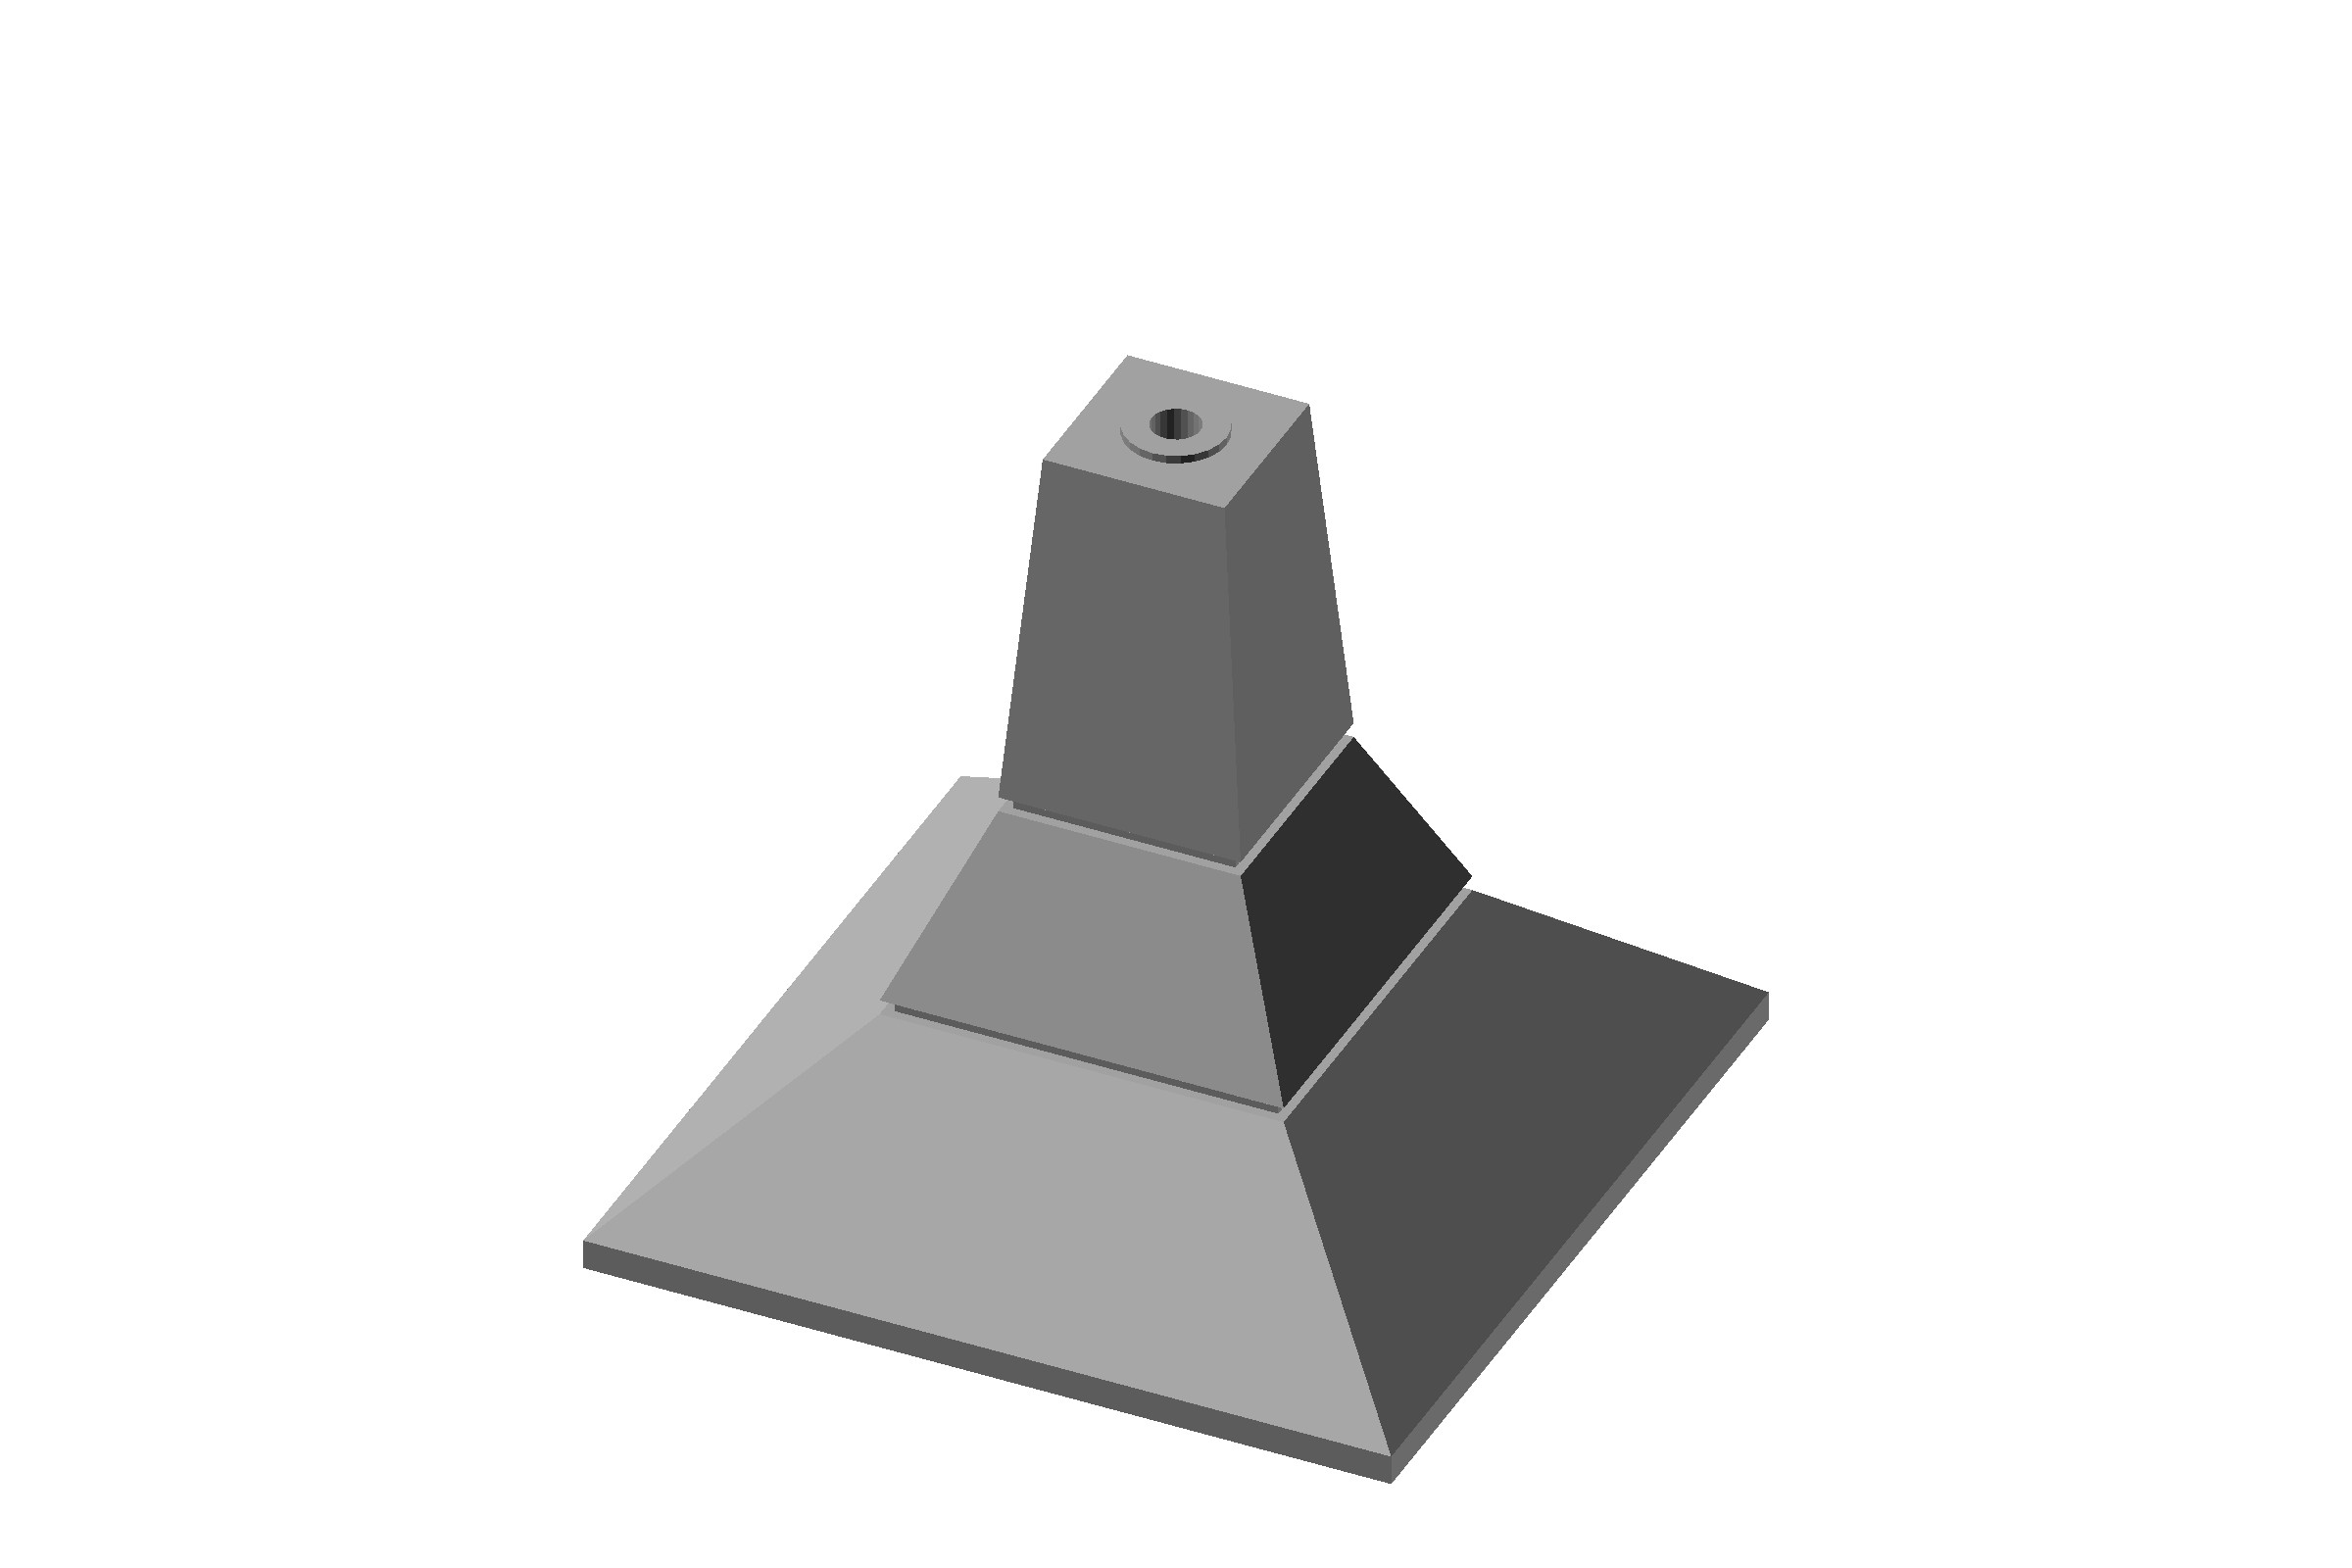
Towers! There are 3 sizes of Death Star turbolaser
tower. IMPORTANT NOTE: These have not passed all the online
printability checks. The 3dhubs checker reports lots of
self-intersecting faces in the panel lines, but Formlabs PreForm
software doesn't report any problems. YMMV.
- One with a 40x40 base and three sections, and two with a 20x20 base - a two section and a single section. There's also a separate 20x20 STL of the bottom section only of the two-section tower.
- Also included is a 20x20 laser tower "shelf", intended for use on vertical walls.
- The turbolaser "head" is modeled separately, so it can be attached at any rotational angle (or even made posable with magnets).
- Like the Dreadnought antenna, I have not modeled the actual laser cannons, as they would be very tiny and probably too fragile to print. Again, I recommend getting some brass cannons from the many varieties Master Model makes.
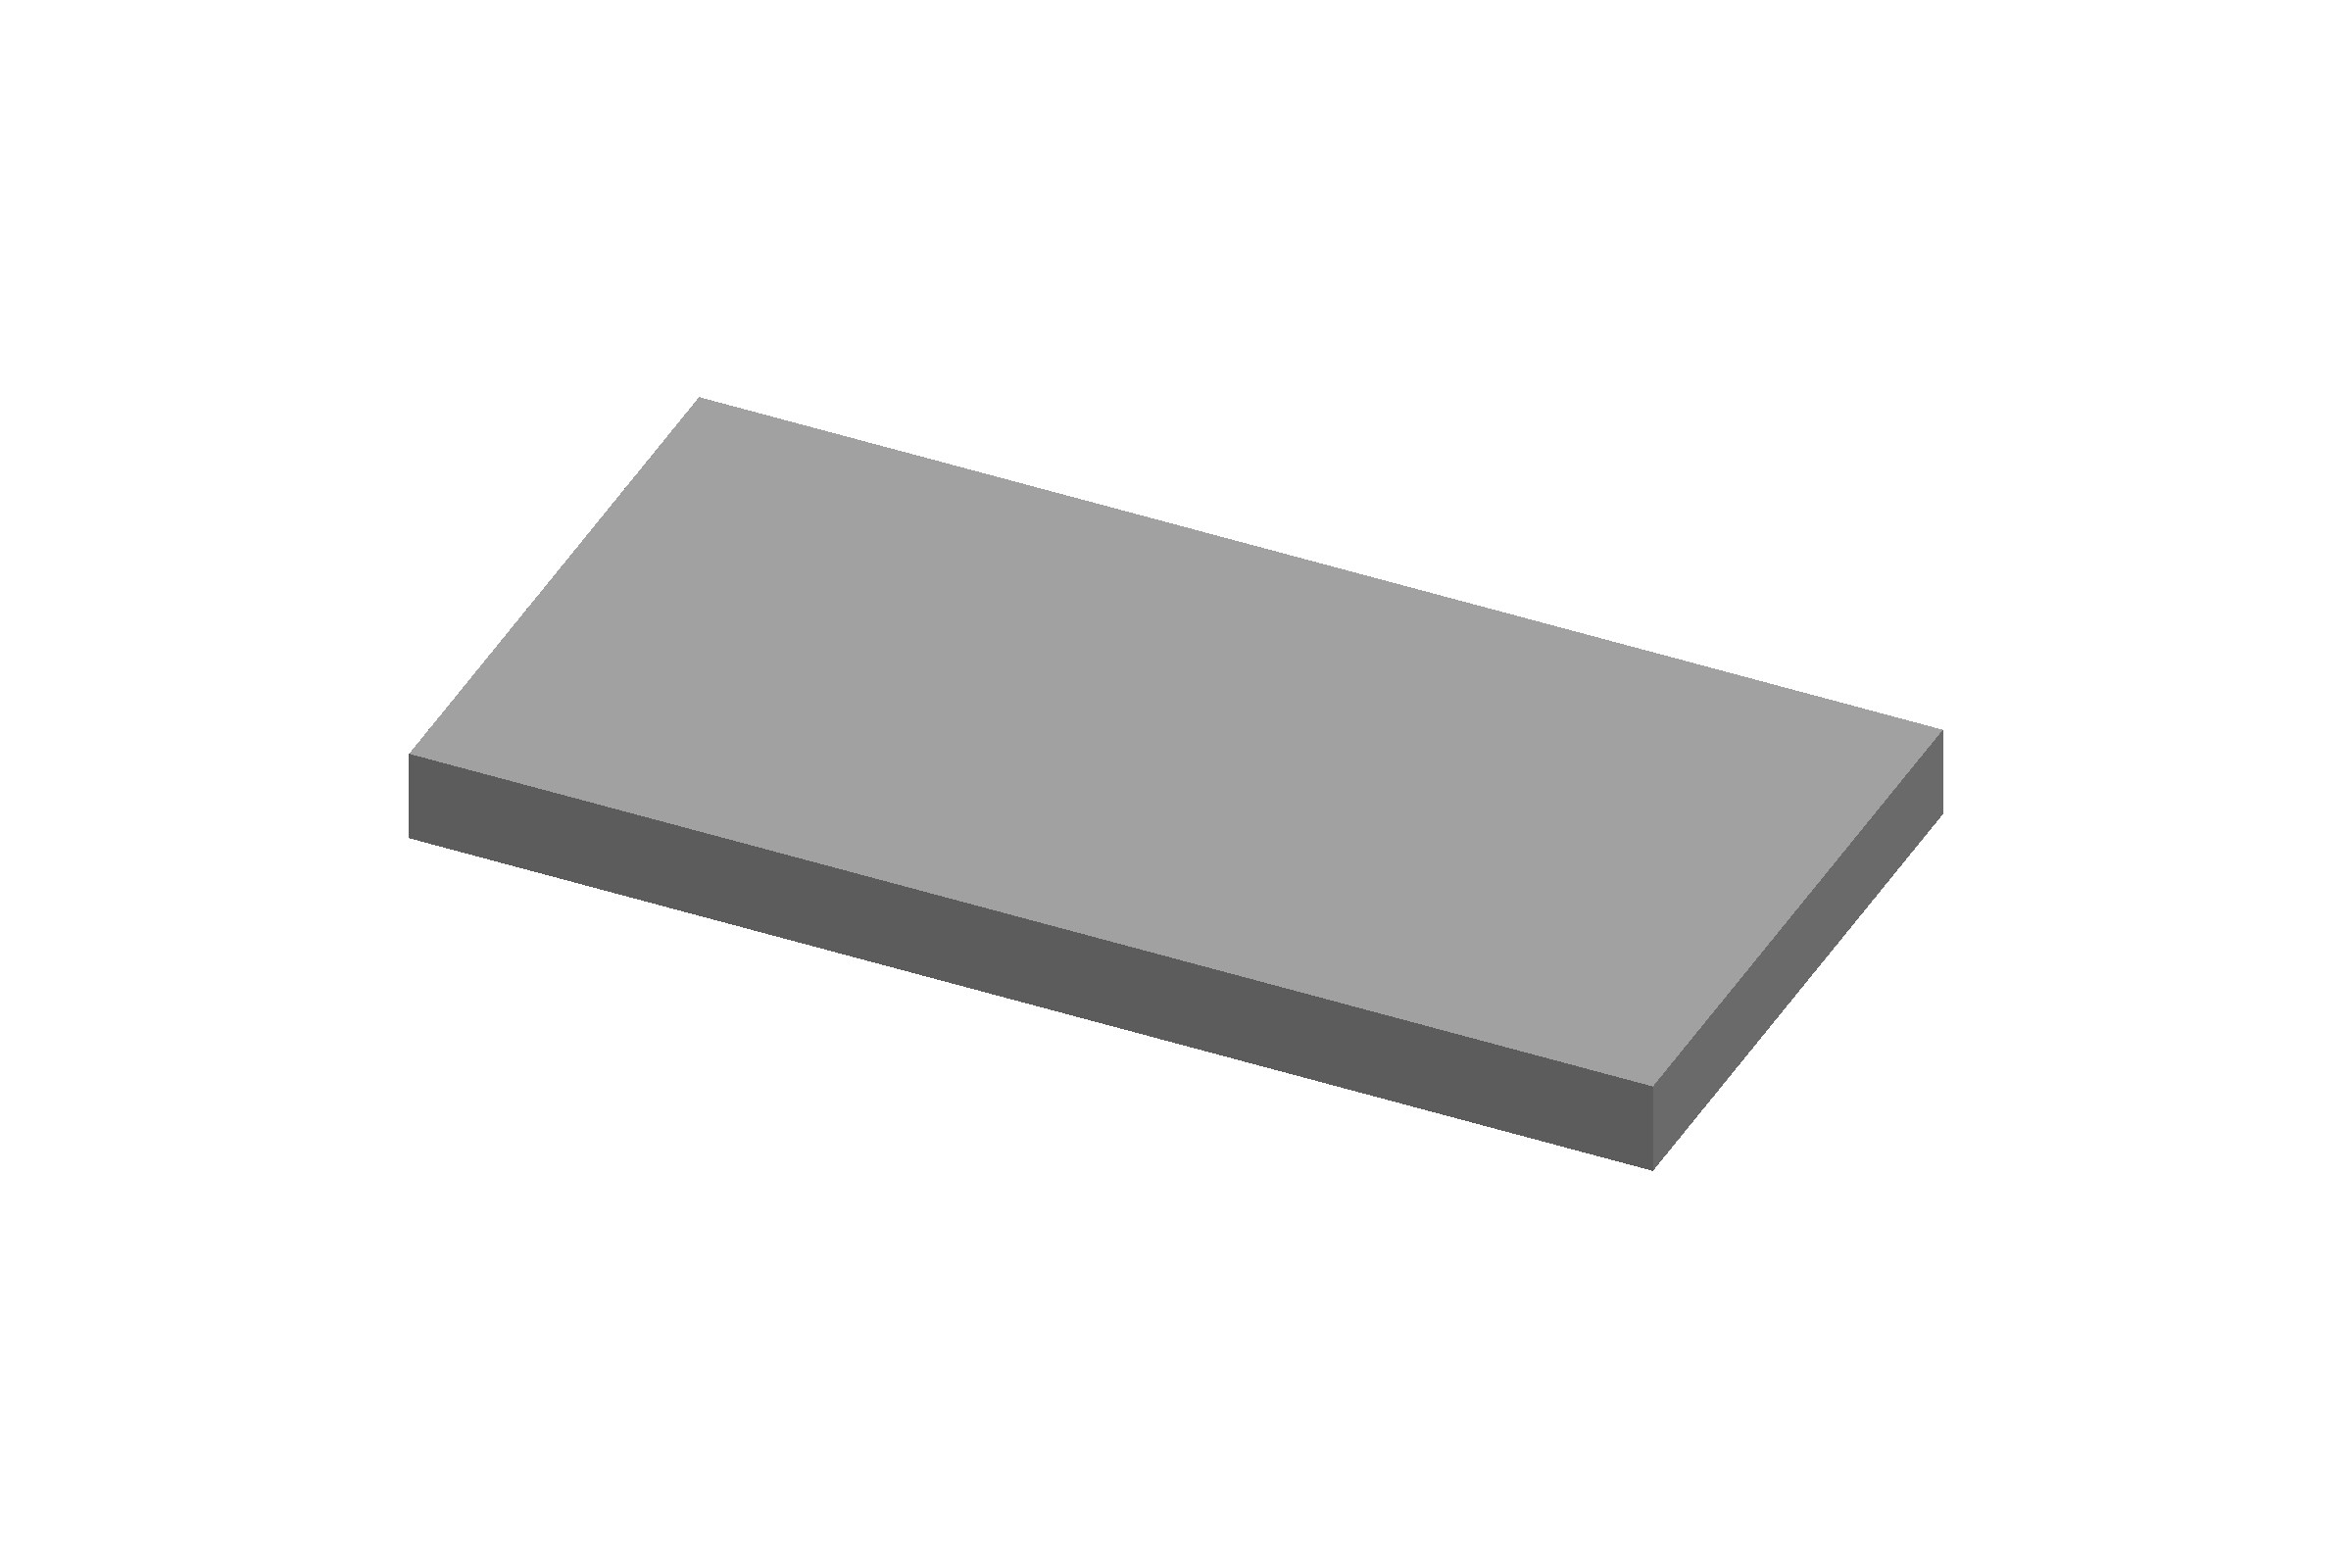
- Blanks - I threw in blank tiles in each size. They're nothing but 1.5mm thick squares in 10x10, 10x40, 10x40, 20x20, 20x40, and 40x40 mm. Print some out and make your own kitbashed tiles!
Version 1, 2020-09-14
Included are the following (so far):
- 20 standard tiles (20x20)
- 12 quarter tiles (10x10)
- 1 "double-half" tile (10x40)
- 2 double tiles (20x40)
- 1 quad tile (40x40)


Links
Print Services
If you want to print these files and don't have a printer of your own, there are lots of 3D printing services out there where you can get them printed.
- Shapeways is probably the most well known, and they do excellent, reliable work. Downsides are that they're very slow, and very expensive.
- Hubs (formerly known as 3DHubs) is a newer service running a network of printers. They have an excellent online printabiilty checker (all my files have gone through it), and they're somewhat faster and cheaper than Shapeways. You don't know exactly who is printing your files, or on what printer though. My first order came out looking weird (definitely not printed on an SLA resin printer), but my second order was beautiful.
- Treatstock is another service running a network of printers, but more like an Etsy for 3D printing. You can choose who to go with, and individual sellers have reviews, photos, etc... including a listing of exactly what printers they have. I like this service the best, so far, although for the less expensive options the quality can be a bit of a crapshoot.
STL Repair
I use these two online STL repair services to fix up the STL files exported from SketchUp, which frequently have numerous minor errors:
- formware.co/onlinestlrepair
- Netfabb. UPDATE: Sadly, Autodesk has taken the netfabb service offline, forcing you into using it from within Fusion 360.
Usually running a file through Netfabb is sufficient. For some files that still have errors (like overlapping faces), running them through Formware first, then Netfabb has produced the best results for me.
Many thanks to Cal Bryant's 10 ways to get the best out of OpenSCAD blog post, for giving me some tips to improve my OpenSCAD rendering of the STL files.


