Table of Contents
Overview
In preparation for our safari trip, I did lots of reading about what to expect and what equipment to bring. This is a rundown of what I ended up going with, what worked, and what didn't. When you look at the comprehensive list, it looks like a ton of stuff, but if you exercise some care in choosing (and going with Micro Four Thirds helps a lot here) it's all still quite manageable to travel with without sacrifing too much. And of course, when you're out on the Serengeti, you're not going to have anything available except what you bring with you!
Most of the advice I found on the internet was centered around DSLRs - either with APS-C or full-frame sensors, and often given by professional photographers. As you might expect, that lead to a LOT of recommendations for BIIIIIIG telephoto and zoom lenses from Nikon and Canon. Do you really want to carry around a lens that's almost as long as your arm, and costs as much as the trip itself?
Well, maybe you do. If you're a professional photographer. I'm just an enthusiastic amateur, and M43 has already proven to me to be quite high enough quality for 16x20 enlargements, which is the largest I'm likely to ever print a single exposure for personal use (panoramas - now, that's something else entirely).
I switched to the Micro Four Thirds format years ago when I got tired of lugging my Nikon D70 around on hiking trips in the Canadian Rockies, and I've never looked back since. I started with a Panasonic GF1, which I was (mostly) thrilled with, and I've never regretted the switch.
Gear
Here's the checklist:
- 2 micro-four thirds bodies, 1 point-and-shoot, and 1 GoPro
- 3 lenses (medium zoom, telephoto zoom, fast prime)
- Extra batteries for all four cameras
- USB chargers for all four cameras
- 6-port USB power supply
- 2-port compact backup USB charger
- USB cables of nearly every flavor (Lightning, mini-USB, micro-USB, USB-3)
- iPhone, iPad Mini and folding Bluetooth keyboard
- backup device
- lots of memory cards
- plug adapters
- monopod
- tripod ball head with Arca-Swiss compatible quick release
- Arca-Swiss compatible camera mounting plates
- Manfrotto super-clamps
- beanbag
- mini tripod


Cameras
We brought two Micro 4/3 bodies, one point and shoot, and a GoPro.
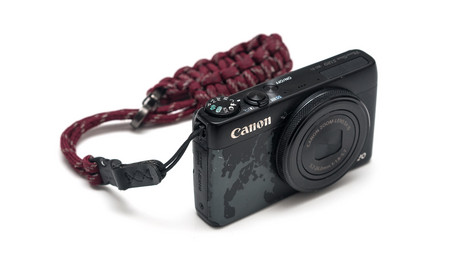
From left to right:
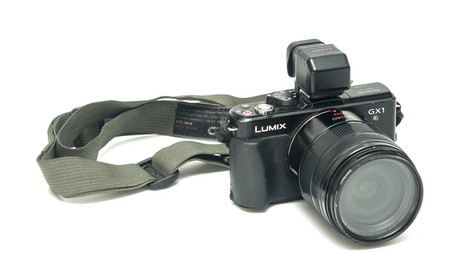
- Panasonic Lumix GX-1
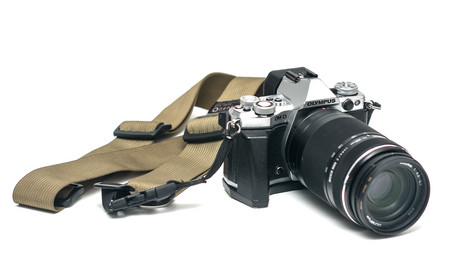
- Olympus OMD-D EM-5 Mark II
- Canon PowerShot S120
Bringing two bodies along is one of the first pieces of advice most safari photo recommendations begin with, and it's definitely a good one. You need a long focal length to capture most wildlife, but you don't want to miss the shot when the wildlife suddenly walks right up to your vehicle and you need a wide angle lens. If you have to swap lenses, you're going to miss it.
It's also widely recommended to bring two bodies so you can avoid dust when changing lenses. That really depends on the season. The short rains arrived at the same time we did, so dust was never a problem on our trip.
Lenses
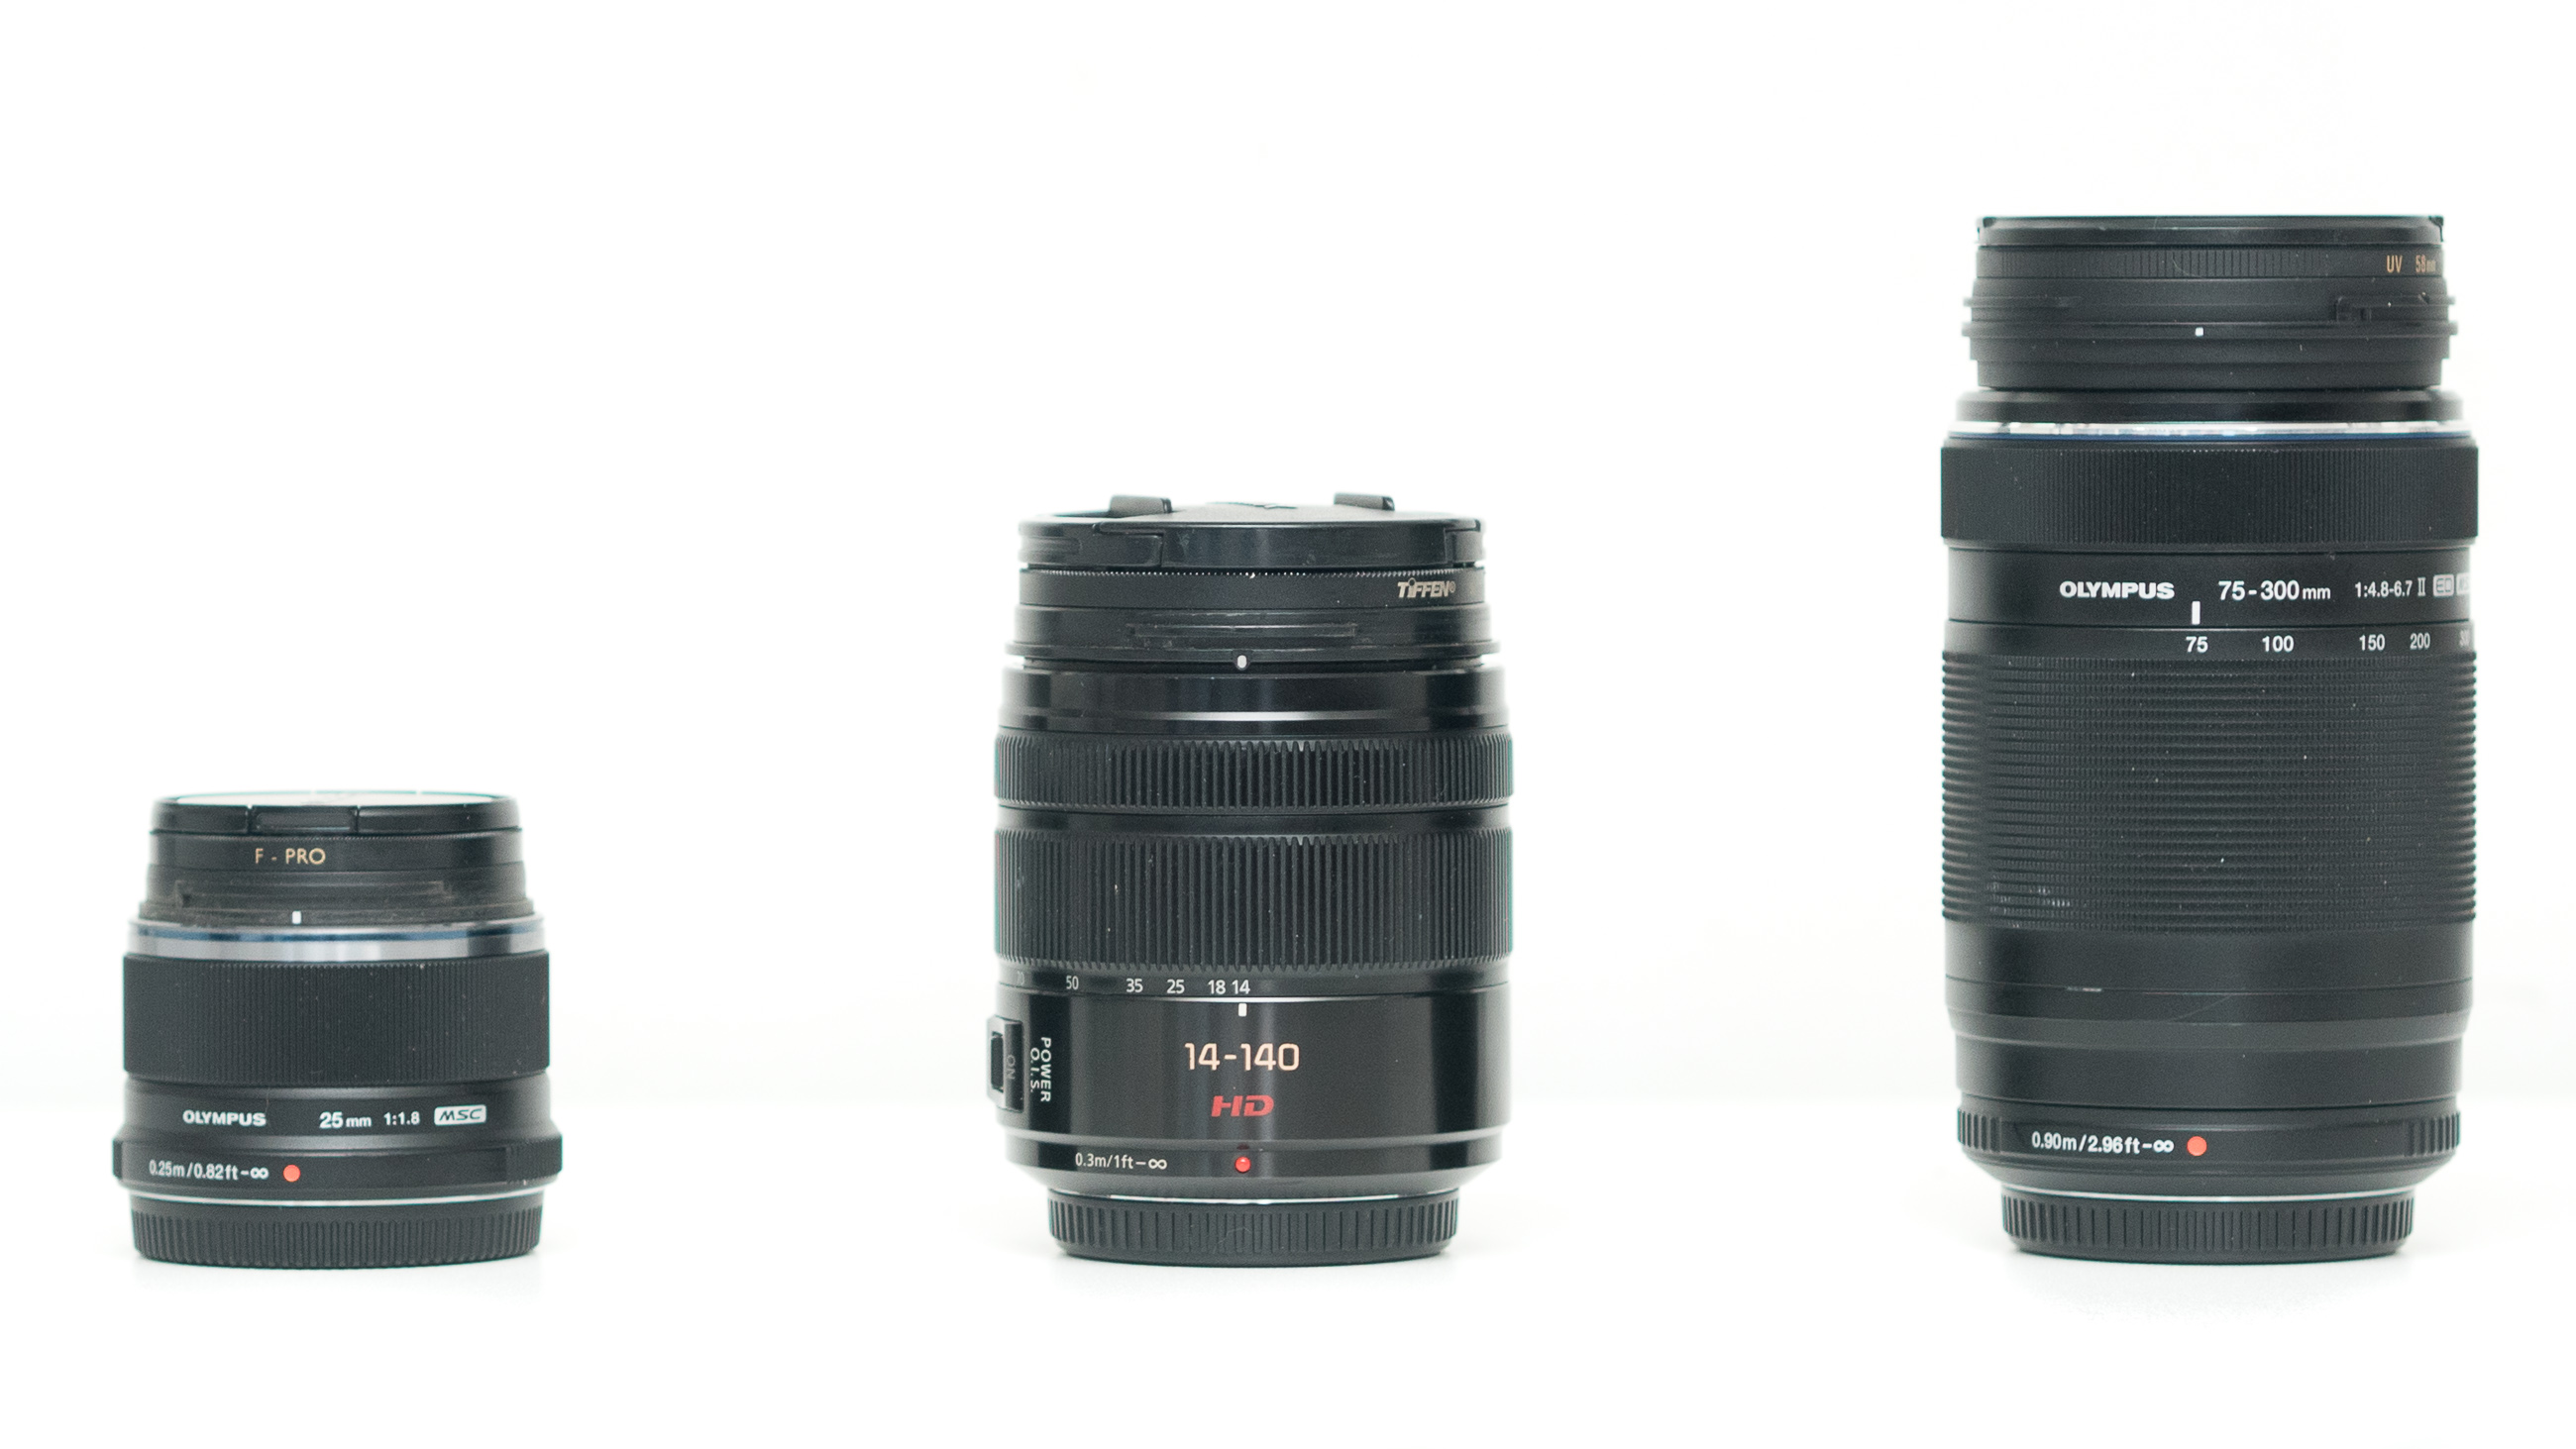
For the Micro Four Thirds bodies I brought 3 lenses. From left to right:
- Olympus 25mm f/1.8 prime
- Panasonic Lumix G 14-140mm f/3.5-5.6 zoom
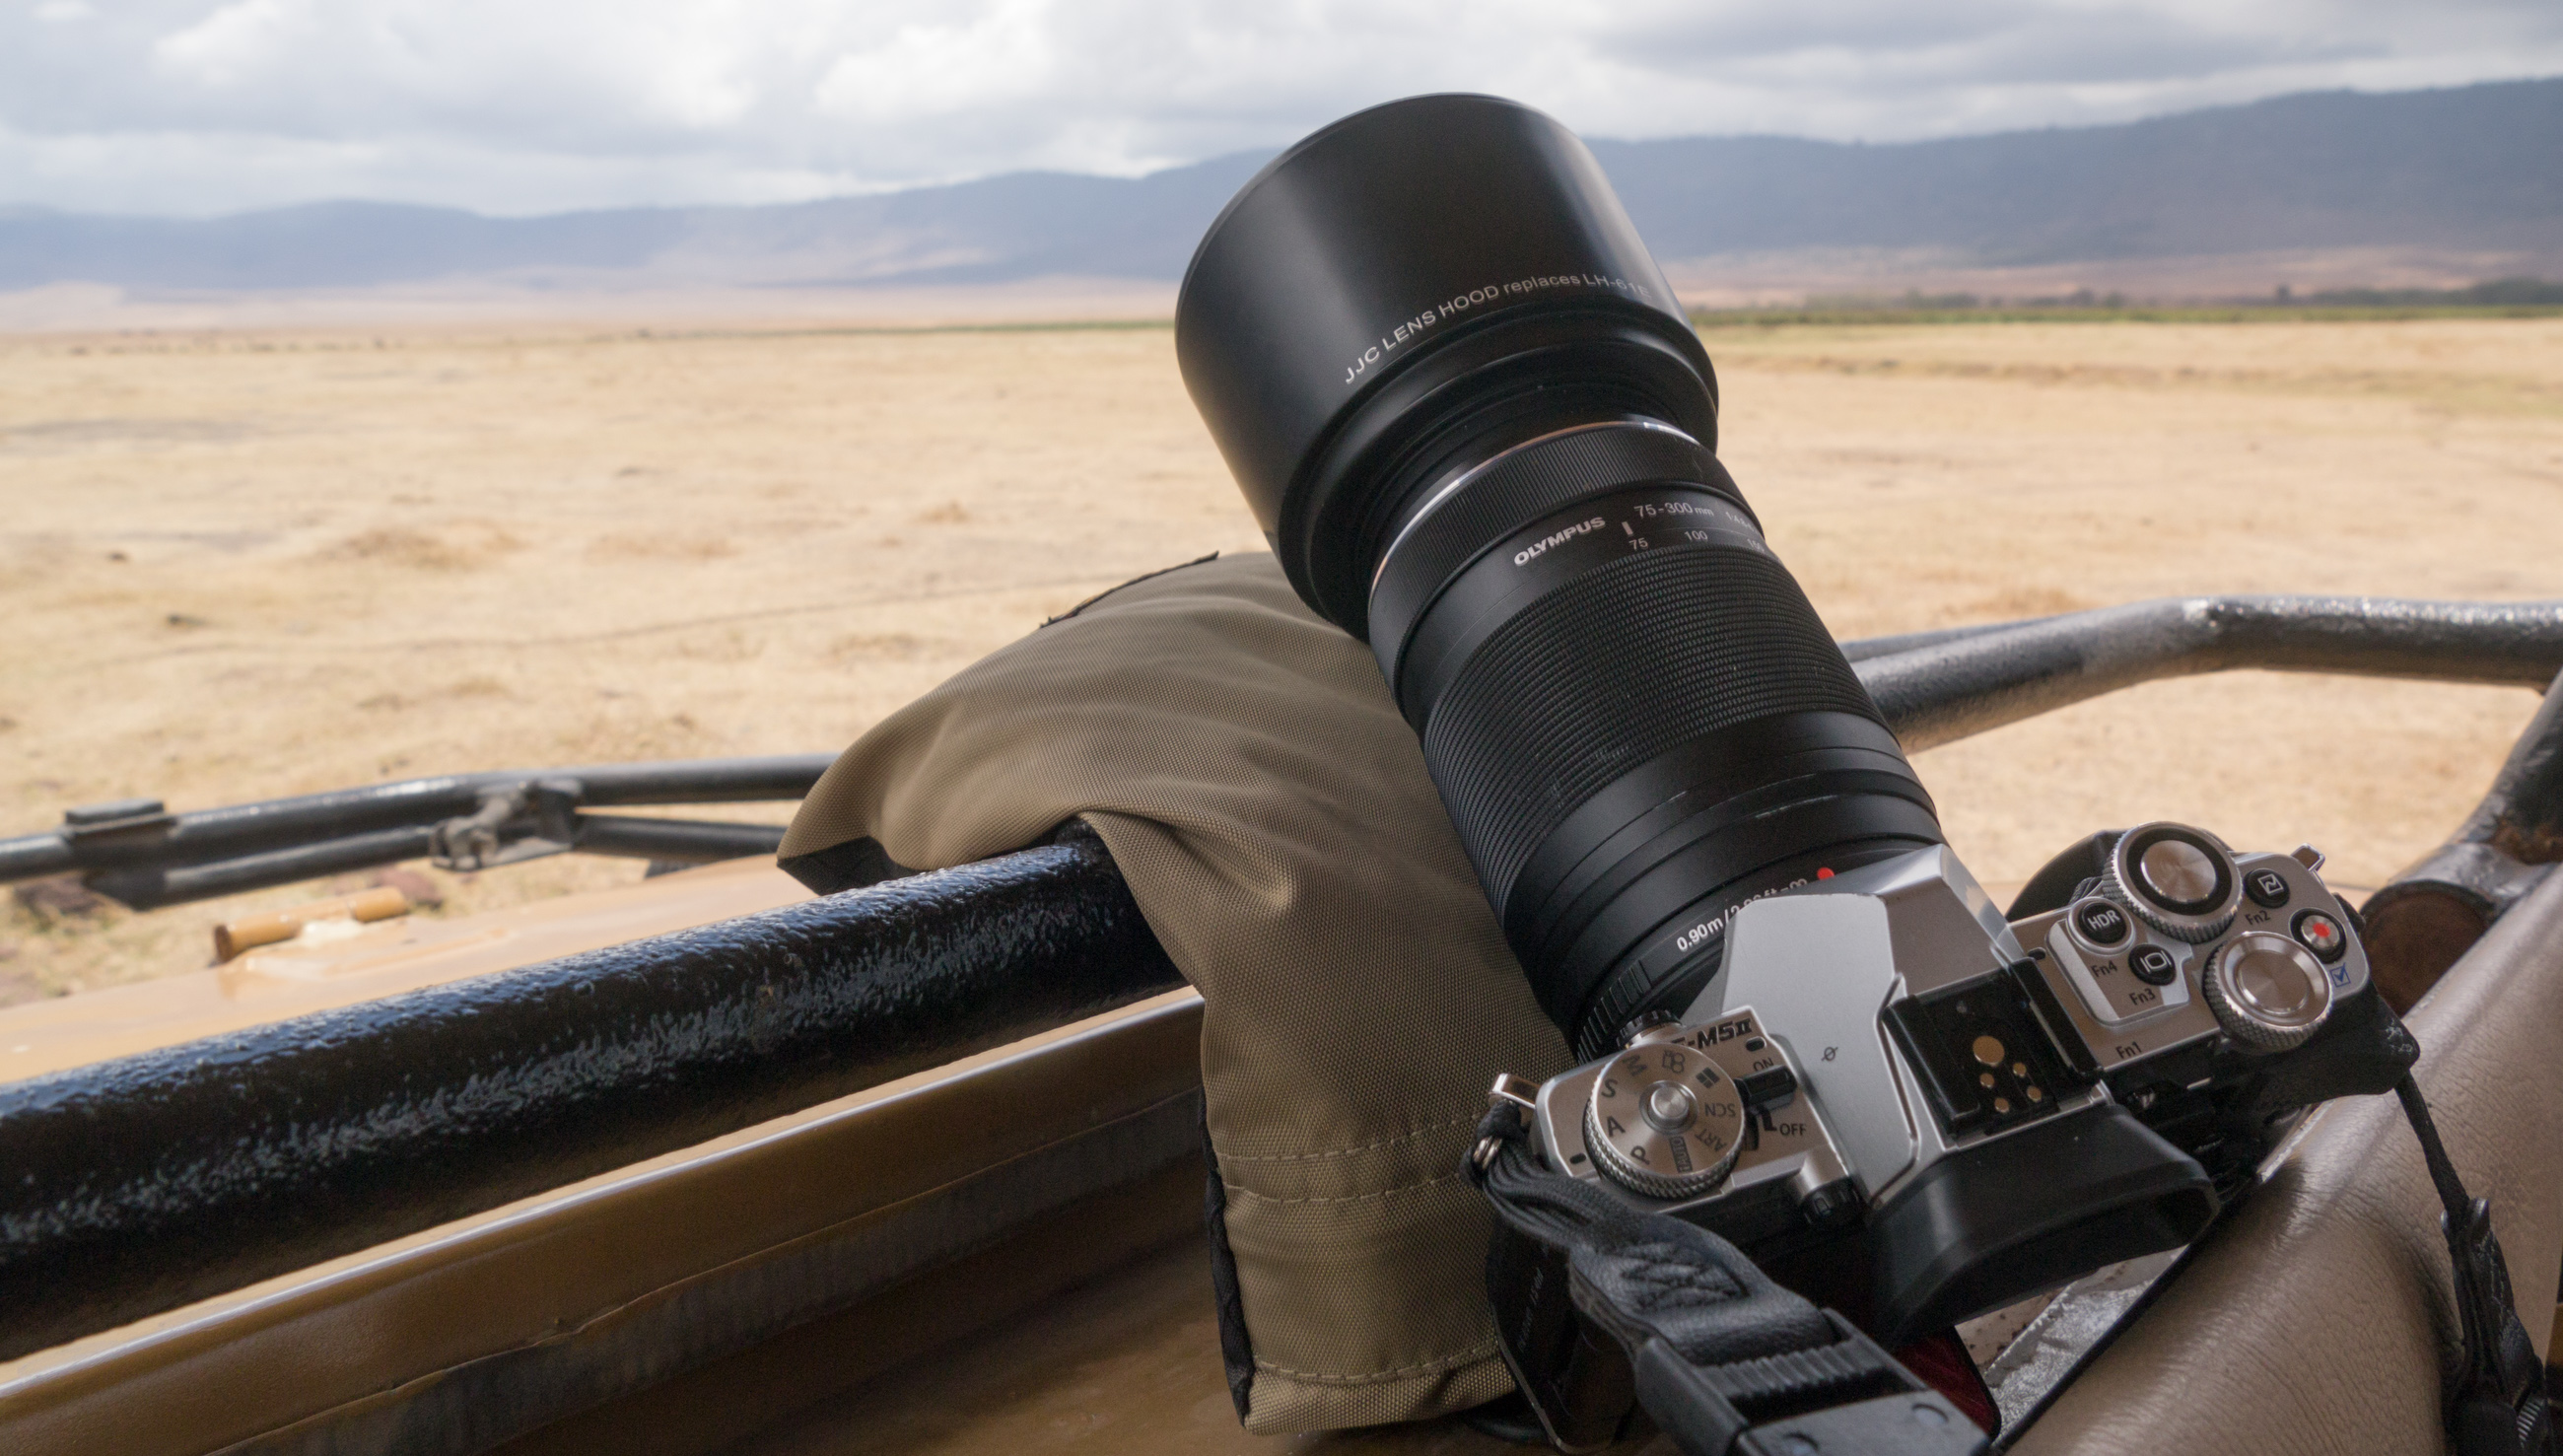
- Olympus ED 75-300mm f/4.8-6.7 II zoom
In 35mm equivalent terms, this covers 28mm to 600mm, with a 50mm equivalent fast prime for times when we weren't chasing wildlife. The Lumix lens, with its in-lens image stabilization, was attached to the Lumix body at all times, and the Olympus zoom was on the Olympus body, with its phenomenal 5-axis IBIS.
Stabilization
- Kinesis Safarisack 1.4 (their smallest size), with their lightweight buckwheat hull filler
- Velbon Ultrastick Super 8 monopod)
- A pair of Manfrotto super clamps and joining studs (straight and right angle)
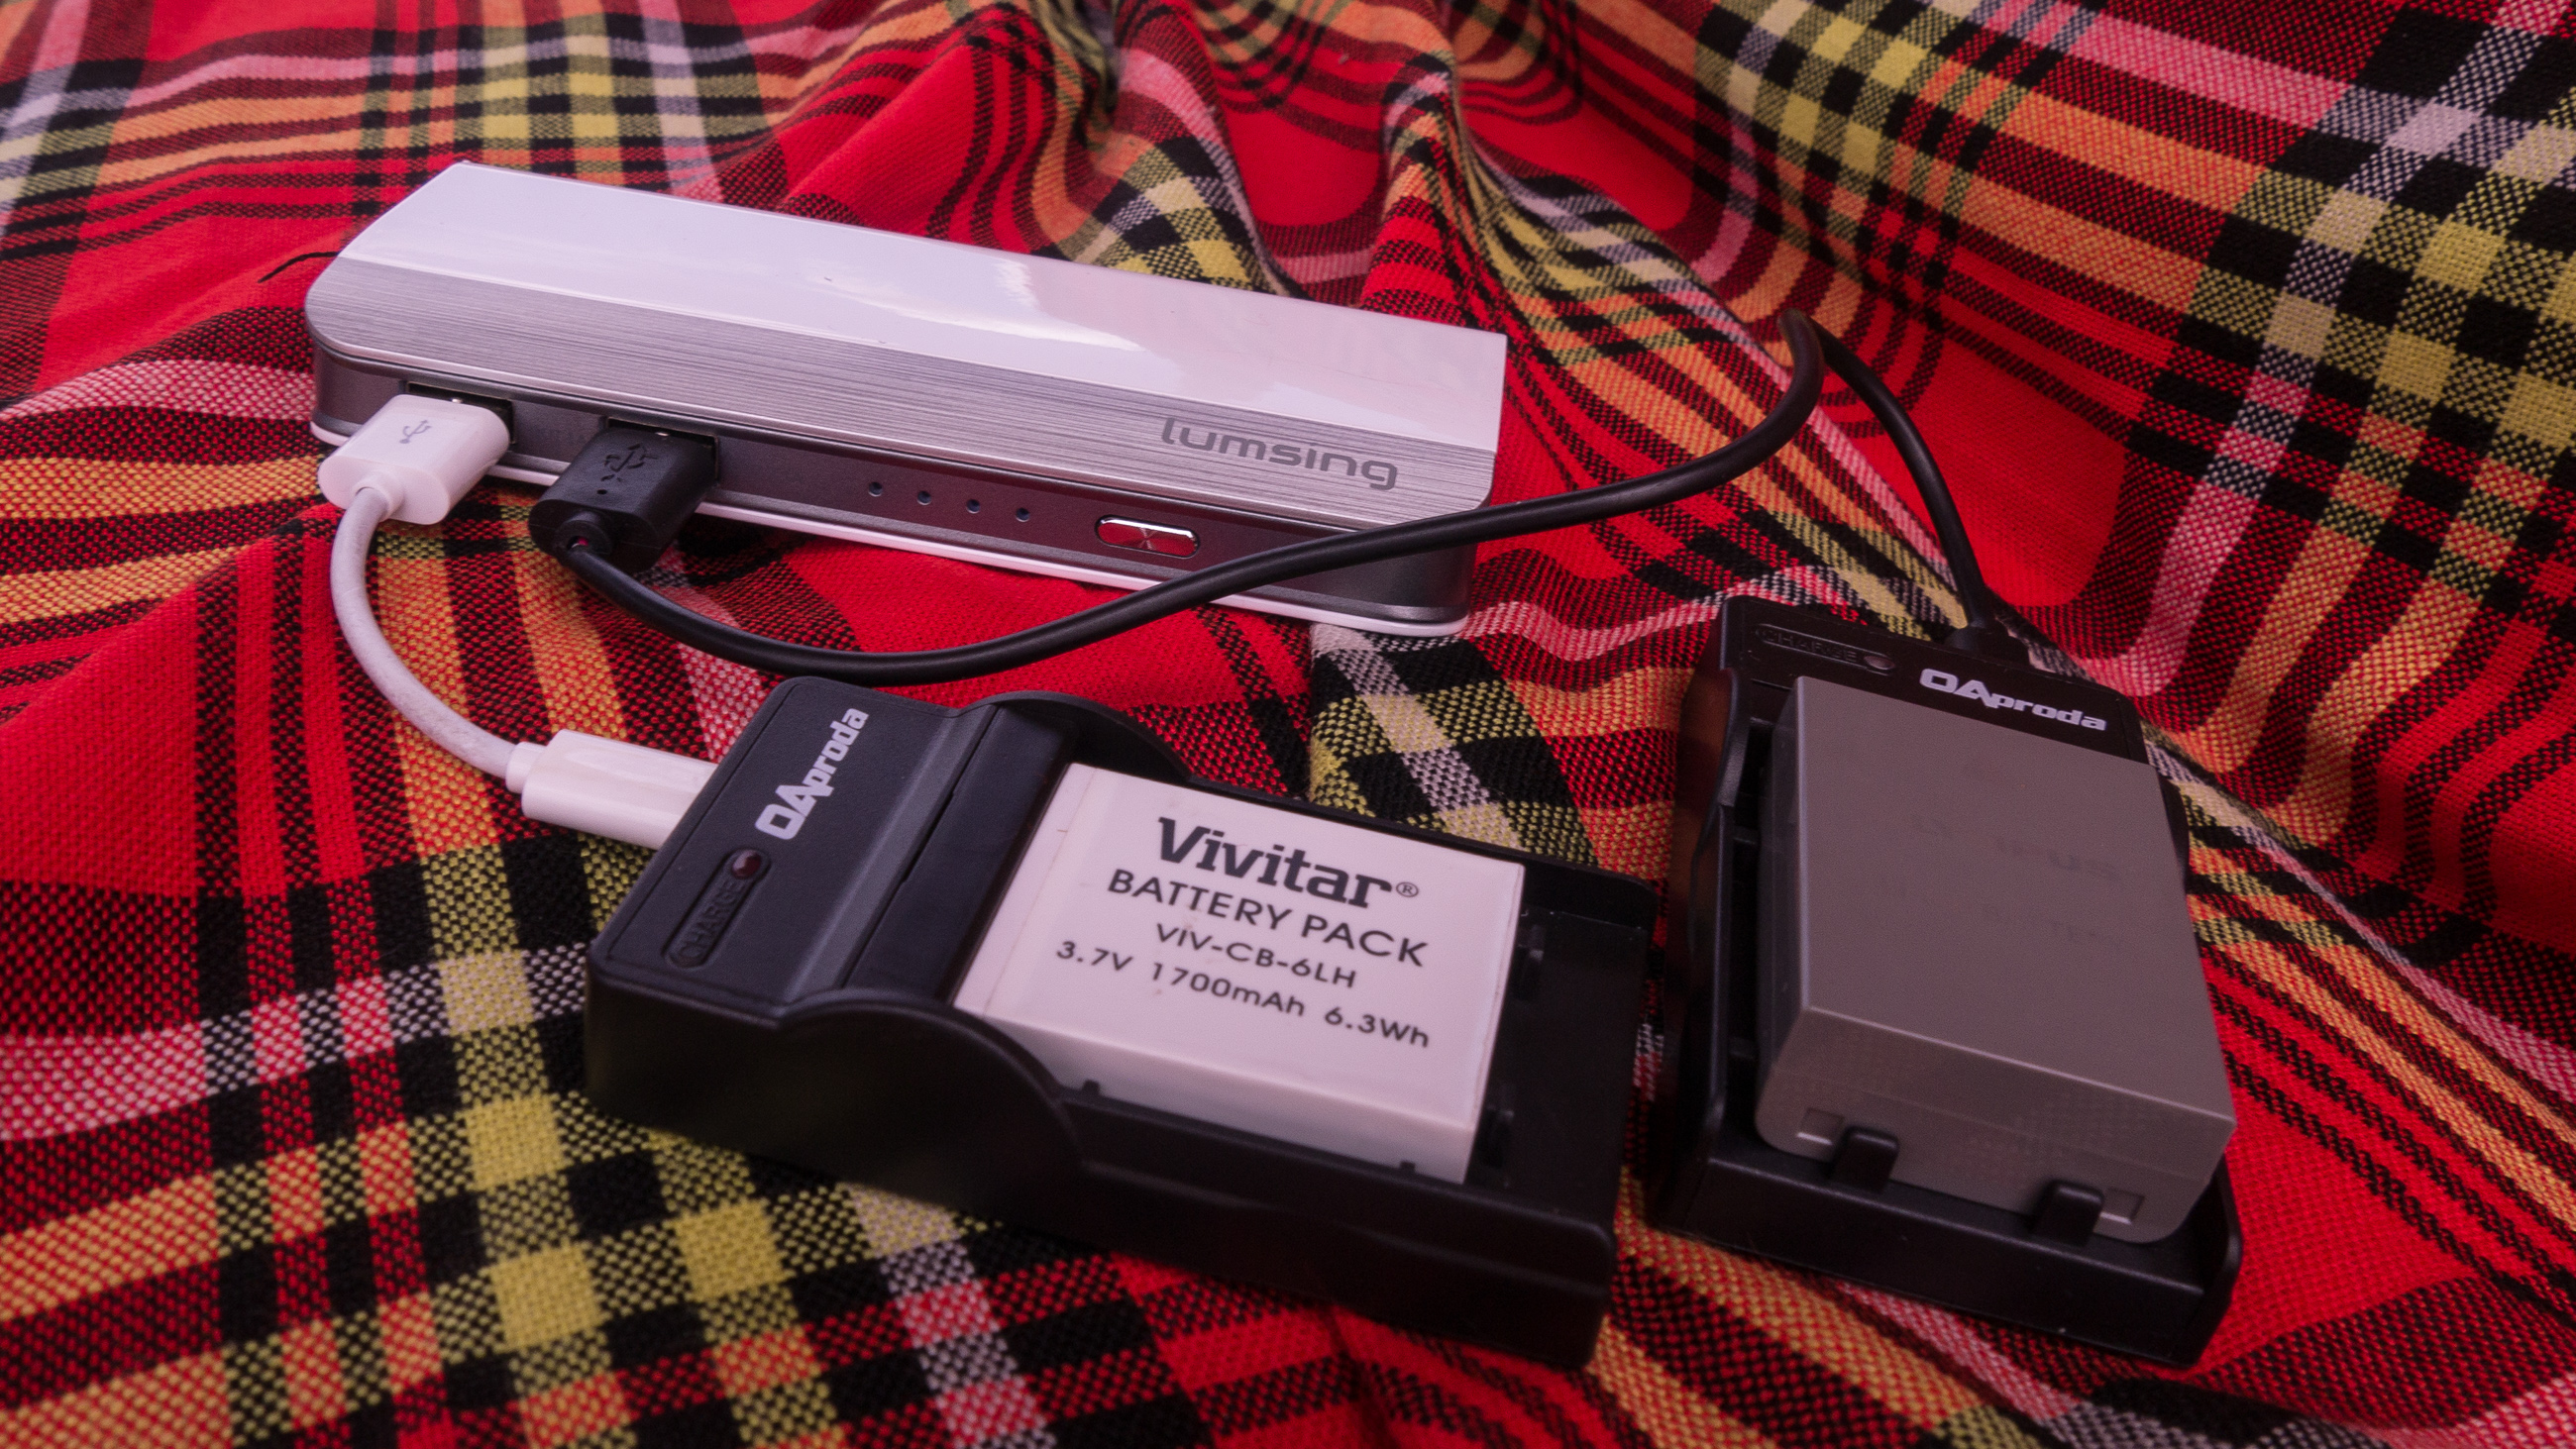
Power
Obviously, batteries and charging are a very important consideration.
Electronics
On our 2 1/2 week trip to New Zealand we shot more than 250GB of data with 1 mirrorless camera, 1 point & shoot, and the GoPro. I had a feeling that, with the much higher shot speed of the EM-5II, and wildlife, we'd probably exceed that figure by a lot.
With that in mind, I brought LOTS of memory cards (about 700GB worth across both the 3 cameras that use SD cards and the GoPro, with its Micro SD cards). We did end up with about 450GB of data by the end of the trip.
Photo Backup and Review
One thing I was NOT bringing on this trip was a laptop. A 13" Macbook Pro and its power supply would eat up nearly 2kg of the 15kg weight limit, present a big target for theft, and be generally of little use beyond photo backup. Besides, I would still have needed an external hard drive, as we came back with over half a terabyte of accumulated data.
The options for dedicated in-the-field photo backup devices feel like they haven't advanced very much in the last decade. It's not really a mass-consumer market, so that's understandable, but it's still frustrating. There are a number of options out there, but none of them are great.
One thing you'll have to resign yourself to if you shoot with a camera that uses SD cards is that backing them up is going to be slow relative to CompactFlash cards. SD cards simply don't have the read bandwidth that CF cards have.

I considered a number of devices, including the awkwardly named HyperDrive ColorSpace UDMA2, which is the only true dedicated photo backup device on the market.
In the end, I decided on the Western Digital My Passport Wireless in the 1TB size.
The WD My Passport Wireless is basically a pocket NAS device, barely larger than a standard external hard drive. It has a built-in SD card reader, wifi, and can be accessed by a web browser on any device using the wifi, or a native iOS app on an iPhone or iPad. It's actually running a full Debian Linux distribution on a recent ARM CPU, and is very hackable if you're into that sort of thing.
Backups were slow, but it did the job well. Western Digital has since released an updated version called the My Passport Wireless Pro (press release and AnandTech review) which seems to address most of the main issues (claiming USB 3.0 speeds on the card reader), although it is somewhat larger).
[UPDATE: WD released an updated version that I brought to Iceland in 2017 which is much faster]
What Worked and What Didn't
Miscellany
- Brought too many AC plug adapters.
- Didn't need the Peak Design Capture Pro (although it's invaluable for hiking; just not important on safari).
- But the Peak Design Bino Kit was fantastic. In fact, we used the monopod much more with the binoculars than we did with a camera, which made a great bird watching setup.
- Didn't need the GoPro head mount strap (I thought we might use it snorkeling, but didn't).
- Never got the chance to use the mini tripod, which I had been hoping to use for night time sky photography. Weather, cabin arrangements, and swarms of bugs all conspired to leave no chance for that.
- Only needed 1 clamp, not two (see below).
- The small Safarisack beanbag was great -- with the small size of Micro Four Thirds gear, you don't need massive stabilization gear.
- iPhone for GPS. Even though I wasn't using it as a phone, the GPS works just fine in airplane mode, so there was no need to bring a dedicated GPS device for getting tracks of our game drives for geo-tagging photos.
All in all, I probaby brought about 1.5kg to 2kg more gear than I needed.
Micro Four Thirds
I've already professed my love for the M43 format -- so this is no surpise -- even with bringing a few things I didn't need, all of the gear (including bag) came in at 18 lbs. I've read about photographers travelling with literally only a single change of clothes to maximize their photo gear within the 35 lb weight limit for safari flights, and I'm very happy to NOT have to do that.
The only real problem with the EM-5 Mark II is that it made the GX1 seem significantly less nice; I wished I had two EM-5 Mk II bodies!
Two Superclamps was One Too Many
I never used the pair as I intended, which was to enable clamping the monopod to the side rails in an open-sided Land Rover. There were several reasons for that. One - some open-sided Land Rovers have padding over the side rails which makes it impossible to get a clamp on. Two - it was just too crowded in our particular land rover, with 5 people in two rows of seating.
When I needed additional stabilization, using the monopod resting on the seat inbetween my legs was quite sufficient.
But One Superclamp was Great (in Tanzania)

If you're in a pop-top Land Cruiser, a single Superclamp is incredibly versatile. I mostly used mine to mount the GoPro for game drive time-lapses, but occasionally put the tripod ball head on it for use with the telephoto zoom lens as well. I only did this when we were staying in one place for a relatively long time, waiting for a pair of lions to do something interesting.

I never used a clamp (or beanbag) at all in Kenya, where we were exclusively in an open-sided Land Rover.
Cheap Monopod - eh, not so great
I chose the Velbon monopod for its combination of small size, low weight, and maximum extension - I optimized for the low weight limit on in-country flights. While it was very compact and light, it wasn't very durable. Next time, I'm going with a more expensive Manfrotto. The extra weight would have been more than compensated for by leaving behind the second superclamp.